stevethefish
My name's actually not Steve
- Joined
- Jun 12, 2015
- Messages
- 403
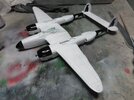
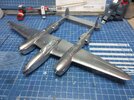
I'll be going with the standard "Virginia Marie" decal option because the blue will look so pretty on the silver. I'm going to follow examples I saw in a recent issue of Model Art Magazine about going with alternating white and black base coats under the silver to produce a varied effect. I can actually see this in the model example on the box, even though the instructions do not call for this.
My wife bought me the Tamiya P-38G about 4 birthdays (or maybe Christmases )ago. I want to build this Hasegawa kit, flaws and all, to give me a better appreciation for the newly-tooled Tamiya kit.
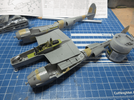
People complain about the wheel wells on the engine nacelles and I see what they mean. They could have been engineered a bit better, with locator teeth to get them to fit together more tightly. The halves also require a lot of sanding for the seamlines. It's unfortunate because the panel lines are already so shallow. There are some indentations on top of the engine pods, so I used some Tamiya Light Curing Putty to fill that in. Dab some on, let it sit under the fluorescent lamp for a while to harden, then sand off the excess. This is particularly useful for filling in injection points on the inside of landing gear bay doors, etc.
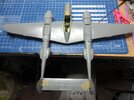
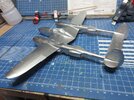
You attach the nacelles to the underside of the wingspan/cockpit and then the underside of the wings. The connection between the engine nacelles and the top part isn't very good. It will require a lot of filing. The nose requires a lot of weight to keep it from becoming a tail sitter. 35g! Someone recommended getting metal landing gears by SAC that are made for this model kit. HLJ has some in stock, so I used my birthday coupon to get a set. Looking at the photo now, I wonder if those engine nacelles are not straight? Maybe it's just the camera angle. I'll have to look a look at it when I get home.
My wife bought me the Tamiya P-38G about 4 birthdays (or maybe Christmases )ago. I want to build this Hasegawa kit, flaws and all, to give me a better appreciation for the newly-tooled Tamiya kit.

People complain about the wheel wells on the engine nacelles and I see what they mean. They could have been engineered a bit better, with locator teeth to get them to fit together more tightly. The halves also require a lot of sanding for the seamlines. It's unfortunate because the panel lines are already so shallow. There are some indentations on top of the engine pods, so I used some Tamiya Light Curing Putty to fill that in. Dab some on, let it sit under the fluorescent lamp for a while to harden, then sand off the excess. This is particularly useful for filling in injection points on the inside of landing gear bay doors, etc.

You attach the nacelles to the underside of the wingspan/cockpit and then the underside of the wings. The connection between the engine nacelles and the top part isn't very good. It will require a lot of filing. The nose requires a lot of weight to keep it from becoming a tail sitter. 35g! Someone recommended getting metal landing gears by SAC that are made for this model kit. HLJ has some in stock, so I used my birthday coupon to get a set. Looking at the photo now, I wonder if those engine nacelles are not straight? Maybe it's just the camera angle. I'll have to look a look at it when I get home.

