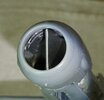
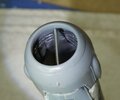
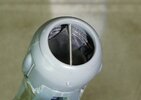
1/48 Hobbygawa Fw293A-2 / U1

This is super cool. And I like that you are actually plumbing it like a real jet. I would think that a lot of that internal stuff would get left out if anyone else was doing it.
 
Thanks ,
it gets a little more ducting .
The radar / radio set behind the cockpit will be ram air cooled so there will be another small intake ahead of the canopy .
probably on one side with the fuel filler access opposite .
or , one each side and the fuel door in the center .
..and the air exhaust port near the empennage somewhere .

Form follows function , so once the cockpit tub is attached I'll see how much ducting will fit , what size and profile , still allowing for frames and stringers .
I need to completely finish out that main intake before going any further . That's going to be the trickiest part of this whole thing ,, I think .
 
As I was saying to Wrx ,
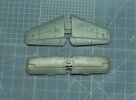
they spent the extra coin on molding a lot of detail on both sides of airframe elements that will be hidden forever .

Even the engine nacelles have the framing details ,


DSC06492.JPGDSC06493.JPG
 
I love Alclad
great on pancakes

That Stynylrez too

It was fairly easy sanding all that , finishing it off with that cowling in the way is going to be a bit more challenging .
The Aves will be paper thin in a lot of areas .
I'll be making some task specific tools for it , no doubt .


The cowling isn't epoxied in yet -- still debating the whole panel line requirement ,, if I have to do the outboard panel joints working thru the cowling , I can just do the inboard ones at the same time .
Thinking up a process to guide the scribe , I don't want to start a cycle of repairs inside there , lol
but ,
you can see how the Aves feathers into the lead tape ,

DSC06494.JPGDSC06495.JPGDSC06496.JPGDSC06497.JPG
 
haha , happy for the audience .
It will be a night interceptor .
with horizontal scan radar antennas and jettisoning JATO rockets .
six 30 mm cannons .
 
While looking at the intake? And the smooth finish, couldn't get the gaping mouth image outta my head...
 
Oh , lol . it has my Alclad on pancakes quote at the top so I was cyphering that vector
trying to make a connection , lulz

It always looked like an owl to me without the cowling .
Big time actually ,

DSC06494.JPG
 
Last edited:
If you are needing space for another intake, would a belly intake like on a P-51 Mustang be something that you could consider? Or is that too big / too far back / or the wrong style?
 
no room .
It's all ducting , engine and framing .
I have to make sure there are avenues for flight control cables and engine control cables too

Are you concerned with water intrusion ?

Last night I was pondering the duct geometry to shed water on it's way back there .
Dog leg trap action .
.. or a duct inlet door ,
of course , the radar would be useless in heavy rain
pulse doppler is at least weeks away , lol
 
It's currently 76 degrees and 93% relative humidity here .
Doesn't feel like Christmas .


You can really see in these pix below how horrible a fit that trim ring is at the front of the cowling ,
from Hasegawa .
That Hobby Boss kit is a better kit .

Cowling is ready for the interior work ,

DSC06504.JPGDSC06505.JPGDSC06509.JPGDSC06510.JPG
 
I have heard nothing but great things about Hobby Boss kits. I don't build aircraft, so I can't speak from experience, but my fellow model club members that do build them have no complaints.

I really like how you are actually thinking of everything. Building this mashup like it would really be done.
 
Hobby Boss / Trumpeter make a lot of cool kits .

" Building this mashup like it would really be done. "

haha , it wouldn't be done this way .
I get what you're saying but this thing has some deleterious CG issues .
I considered keeping it a tail dragger but I didn't like the visual of having a protrusion for retractable tail gear . really tall tail gear too .

Wanted to move the engine much farther forward but the main landing gear well pushed it up too high and the front nose gear well interfered with the intake ,, and then all that put the cockpit tub into not really fitting anywhere that was sane .

I did consider that the curvalicious intake would be fabricated in fiberglass , negating panel lines .
I assume it would be left unpainted to avoid FOD .
but , that would add much more weight than aluminum and I was really liking the idea of panel lines in there .

I now have a plan to easily and accurately scribe the longitudinal joints inside .
One easy jig and I'll need to make only one cutting tool .


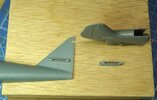
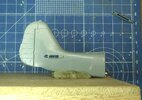
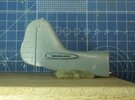
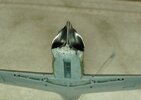
Last night I securely mounted the tail to Mr Plywood Scrap so it sits level and plumb to facilitate installing the horizontal stabs dead-nut square and in plane :
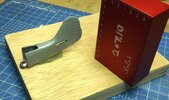
DSC06513.JPG


It gets the 262 stabilizers ,


DSC06518.JPGDSC06514.JPGDSC06515.JPGDSC06516.JPG

Just roughed out and sitting there to show the position .
 
Last edited:
Gotta ask, what is that ektoplasmic goop you used to comp the build? And it adds volume to help visualize the shapes and layout as well as temporarily holding parts in place while you try things out!
 
2 part epoxy ,

My favorite :

71KDJ79xflL._AC_UF1000,1000_QL80_.jpg


They make it in a bunch of colors ,
I always use the " natural "
https://avesstudio.com/shop/apoxie-sculpt/

They of course sell it on Amazon
 
Thanks! I'm sure to try it out... I've only ever sculpted in clay, for plaster molds and cast plaster in art school. I did cast in wax once, that was an adventure.
For model making, only small amounts of two part, not the dollops I see you working with!
 

Latest posts

Back
Top