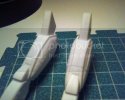
1/100 Macross Valkyrie VF-1J

fcschmidt

New Member
Joined
Apr 4, 2011
Messages
57
Hi, all! Thought I'd throw my hat into the ring and try my hand at an old (I think) Macross Valkryie kit. I say "I think" because I have no idea when it was made... the instructions and info are all in Japanese with snippets of broken english. Should make things interesting.
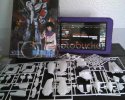
Photo04141501.jpg

I consider myself a beginner modeller, so hoping to try out some new techniques and learn a bit from this kit. It has really nice panel lines, so I'm looking forward to working with those. Also, the kit is posable, which I think may present some challenges with painting. But as the instructions say,"Be enjoy various poses of robot!"
 
The Arii models were made in 1982. Bandai made some re-essiues of 100 scale models but from Imai (far better models BTW IMHO). Some Arii models were reissued 15 years ago, along with some toy versions.

Good luck with it. You'll need it.
 
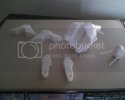
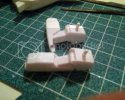
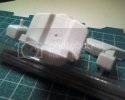
I'm very humbled that so many great modellers are watching my build... and also a little nervous! Anywhoo, one night in working on it and I've got some parts together. I had to cut off most of the guide pins to make the parts fit together without leaving a massive seam. I've got the main body and head together, filed, and sanded smooooth. The shoulder areas are smooth, though the artwork shows some panel lines... I think I will scribe them in. Also some "inside" parts together, the upper arms and feet. Some of the small rubbery rings used to make the model posable were difficult to get into their holes, and I ended up having to shave some down... shouldn't be a big deal in the end. The arms have a plug that you assemble that will go into the main body, I think I am going to deviate from the instructions and leave those to attach until after it is painted.

Not much to look at at the moment... just looks like hunks of white plastic.

Photo04151809.jpg
 
good luck with this kit just cant wait to see how it comes out I love macross/robotech kits I have tons laying around
 
Got a couple more short sessions in working on this thing. The more I look at it the less of a fan I am of this kit. The proportions of the model seem to be all wrong... the body seems short and stumpy, the legs too long, and the backpack and folded wings on the back are too small. The model doesn't seem to match the super-cool artwork on the box cover. Plus the back of the instruction sheet has some example pics of the completed kit (two different builds looks like) with directions for the decals... whoever built the example kits didn't put much work into them... mold lines all over the place, and the panel lines are all black against the white skin... really cartoony and again not at all like the cover artwork.

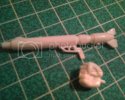
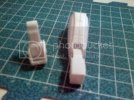
Oh, and check this out... here is the gun and the hand that holds the gun.

Photo04162046.jpg

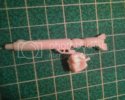
Here is the hand holding the gun.

Photo04162047.jpg

Now that just looks stupid. Plus, the hole that the gun slots into is in the TOP OF THE THUMB. I will be remedying that so it looks to be holding it in a more natural position. I'm also hoping to scratch build the gun strap like in the artwork.

Sorry for the photo quality, crappy cell phone under crappy lighting.

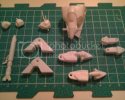
Anyhow, I spent more time filing and sanding mold lines. Its very therapeutic. I think I have all of the parts together except for the external armor areas.. shoulders, forearms, and lower leg armor. I'm thinking of possibly priming the parts that will fit into the armor before building the armor around them.

Photo04170028.jpg
 
Yikes, that is almost as bad as the Darth Vader that came with the old mpc advanced tie fighter......
 
Well may be you can mod a strap for the gun and fill in the fist and do a superman pose I did one like that good luck man
 
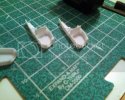
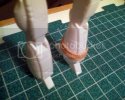
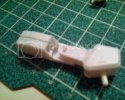
Got just a few minutes last night to futz around with this. Dry fit the arms and legs together and found that from most angles you can see into the hollow structure and see the back side of the parts and the guide pins.

IMG-20130418-00028-2.jpg

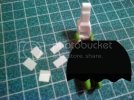
Anyway, I cut some plastic card to fit into the voids to hide the internals and make it look like a solid structure.

IMG-20130418-00032-2.jpg

Thank you to Ian for his awesome photography tutorial! I got some white balance correction going on which makes a huge difference! Still a bit fuzzy, though... and the glare off of my clamp was preventing the white balance from doing anything, so it had to be mustachiod.


Still debating how I'm going to go about painting this... paint the upper arms, feet, etc, before attaching the outer armor to them then mask them off to paint the outside parts, or just assemble and paint all together and hopefully the spray will reach in there and I will be able to reach with a brush.

And I think I lost my panel line scriber... may have to go buy a new one.
 
Thanks for the encouraging words, Grendels!

I've decided to not worry about painting for now and just assemble it. I really want to try some weathering effects, so I'm planning on modelling this as a late war Valkyrie, after they return to Earth. Maybe it spent a lot of time on long patrols, has gotten really beat up and seen a lot of battle. Try to make it more "realistic" and less cartoony.

I've got the limbs together with the plasticard bulkheads to close up the open hollows.

Photo04200026.jpg

Looking up into the shoulders.

Photo04200027.jpg

Backs of the legs behind the knees.

Photo04200030.jpg


I found while playing around with it that the arms didn't allow me to achieve the pose that I wanted, which is similar to the box art with the gun held up near the shoulder. The arms don't allow any twist, only one axis of movement, so the arms end up in sort of an ape like range of motion. I wanted the right forearm to be twisted 90 degrees than what the joints allowed.

Photo04200115.jpg

So I cut out the joint pins for that arm and just glued the arm into the position I wanted. I'm not going to be playing with the thing, anyway... and if I did want to change the pose this would still allow the arm to hold the gun in a natural "safe" position upwards or a firing from the hip position.

Photo04200139.jpg
 
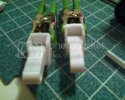
Quick update. Added panel lines to the top of the torso and shoulders.

Photo04222225.jpg

And to the fronts and backs of the feet.

Photo04222223.jpg

I tried using a little line scribing tool (the hooked dentist's pick type), which was really a challenge. I used that for the torso bit. For the other areas where I could just do a straight line all the way across I just used the sharp edge of a thin needle file, which was MUCH easier and turned out nicer.

Also added panel lines to the head and cleaned up lines around seams. Next step, it would seem, would be paint!
 

Latest posts

Back
Top