1/170 Armored Valkyrie
- Thread starter MrNatural
- Start date
tetsujin
Active Member
- Joined
- Jun 26, 2009
- Messages
- 102
MrNatural said:tetsujin-thank you for the info. I cant imagine doing a 1/200 valk with all those mods.
It's probably not too bad, for the chest and shoulder launchers at least. It wouldn't be too hard to cut out some replacement doors from sheet styrene, and then when you cut the original doors off to open the bays, the bays get stuffed with missiles so there's not much need for detailing anything... But, yeah, when I saw it I thought it was a rather impressive piece of work.
Looking forward to seeing more of your build. Love a good Macross build.
MrNatural
my head is falling off my head
- Joined
- May 27, 2009
- Messages
- 983
Once again thank you all for the nice comments, keeps me going.
back to the valk...this thing has no weapons, not cool. so I cut out the shoulder hatch and filled it up with milliput to create a base for some missiles.
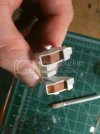
drilled out some holes and started making missiles out of styrene rod.
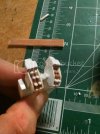
then I re-attached the hatch's in the open position and added a few pieces of styrene to give it some character. i still need to shape up the missiles a little bit.
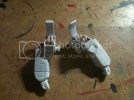
Here is the torso glued up. going to change up these details...
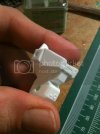
re-vamp
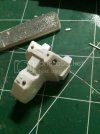
Getting close to primer time, im thinking about opening up the leg missile compartments, but Im still not sure, those shoulder missiles exhausted me i'll probably end up doing that. I also want to build some kind of blaster/laser cannon for him to hold....we'll see...
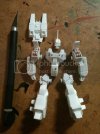
over and out
back to the valk...this thing has no weapons, not cool. so I cut out the shoulder hatch and filled it up with milliput to create a base for some missiles.

drilled out some holes and started making missiles out of styrene rod.

then I re-attached the hatch's in the open position and added a few pieces of styrene to give it some character. i still need to shape up the missiles a little bit.

Here is the torso glued up. going to change up these details...

re-vamp

Getting close to primer time, im thinking about opening up the leg missile compartments, but Im still not sure, those shoulder missiles exhausted me

over and out
ModelMakerMike
"It's Slobberin' time""
- Joined
- May 28, 2011
- Messages
- 1,838
Incredible detail work there partner!
Looking amazing!
Looking amazing!
CTspeedshop
I picked the wrong week to stop sniffing glue. : )
- Joined
- Apr 17, 2011
- Messages
- 1,388
Very Nice!!!
MrNatural
my head is falling off my head
- Joined
- May 27, 2009
- Messages
- 983
Alright its been a while since I updated this thread but I actually was able to pull my self away from the falcon and work on this little beast.
I got the main color coats on him. there are some areas that I need to go in and fix but to get to this stage was not easy :'(...I first sprayed my primer then based the whole thing with tamiya blue, then like I always do I clear coated the first color with testors dull coat to protect from the masking process. I have had nothing but success with this method until this model. My clear coat ate the paint, I am sure that my paint was cured fully but I think I was just too aggressive with the clear coats. so I had to strip paint and start over. I did the same thing but took my time with the clear coat and did many mist coats over time and this worked fine so im back on track ;D
Here are the legs, you can see where my masking did not quite cut it, but in my defense this was the most difficultly tiny model i've ever tried to mask
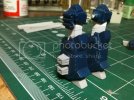
arms. the arms came out a little better. I still have to mask off for some red im going to spray on these.
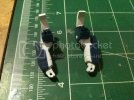
the torso came out ok. like with the arms I still have to spray some red
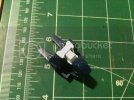
the head, which will get finished off with a brush painting session
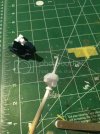
thanks for looking guys.
until next time
I got the main color coats on him. there are some areas that I need to go in and fix but to get to this stage was not easy :'(...I first sprayed my primer then based the whole thing with tamiya blue, then like I always do I clear coated the first color with testors dull coat to protect from the masking process. I have had nothing but success with this method until this model. My clear coat ate the paint, I am sure that my paint was cured fully but I think I was just too aggressive with the clear coats. so I had to strip paint and start over. I did the same thing but took my time with the clear coat and did many mist coats over time and this worked fine so im back on track ;D
Here are the legs, you can see where my masking did not quite cut it, but in my defense this was the most difficultly tiny model i've ever tried to mask

arms. the arms came out a little better. I still have to mask off for some red im going to spray on these.

the torso came out ok. like with the arms I still have to spray some red

the head, which will get finished off with a brush painting session

thanks for looking guys.
until next time
MrNatural
my head is falling off my head
- Joined
- May 27, 2009
- Messages
- 983
Quaralane and Grendels-You guys rock thank you for on going encouragement
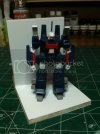
I've been fighting to get this guy done. Painting has been a challenge. Masking this little thing for hours and still having bleed ins. Im done airbrushing all the main colors and am now touching up and detailing with the brush.
masks for the red
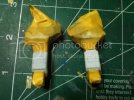
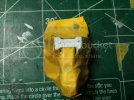
went ahead and attached everything
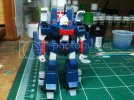
still more painting to do and decals
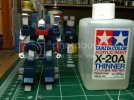
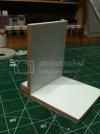
Started making a base using balsa wood and sheet styrene
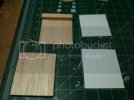
using the kotobukiya chain base as inspiration. when its done just want it to look like a hanger on the inside of a space ship. there wont be any wood showing when im done
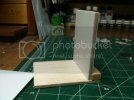
well thanks for looking until next time
party on
I've been fighting to get this guy done. Painting has been a challenge. Masking this little thing for hours and still having bleed ins. Im done airbrushing all the main colors and am now touching up and detailing with the brush.
masks for the red


went ahead and attached everything

still more painting to do and decals

Started making a base using balsa wood and sheet styrene

using the kotobukiya chain base as inspiration. when its done just want it to look like a hanger on the inside of a space ship. there wont be any wood showing when im done


well thanks for looking until next time
party on
NecronautDrummer
Member
- Joined
- Sep 25, 2011
- Messages
- 804
The paint job looks nice and crisp, especially considering the small scale of the model (built a couple Valkyries/Veritechs in my younger days). Can't wait to see the base come together! Any plans to do a specific shot from the show?
Similar threads
- Replies
- 0
- Views
- 489
