You are using an out of date browser. It may not display this or other websites correctly.
You should upgrade or use an alternative browser.
You should upgrade or use an alternative browser.
1/35 Meng Merkava Mk.4M (with roof slats)
- Thread starter Edbert
- Start date
Edbert
Well-Known Member
- Joined
- May 16, 2024
- Messages
- 897
Just to provide an update...
I cut all the road wheels loose from the sprue and spent an entire evening cleaning them up. This kits is crazy on part-count too. Just the wheels (both sides), and you can see above that is 6 per side, plus drive, idlers (2 per side) and the return wheel, that is 74 parts!
Anyway, I discovered that the poly-caps were not in the box, without them I cannot attach the wheels so I reached out to Meng support. They are mailing me a "sprue" at no cost. Wow! It has not shipped yet, so I can say they are a bit slow, but they reach out via email every two pr three days to let me kknow it is processing. Today I got a note saying it will ship in the next few days and they'll provide a tracking number.
Nice!
Edbert
Well-Known Member
- Joined
- May 16, 2024
- Messages
- 897
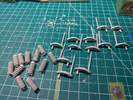
Any tips for sanding seams from coil springs? I'm thinking heavy coating of dust/debris after painting will cover them, that is the lazy way out. Although I respect the "I know the detail is there" crowd, I'm usually not one.
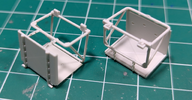
These were fairly fiddly, but those ejection marks are huuuge, instead of filling/filing them, I think they will be covered when I fill the storage bins, see above
Scratchbuilder
Well-Known Member
- Joined
- Sep 30, 2024
- Messages
- 98
Will follow along and watch with interest.
Edbert
Well-Known Member
- Joined
- May 16, 2024
- Messages
- 897
Upper hull is just sitting there for now, think I'll leave it off until running gear is finsihed and painted, the wrap them up in foil/saran-wrap when painting the body.Will follow along and watch with interest.
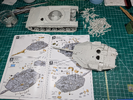
I'm trying to learn how to slow down and enjoy things, it helps if I put the kit aside when or if I feel frustrations coming. But that leads (for me) to seeing and chasing lots of squirrels. I just did an inventory and I have 6 kits in various stages of completion. I really need to focus better, but at age 60 I do not see character traits changing much.
Edbert
Well-Known Member
- Joined
- May 16, 2024
- Messages
- 897
The IDF uses a unique color called "Sinai Grey" on their AFVs. the issue for me is the color has changed or varied greatly over the decades. One would also assume the sunshine and heat of the sandlot would have an effect too.
There's a mobile app called "hobby color converter", I make no claims as to warranty or veracity, but I've found it useful to cross reference major manufacturers. The issue is, here's what it (the app) shows for Sinai Grey...
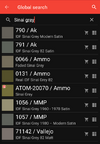
So for my 2024 subject matter I think I can rule out the bottom three, as well as #2 and 3. But the remaining ones are not very close on color.
What would you do?
There's a mobile app called "hobby color converter", I make no claims as to warranty or veracity, but I've found it useful to cross reference major manufacturers. The issue is, here's what it (the app) shows for Sinai Grey...

So for my 2024 subject matter I think I can rule out the bottom three, as well as #2 and 3. But the remaining ones are not very close on color.
What would you do?
kevin
Well-Known Member
- Joined
- Mar 21, 2024
- Messages
- 273
Scratchbuilder
Well-Known Member
- Joined
- Sep 30, 2024
- Messages
- 98
Looking at recent news coverage and allowing for the camera adjusting to light etc, plus the paint chip I liberated from a IIID I would go for 0066 and apply a thin wash over it.The IDF uses a unique color called "Sinai Grey" on their AFVs. the issue for me is the color has changed or varied greatly over the decades. One would also assume the sunshine and heat of the sandlot would have an effect too.
There's a mobile app called "hobby color converter", I make no claims as to warranty or veracity, but I've found it useful to cross reference major manufacturers. The issue is, here's what it (the app) shows for Sinai Grey...
View attachment 125993
So for my 2024 subject matter I think I can rule out the bottom three, as well as #2 and 3. But the remaining ones are not very close on color.
What would you do?
Mike
Edbert
Well-Known Member
- Joined
- May 16, 2024
- Messages
- 897
I've decided to use an old calibration system, the eyeball MkIII.
I also suspect I will be adjusting it continuously while spraying. I did that on the Bradley last month and I like the effect if kept subtle.
The result, with the three primary ingredients....
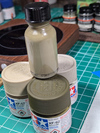
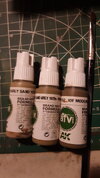
XF-20, XF-57, & XF-62, approximately 2:3:5 ratio.
Not sure If I'll be able to spray today or not, might have to start tonight.
But I got the surfacer down yesterday. I used the can this time and was a little paranoid about getting too thick and obscuring detail, so some spots are a bit thin. Not worried about the surface and adhesion, but I need to get some darkness down into those small spots for a lighting effect.
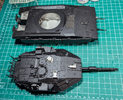
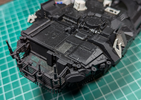
I also suspect I will be adjusting it continuously while spraying. I did that on the Bradley last month and I like the effect if kept subtle.
The result, with the three primary ingredients....

XF-20, XF-57, & XF-62, approximately 2:3:5 ratio.
Not sure If I'll be able to spray today or not, might have to start tonight.
But I got the surfacer down yesterday. I used the can this time and was a little paranoid about getting too thick and obscuring detail, so some spots are a bit thin. Not worried about the surface and adhesion, but I need to get some darkness down into those small spots for a lighting effect.


Last edited:
Scratchbuilder
Well-Known Member
- Joined
- Sep 30, 2024
- Messages
- 98
Take a piece of wet n dry auto sanding paper, fold it it half and run it along the seams, that will remove the mould marks.View attachment 125550
Any tips for sanding seams from coil springs? I'm thinking heavy coating of dust/debris after painting will cover them, that is the lazy way out. Although I respect the "I know the detail is there" crowd, I'm usually not one.
View attachment 125551
These were fairly fiddly, but those ejection marks are huuuge, instead of filling/filing them, I think they will be covered when I fill the storage bins, see above
Edbert
Well-Known Member
- Joined
- May 16, 2024
- Messages
- 897
No color, at least as in a top-coat. I just had time to shoot the darkest Olive I have into gaps where the 1500 was thin. Also shot some spots on the wheels where the finisher was thin, having a white or very light gray plastic requires more attention. Then I had extra thinned paint so I did a sort of "panel line undercoat" the way aircraft are typically done, just to suck down the last of the paint-cup. I expect 95+% of that green will be invisible when finished.
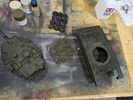
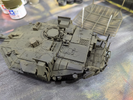


Edbert
Well-Known Member
- Joined
- May 16, 2024
- Messages
- 897
Okay, the top coat is down, at least the first iteration of it.
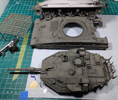
It looks brighter/lighter under LED, and I think I need to go over it again to show more highlights and fading. This is before clear coating which seems to lower the brightness, so yeah..."Sinai Gray" is hard to replicate.
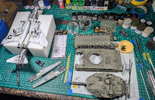
Perhaps I should stop chasing squirrels, even if the physical ones chew on my house, those short-attention-span versions distract from the job at hand.
Yes, I have a problem!

Edbert
Well-Known Member
- Joined
- May 16, 2024
- Messages
- 897
After an overnight hardening period and fresh morning/caffeinated eyes...I decided the color was too dark and/or too green.
So I spent some time adjusting that.
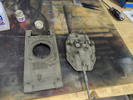
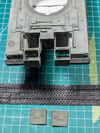
I'm not very experienced with armor, this is my 2nd example since the 1990s, but I usually assemble the top and bottom halves of the hull when the instructions say to. In this case I put it off until the top-color was completed, because some clear parts needed to be inserted. I might regret this, because two large back panels need to be added after paint, and the odds are high for causing damage to the paint.
These are the two parts that could not have been installed if I had glued the halves together. The rear view is not impressive, but the headlights, with the painted PE grilles really do!
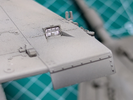
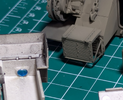
This picture (below) shows the two panels I have to figure out how to attach without making a mess.
So I spent some time adjusting that.

I'm not very experienced with armor, this is my 2nd example since the 1990s, but I usually assemble the top and bottom halves of the hull when the instructions say to. In this case I put it off until the top-color was completed, because some clear parts needed to be inserted. I might regret this, because two large back panels need to be added after paint, and the odds are high for causing damage to the paint.
These are the two parts that could not have been installed if I had glued the halves together. The rear view is not impressive, but the headlights, with the painted PE grilles really do!


This picture (below) shows the two panels I have to figure out how to attach without making a mess.

Edbert
Well-Known Member
- Joined
- May 16, 2024
- Messages
- 897
I've failed to keep this thread updated. I do not work on the Merkava every week, sometimes I find I put myself in a small jam and set it aside for a while. But I've not given up, just making slow and steady progress.
One of my biggest problems (for aircraft too, not just armor) is that I'm unable to get a super-solid clear coat. By that I mean one that will stand up to enamel washes, the wash itself doesn't dissolve the color coat, but I think it softens it enough that the removal of excess does damage. I'll keep working on improving my technique, I purchased the specific brand of thinner for the varnish and am hopeful that will resolve most of my problems.
Here are some updated pictures of it taken this week.
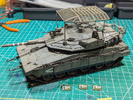
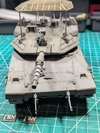
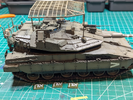
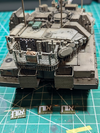
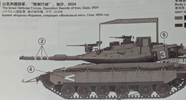
It is 'almost" done. I see some areas are still a bit shiny, need to hit them with some dullcoat. That includes the three banners that are shown, but first I gotta figure out how to mount them. There's a 30mm wire on two and a 35mm wire on one (as instructions showed) but no indication HOW to attach them, only an arrow showing WHERE. Thinking some CA is my only option but that will be hard to hide.
So the three banners that I cannot read (Hebrew I'd guess), a little touch-up, and some aerials (never done these before but I bought some guitar strings for this) and this one can be called done.
I guess I could try using pigments for the 1st time ever, but might save them for the Panther that is replacing my only WIP armor.
One of my biggest problems (for aircraft too, not just armor) is that I'm unable to get a super-solid clear coat. By that I mean one that will stand up to enamel washes, the wash itself doesn't dissolve the color coat, but I think it softens it enough that the removal of excess does damage. I'll keep working on improving my technique, I purchased the specific brand of thinner for the varnish and am hopeful that will resolve most of my problems.
Here are some updated pictures of it taken this week.


It is 'almost" done. I see some areas are still a bit shiny, need to hit them with some dullcoat. That includes the three banners that are shown, but first I gotta figure out how to mount them. There's a 30mm wire on two and a 35mm wire on one (as instructions showed) but no indication HOW to attach them, only an arrow showing WHERE. Thinking some CA is my only option but that will be hard to hide.
So the three banners that I cannot read (Hebrew I'd guess), a little touch-up, and some aerials (never done these before but I bought some guitar strings for this) and this one can be called done.
I guess I could try using pigments for the 1st time ever, but might save them for the Panther that is replacing my only WIP armor.
- Joined
- Mar 6, 2023
- Messages
- 2,090
Great job. Love the detail on this.I've failed to keep this thread updated. I do not work on the Merkava every week, sometimes I find I put myself in a small jam and set it aside for a while. But I've not given up, just making slow and steady progress.
One of my biggest problems (for aircraft too, not just armor) is that I'm unable to get a super-solid clear coat. By that I mean one that will stand up to enamel washes, the wash itself doesn't dissolve the color coat, but I think it softens it enough that the removal of excess does damage. I'll keep working on improving my technique, I purchased the specific brand of thinner for the varnish and am hopeful that will resolve most of my problems.
Here are some updated pictures of it taken this week.
View attachment 132523
View attachment 132524
View attachment 132525
View attachment 132526
It is 'almost" done. I see some areas are still a bit shiny, need to hit them with some dullcoat. That includes the three banners that are shown, but first I gotta figure out how to mount them. There's a 30mm wire on two and a 35mm wire on one (as instructions showed) but no indication HOW to attach them, only an arrow showing WHERE. Thinking some CA is my only option but that will be hard to hide.
So the three banners that I cannot read (Hebrew I'd guess), a little touch-up, and some aerials (never done these before but I bought some guitar strings for this) and this one can be called done.
I guess I could try using pigments for the 1st time ever, but might save them for the Panther that is replacing my only WIP armor.
- Joined
- Sep 4, 2022
- Messages
- 1,074
Agree! Have you figured out the banners yet. I'm intrigued...Great job. Love the detail on this.
Similar threads
- Replies
- 11
- Views
- 708

