1/35 Tamiya King Tiger ( Ardennes Front )

hummingbird

New Member
Joined
Nov 15, 2012
Messages
127
Hey guys ... Not sure if it is ok for a noob like to open a new WIP thread but I feel like sharing and maybe get some tips and advice along the way while building .... so yeah ...

Here's the Box art -
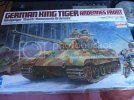
P1110879.jpg

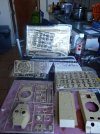
and here are the Sprues -
P1110880.jpg

This is one seriously simplified kit ... but still, its a lovely kit and tamiya made this thing quite beautifully -

Anyway here's what I have done -
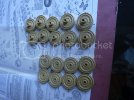
P1110881.jpg

Did the road wheels ... Tamiya is just awesome .. all the road wheels fit just beautifully

Spocket and Ideller wheels
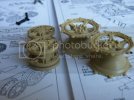
P1110882.jpg

The details are pretty awesome

Exhuast are glued on and sanded ( although they will be covered, I just can't help getting rid of the seams )
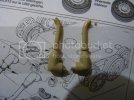
th_P1110883.jpg

th_P1110884.jpg

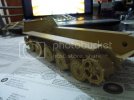
The wheels fit very very nicely on the suspension
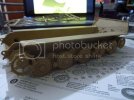
th_P1110885.jpg

th_P1110886.jpg

And I also made the Wheels movable by utilizing Tamiya's own superb engineering .. I plan to make a video showing you the moving wheels so be on the look out for that .....

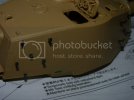
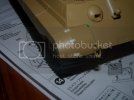
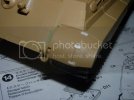
Although this kit is really good, when I put on the rear plate on to the chassis, there was this huge huge gaps all along the joint so I had to filled it and sand it down
P1110887.jpg

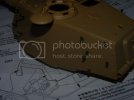
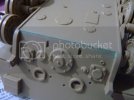
Also ran into some gaps on the front Glacis plate so I had to fill them and sand them down ( I just realize there are still gaps ... darn it ... oh well, more fillers &nbsp
P1110896.jpg

The Exhaust goes on nicely onto the rear hull
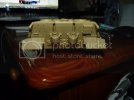
P1110898.jpg

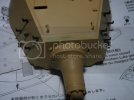
And then, I moved on to the Barrel - Here is how I deal with barrel -
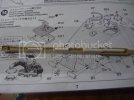
P1110888.jpg

I put bits and bots of my stryene rods lying around inside the barrel as support and to make them heavy and to have a proper rigid feel to them

With those in place, I glued the other half and I can even do this without breaking the barrel -
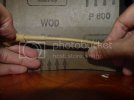
P1110894.jpg

and followed with some usual filling and sanding . .. ( darn things always leave a seam in the middle )
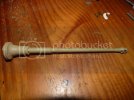
P1110895.jpg

And there you have it... I will update more in a day or two ... thanks for looking
 
Posting your wip is actively encouraged here, in fact that's exactly what this forum is for. Keep it coming hummingbird, that Cat is shaping up very nicely. And I'm gonna borrow that trick with the barrel. ;D

Cheers.
 
nice find buddy is that kit from "moddelzone" nice start to your build look forward to seein this come on
 
Yeah feel free to share, we can't get enough of Tigers on this forum

Look forward to seeing your progress!
 
spud said:
oh very cool, no worry's starting wips

Thanks sir.... won't worry then ...

Bullet21 said:
Posting your wip is actively encouraged here, in fact that's exactly what this forum is for. Keep it coming hummingbird, that Cat is shaping up very nicely. And I'm gonna borrow that trick with the barrel. ;D

Cheers.

Thank you sir. You are more then welcome to borrow the barrel trick .. I have used that method for by Panther G and this cat ... both of the barrels looks stout and rigid after that ... I really recommend doing that

geegad said:
nice find buddy is that kit from "moddelzone" nice start to your build look forward to seein this come on

haha.. yeah, you guessed it right .. I was browsing around in the London-Holborn branch and all of a sudden, my eyes fell on this baby and to my surprise, this had half price sticker on it.. I just had to buy it :p

Leighbo said:
Yeah feel free to share, we can't get enough of Tigers on this forum

Look forward to seeing your progress!

Thank you sir .... I can never get enough of tigers as well... there's something about them that's just attractive
 
Great start to this big girl!!! Love it!! Keep the pics coming!! ;)
 
nice find im off to merry hill to grab a couple of late bargins look forward to seein your next build
 
TRM said:
Great start to this big girl!!! Love it!! Keep the pics coming!! ;)

Thank you .. don't worry, new pics are coming now

geegad said:
nice find im off to merry hill to grab a couple of late bargins look forward to seein your next build

Get them quick before their sale is finished ...and the next build will be a Tiger I
 
Alright, Update time

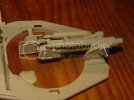
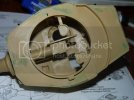
I worked on the Breech and the inner parts of the Turret .. Because the kit has a working rear escape hatch, Tamiya decided to put in the ammo rack ( but strangely enough, no ammo at all )

P1110900.jpg

I really like how the gun vertical traverse is controlled by a screw.. very very rigid and very tight and makes it work just perfect

There's still a huge seam line in the middle of the breech but since it will be hidden, I don't bother P1110902.jpg

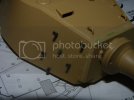
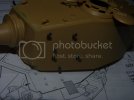
The mantlet didn't want to fit perfectly so I had to fill it out
P1110907.jpg

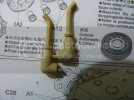
and those little S shaped hooks for the Spare tracks are glued on after it -
th_P1110906.jpg th_P1110903.jpg

th_P1110905.jpg th_P1110904.jpg

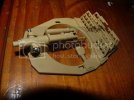
Closing up the turret from the bottom .. despite my best efforts, there are humongous gaps and I just can't help fill and sand them P1110908.jpg

After that comes the fun parts .. I was doing research about the King Tiger and I found some little bits and bobs of stuffs that were missing on the kit so I decided to put them on to the best of my degree

On my research, came across this particular picture -
img5645zz3.jpg


and since the kit lacks those details, I SB ( scratchbuild ) some of a 0.25 Stryene sheet and 0.2mm stryene rod
Right -
P1110911.jpg

Left -
P1110910.jpg

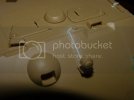
Obviously, no research is need to realize that there was no wiring for the single head lamp on the front glacis Plate so further improvising was need. For that I used 0.2 mm stryene rod and glue it on the glacis plate and into the little hub just like on the real thing
P1110912.jpg

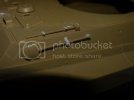
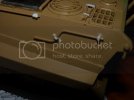
And I wasn't exactly too happy with the tie downs on the base kit so I decided to improve them as well
I used 0.25 mm thick stryene sheet and cut those little parts accordingly and glue them on ..

I was lucky enough to stumble across a short length of cable at work and I use the wires inside as those little belt buckle for the tie down
P1110913.jpg

P1110916.jpg

P1110919.jpg

after that I put on the meshes according to the instruction
P1110923.jpg

I thought about putting meshes over the other areas as well, but I found that not all tigers have meshes on all of them so I just opted out to put meshes over the other areas

I lost one of the little curvy (I don't know what these are called ) and after looking around the work area ( accompanied by almost constant stream of curses ) and couldn't find it so I just had to let it go and just cover up that area .. maybe I should put in the attachment point for that little curvy thingy .. hmmm.. Im gonna have to think about that ...

anyway, that's all folk.. Hope I don't disappoint you guys
 
hey guys .. more upates ( just a small amount today though )

Aftter priming to check , I noticed that I still haven't put on those little buckles on some of those tie downs so I have to put some more on -

P1110949.jpg

P1110948.jpg

P1110947.jpg

I have put on the base dark yellow and in the process of putting on the very first soft edge camo ( im doing the camo in two steps, freehand with soft edge and use blu tack to turn those into hard edges ) but I have no photo available at the moment so I will put some more after that ...
 
always nice to see another KT! 8) Nice build so far, I like the extra detailing you are doing, and nice to see a piece of fender of the KT at La Gleize (prior to camouflage application)

btw, if you are going to depict a KT which fought during the Battle of the Bulge you might want to discard the jack and it's brackets, as well as the wooden block at the backplate, since these weren't anymore at later production KT's ^^

Keep up the good work mate

Cheers
 
TRM said:
Nice job!! Looking forward to seeing the base coat go down!!

Thank you sir ... the base coat has already been put down along with the first coat of the soft edge camo.. I will take some photos of it when I work on this baby again ...


JohnSimmons said:
Yeah nice attention to detail! ;)

Thanks .. I scratch build gundam models ( and modify them a great degree).. the skills I got from that area really helps in upgrading those tiny details on this KT

Wouter said:
always nice to see another KT! 8) Nice build so far, I like the extra detailing you are doing, and nice to see a piece of fender of the KT at La Gleize (prior to camouflage application)

btw, if you are going to depict a KT which fought during the Battle of the Bulge you might want to discard the jack and it's brackets, as well as the wooden block at the backplate, since these weren't anymore at later production KT's ^^

Keep up the good work mate

Cheers

Thank you much for the advice ... I will take of the wooden block then ... and about the Jack's brackets, shoud I remove them completely?

letsgobrowns82 said:
Great looking kit and really nice detail your putting into it.

Thank you soo much brown
 
Im sorry to bother you guys with question but Im wondering if you guys would know some of the question I have

1 - Does anybody know what colour is the commaner/driver/loader/gunner Periscope used on German tanks? Some of the sources say green but I can confirm it.

2 - Im trying to build Tiger number 555. Does anyone have any info on it? was it hard-edge? or Soft-edge? All I can find out is that it was the battalion commanders tank of the 502 SS Panzer Abt.

Any help is appreciated. MAny Thanks.
 
Hi mate, yes, the supports for the jack were not apparent on the tank as well

About Tank 555, commanded by SS-SturmBahnführer Kurt Hartrampf: Waldemar Trojcas book about the KT states that it was a Pz.Bef.Wg. Tiger Ausf B, so it would have had the Sternantenna, as well as two other ones.
Camouflage was 'Licht und Schaten' - also called the Hinterhalt-Farbenschema or Ambush scheme - and was the hard edge tri tonal factory applied camo.

Tiger 555 was distinctive to the others of s.SS.Pz.Abt.502 since number 555 was black with a white outline and underneath the turretnumber on the sides of the turret was also a Balkenkreuz

I saw a periscope of a German tank for sale at a the museum at La Gleize a while ago, and it seemed like a combination of blue/green hinge of color to the periscope

Hope it helped a bit ^^

Cheers
 

Latest posts

Back
Top