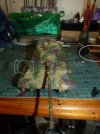
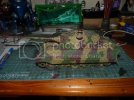
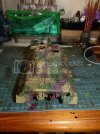
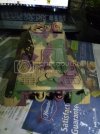
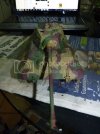
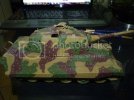
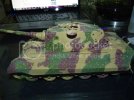
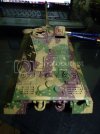
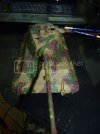
1/35 Tamiya King Tiger ( Ardennes Front )

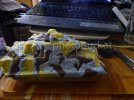
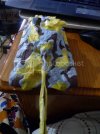
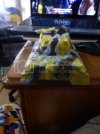
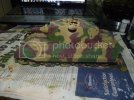
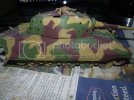
Put on the base coat ( dark yellow ) and the first run of camo

P1120097.jpg

P1120096.jpg

P1120095.jpg

P1120094.jpg

All that's left is to use a huge amount of Blu-tack to mask the out line for each colour and put on hard edge camo
 
Thanks guys ... it was touch and go for me to put down this layer of camo ... currently putting Blu-Tac around the Red-brown patches .... will keep you guys updated
 
Alright, Managed to do some work on this cat ..

After the initial run of the camo airbrush, I got a better canvas to lay down a hard edge so on to the masking .. I started with masking the dark yellow and the olive green
P1120164.jpg
P1120166.jpg
P1120165.jpg
P1120167.jpg

That WAS NOT EASY.. WHEW ...next time, I think I should just skip first run and go straight into masking .. anyway -

After the red brown was painted, I went for the olive green, This time, I skipped masking the entire thing and carefully mask and paint on the go with blu-tac ..

This is what I got .... and I have to say, I am starting to love hard edge
P1120180.jpg
P1120182.jpg
P1120183.jpg
P1120181.jpg

I purposely painted the hard-edge layer a bit messy and not entirely uniform as King Tiger 008 was historically Hard-edge, which implies that it was painted by the crew on the field and with the lack of petrol, crew use what ever they can to thin the paint so messy out come ( please correct me IF my assumption was wrong )

Now that Im happy with the results, I sprayed two coats of Vallejo Gloss Varnish and Revell Flat to protect the layers of paint...

After the follows the First step on the '' Ambush Scheme ''

P1120184.jpg
P1120186.jpg
P1120185.jpg
P1120187.jpg

The first step, which consist of dotting dark yellow over the red brown and olive yellow is done ... All I need to do is follow up with the other colours

Well, that's it for today folks, after the 2nd and third step of ambush scheme, comes details painting of the onborad tools and then the crews and I will be done...
 
That camo does indeed look good, nice job! looking forward to seeing your progress and finishing of this kit.
 
great re-do of the paintwork mate, it's a jawdropping scheme :eek:, well done :)

the 'Ambush' camo wasn't field applied btw: KT's with the 'Licht und Schatten' camo came like that from the factory. At the factory some masks were used to get the hard edge camouflage.

Looking forward to next update!

Cheers
 
That repaint definately was a good choice.

Nice built. Was fun to read through it. Very nice to see some scratchbuilding too.

It also reminds me that I really need to do a camo paintjob soon. A lot of my stuff lately is either sand or grey.
 
andrei383 said:
the camo looks great on the big cat!

Thank you andrei

Subhuman1 said:
That camo does indeed look good, nice job! looking forward to seeing your progress and finishing of this kit.

Thank you sir.. I won't disappoint you guys

Wouter said:
great re-do of the paintwork mate, it's a jawdropping scheme :eek:, well done :)

the 'Ambush' camo wasn't field applied btw: KT's with the 'Licht und Schatten' camo came like that from the factory. At the factory some masks were used to get the hard edge camouflage.

Looking forward to next update!

Cheers

Thanks for the feedback Wouter .. So these hard-edges were factory applied? dang it .. If i knew that, I would have painted them LESS messy ... oh well, the damage is done and I learned a valuable lesson for more future TIGERS .. Thanks Wouter

MrT said:
Very nice!!!

Terry ;D

Thank you sooo much Terry

FAUST said:
That repaint definately was a good choice.

Nice built. Was fun to read through it. Very nice to see some scratchbuilding too.

It also reminds me that I really need to do a camo paintjob soon. A lot of my stuff lately is either sand or grey.

Thanks Faust .. You have to do Camo.. Camo are very much fun to do so
 
Alright... Time for an update ...

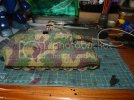
I mentioned in the earlier update that I only finish the first part of the camo scheme... so I followed through with it ..

After the dark yello dots, I applied the red-brown dots followed by the olive green
P1120196.jpg

P1120197.jpg

P1120199.jpg

P1120200.jpg

My mix of olive green is a little bit too dark and don't show too much on the Red-brown camo patches .. Im thinking I should put on a lighter tone,... MAYBE.. I don't know

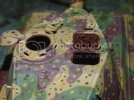
I wanted to have this display with the hatches open and did a little research for it and found out some are with the red-oxide paint layer on the interior of the tank and since I didn't know how exactly is the red-oxide is mixed, I just used the closet colour to it, which is Tamiya Hull Red -
P1120201.jpg

I might need to do a bit of re-touch around the hinges..... AND i just see the little boo-boo around the edge of the commander hatch ... oh well, i will just chip it on the weathering stage.. LOL

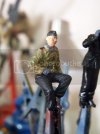
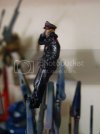
And I painted the two crew members that I want to show ...
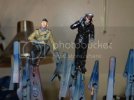
P1120203.jpg

This is my 2nd time painting crew figures and my 1st time painting it with full attention to details including hairs and eyes ... and I suck at it .. :(

Anyway, Following is the all around of the loader -
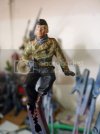
P1120209.jpg

P1120215.jpg

P1120216.jpg

There may be a small amount of in-accuracy in the exact colours or placement of the colours. I had to work with what ever I had in my paint box and didn't want to waste more money on exact paint.. TBH, Im not exactly a rivet counter and as long my work come out nice and clean, I am happy.. I don't want to kill myself with 100% accuracy ..

anyway - followed up the commander figure
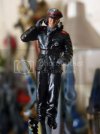
P1120218.jpg

P1120221.jpg

P1120222.jpg

P1120223.jpg

P1120224.jpg

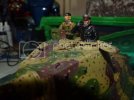
And some shot of the might cat being manned
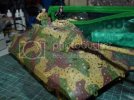
P1120225.jpg

P1120226.jpg

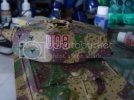
A Number of option for turret number was avaiable so I choose for '' 008 '' as I had a tiger I ''007'' in the making and my friend suggest a 007 and 008, tiger 1 and 2 respectively ....
P1120233.jpg

P1120232.jpg
Because i choose 008, I have to Scratch built a '' Sternantennae'' and it is in the making right now and will be shown on the next update ...

Well, that's it for now folks... I will keep you updated
 

Latest posts

Back
Top