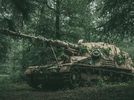
1/35 Tamiya Rhino

Edbert

Well-Known Member
Joined
May 16, 2024
Messages
282
1718150990494.png
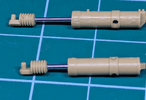
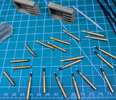
These are called "equilibrators" (apparently), there are two of them, 6 parts each.

1718151023836.png
Still learning these new glues, using MUCH less, and cementing one half while clamping the other half to avoid my clamp from attracting it.

1718151067638.png
I was pretty unhappy seeing those casting or injection marks (right term?) in the middle like that. Was trying to figure out how to remove them when I realized NOBODY will see that installed.
 
Last edited:
Yeah, ejector pin marks. The pins pop the sprue out of the mold after the styrene is injected and set. You might be able to fix those, too, with some 2-part epoxy putty, or even some of the kit sprue, stretched over a candle to the right thickness and then laid in with some liquid styrene cement. If they're hidden, though, yeah, you could leave 'em. Unless it bothers you that YOU know they're there! ;)
 
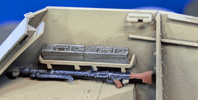
Using "gold" paint would be too bright for 88mm shells wouldn't it? Need more of a dull tarnished brass. Is there a good way to weather a pile of shells?

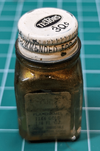
(thought ya'll might get a kick out of this bottle, paint is in excellent condition)
1718226322652.png
 
I've got some old Testor's jars like that, from when I was a kid. Some of those enamels start congealing from the minute you open them, like gloss black and gloss white. But I have a bottle of copper that I got in the 70s, and it's still useable.
As far as those colors go, if you were to use Testor's enamels, I agree, gold is too bright. Copper would work better. I use it for gold lace on my figures, because it's a little darker than the gold.
 
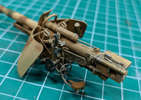
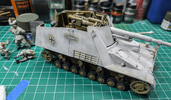
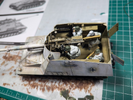
Still working through the kit, overall it is going very well. Lots of fiddly bits on the gun, but just a matter of patience because the parts do fit very well.

Here's some "issues" I had...

1718813476837.png
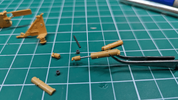
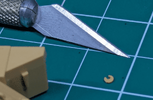
These tiny hooks, or tie-downs. It was a chore to get them into their slots, there is a top and bottom to them. But that wasn't the issue I had, again that is just a patience thing. My problem was grabbing them with tweezers, only to see them disappear, launched like a rocket into oblivion. Think I need to learn to be more gentle with the tweezers.

1718813504806.png
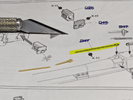
This part (D17), I managed to break it clean when using snippers off the sprue. Tried twice to glue it, but it looked like it had been broken and glued. Replacing it with wire was much easier.
 
1719351420309.png

Bummed that I missed those seams, will try to hide then inside the racks.

1719352336423.png

Pictures make me see things I missed during assembly, like those ejection pin (?) circles.

1719352466837.png

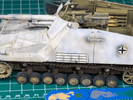
This is the point, after applying whitewash (1st ever attempt) and beginning the aging, that I realize I took no pics of the beautiful yellow/red/green camo before covering it up.
 
Last edited:
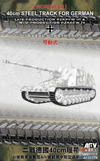
Picking this one back up after a break. Was never happy with rubber-band tracks, something about their texture, and of course no sag (not enough) on the top. So I decided to put some more money into this kit and use a "workable" kit from the AFV Club.

!!!

Why am I such a masochist?
1722017696190.png
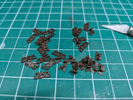
There are two parts per link, the smaller one glues in the center and has one lip on one side and two on the other than form the hinges. The little pile above represent about half of a sprue for each part.
1722017726242.png
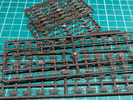
But there are six sprues here, for one track. Ugghhhh.
1722017776116.png
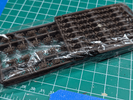
Another six sprues for, yeah, the other side of the tank. Leaving them bagged and hidden from my view, for my sanity.

1722017826019.png
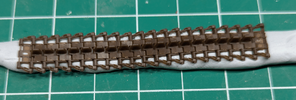
These are tricky. What you see above was me using Blu-Tack to hold the lower/larger part of the links together, with the pinss alinged with the hinges of each other. It provided a nice stable platform for adding the smaller parts. What I was not ready for was my gluing the tracks to the Blu-Tack. Ughhh again.
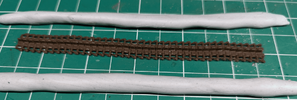

1722018225890.png
But here's a finished segment divorced from the Blu-Tack although there's still little bits of it stuck in there (only visible from the other side), will be covered by "mud" and weathering so I'm leaving it. That segment represents one sprue each, so two down ten to go. Ughhh!
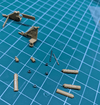
 
Good idea with the blue tack. Too bad you didn't get a jig or something with the track. I wonder if you could make a jig like Takom kits give you.
 
This is going to be a very intensive thing, but (I hope) worth it. The "sag" is controllable, I could add a link to exaggerate. But it looks and feels heavy.

1722210007254.png
 

Latest posts

Back
Top