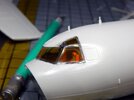
1/72 Hasegawa P-3C Orion VP-8

DavidsScaleModels

Well-Known Member
Joined
Sep 16, 2022
Messages
134
NEXT UP – Hasegawa 1/72 P-3C Orion – Commission Build!

For my next build and the first of a few commission builds I will be building the Hasegawa/Minicraft 1/72 P-3C Orion. The P-3C is an anti-submarine warfare patrol aircraft for the U.S. Navy. The scheme of this build is that of VP-8 known as "The Flying Tigers" when they were stationed at NAS Brunswick (Brunswick, Maine) during the early 1980's. This is being built for a U.S. Navy Veteran who served with this squadron. All the details will be scratch built and the squadron specific decals will be made by me.

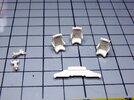
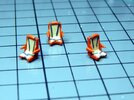
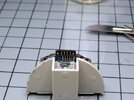
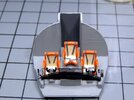
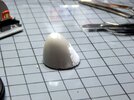
Starting off on the cockpit I needed to first fill in some mold marks on the seats and the cockpit floor. For the seats I used some 3M cloth tape to create the light tan seat pads and the dark grey seat belts. The kit supplied decals for the instrument panel and center console. However these were just outlines of the gauges and control boxes. I made a template of the decals and painted the background with the various colors so when the decals were applied the color was correct. The kit allows for two different versions of the nose cone. The solid one and the other version has a small canopy on the underside. The scheme I am doing has the solid nose so the instructions call out to fill the void with putty. Due to the size of the void I applied putty in layers so that each layer cured correctly. I also added two weights behind the cockpit assembly and one in the nose so that the model will sit correctly on the tricycle landing gear.

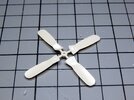
The fuselage was then assembled. Surprisingly for such an old kit the fit was very good. I then assembled the engines and main wing. The propellers all had mold marks on the backside which required to be filled with putty as well. The only portion of the aircraft that gets painted white is the middle and topside of the fuselage. I installed the windshield which also fit very well. I then began using kapton tape to mask off the windshield sections. I am now working on masking off the areas so I can spray the white section. I still need to clean up the wings and engines so they can be installed onto the fuselage. Then I can mask off the white areas and spray the gull grey. I am also working on the squadron specific decals that I will need to make. I am also going to make a copy of the kit decals just in case I have issues. The kit is from 1979 and the decal sheet looks its age. If the decals start to break apart (especially the larger ones) I will be able to create new copies.

You can see all the photos and details from the start in the build log at: https://davidsscalemodels.com/build-log/1-72-p-3c-orion-of-vp-8/
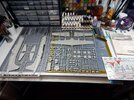
DSCN0215.jpg


DSCN0240.jpg


DSCN0242.jpg


DSCN0245.jpg


DSCN0247.jpg


DSCN0248.jpg


DSCN0250.jpg


DSCN0255.jpg


DSCN0259.jpg


DSCN0264.jpg
 
For the second week of the P-3C Orion I masked and base coat painted the fuselage with the white over gull grey paint scheme. I used kapton tape to mask off the windshield and the fuselage. While the white was drying, I built up the propellers and painted them to match the reference photo.

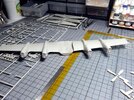
I then installed all the under wing hard points and the two inboard pods and attached the wings to the fuselage. For as old as this kit is the wings to the fuselage was an excellent fit. The white sections were masked off on the aircraft and the gull grey base coat was applied. The nose was painted black and the latches were painted gull grey.

I then spent two nights creating and scaling the specific VP-8 scheme decals. I had a difficult time locating the tail logo but I was able to use a reference photo and recreated the tiger head. I am unable to print in white so the grey area will be printed on white film decal paper then trimmed with w hobby knife. I went to apply the propeller decals and realized the kit decal sheet had a section that was slightly off register. (Colors not aligned within a single decal) so I made the propeller manufacturer decals as well. The propeller decals were then applied and the top coat of clear was done.

I am currently working on the landing gear and the bays. The bays have very limited details so I will be adding some. Also the landing struts and the wheels have a lot of mold marks so these needed to be filled with putty. I plane on getting the landing gear installed and then I can start applying all the decals.


You can see all the photos and details from the start in the build log at: https://davidsscalemodels.com/build-log/1-72-p-3c-orion-of-vp-8/


DSCN0265.jpg


DSCN0267.jpg


DSCN0268.jpg


DSCN0272.jpg


DSCN0275.jpg


DSCN0278.jpg


VP-8-Decal-Sheet.jpg
 
For the second week of the P-3C Orion I masked and base coat painted the fuselage with the white over gull grey paint scheme. I used kapton tape to mask off the windshield and the fuselage. While the white was drying, I built up the propellers and painted them to match the reference photo.

I then installed all the under wing hard points and the two inboard pods and attached the wings to the fuselage. For as old as this kit is the wings to the fuselage was an excellent fit. The white sections were masked off on the aircraft and the gull grey base coat was applied. The nose was painted black and the latches were painted gull grey.

I then spent two nights creating and scaling the specific VP-8 scheme decals. I had a difficult time locating the tail logo but I was able to use a reference photo and recreated the tiger head. I am unable to print in white so the grey area will be printed on white film decal paper then trimmed with w hobby knife. I went to apply the propeller decals and realized the kit decal sheet had a section that was slightly off register. (Colors not aligned within a single decal) so I made the propeller manufacturer decals as well. The propeller decals were then applied and the top coat of clear was done.

I am currently working on the landing gear and the bays. The bays have very limited details so I will be adding some. Also the landing struts and the wheels have a lot of mold marks so these needed to be filled with putty. I plane on getting the landing gear installed and then I can start applying all the decals.


You can see all the photos and details from the start in the build log at: https://davidsscalemodels.com/build-log/1-72-p-3c-orion-of-vp-8/


DSCN0265.jpg


DSCN0267.jpg


DSCN0268.jpg


DSCN0272.jpg


DSCN0275.jpg


DSCN0278.jpg


VP-8-Decal-Sheet.jpg
Looks fantastic. Pantherman
 
This is kind of the third week of the Hasegawa 1/72 P-3C Orion build. The "kind of" is because there was no update last week. My Wife and I went away to a friend's cabin for a few days to celebrate our 31st​ wedding anniversary.

Prior to our trip I was able to finish the base coat of paint. The landing gear was then assembled, painted, and installed. On a side note I installed weights under the cockpit and inside the nose so that the aircraft sits correctly on the landing gear. Next I scrounged thru my spare photo etch box and located numerous blade antennas. The reference photos show many around the aircraft. One on top of the tail, five on the underside aft, five on the underside forward, one on the spine just forward of the tail and two above the cockpit.

After our return I did some minor painting on the top of the tail and the MAD boom. At this point the aircraft was ready for decals. I started by placing the VP-8 specific decals on the aircraft. I then started adding the kit decals and found out that the kit decals are extremely fragile due to the age of the kit and decal sheet. The smaller decals seem fine however the larger ones take a lot of time to get them placed correctly. I am using Microscale's liquid decal film on the larger decals to aid in keeping them from falling apart. I have noticed some of the smaller decals like the rescue arrows, prop warning stripe, and various placards are also slightly off register so I am going thru my spare decal binder and looking for some replacements. The placing of these fragile decals is a very tedious task. Once I get to the underside decals I will install the landing gear doors. I still have the display base to detail as well. The goal is to complete this by the end of next week.

You can see all the photos and details from the start in the build log at: https://davidsscalemodels.com/build-log/1-72-p-3c-orion-of-vp-8/


DSCN0281.jpg


DSCN0286.jpg


DSCN0289.jpg


DSCN0290.jpg


DSCN0291.jpg


DSCN0292.jpg


DSCN0293.jpg
 
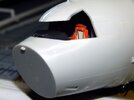
In just four weeks the P-3C Orion of VP-8 "Flying Tigers" is now finished. After many tedious hours of carefully applying the kit decals I was able to get them all on with only some minor issues. The biggest issue of the decals was the upper wing walkways. It seems the grey ink was affected by the top clear coat. It was actually kind of weird it was just the grey areas. These shriveled a bit. I used a few coats of Microscale solvent and they finally settled down to the surface again. With the top clear coat sealing the decals I removed the canopy masking. The underside light was just molded in the plastic so I trimmed it off and replaced it with a clear lens and painted it with clear red. The upper light was not even represented in the kit so I made it from some clear styrene rods.

Next I installed all the side windows, engine exhausts, and the propellers. I use EZ-Line for the antenna wires from the tail to the top of the fuselage and this completed the aircraft.

For the display base I started with a 16" round base and painted it medium grey. I then misted some light grey and dark grey paint to represent the cement of a flight line. The expansion joints in the cement were made using a dark grey detail pencil. I then used pastel chalk to highlight the lines and stains along the surface. The backside was covered with a sheet of HO scale grass mat to match the reference photo of the actual aircraft. I then added an aluminum etched nameplate listing the aircraft, squadron and location as the final step in this build.

This build was an interesting build. For the age of the model it went together very well. The only issue was the decals being brittle from age and the weird reaction to the clear coat on the grey walkways. If you are looking for a nice P-3 the Hasegawa kit is nice. I would recommend a newer edition so the decals are not as brittle or use aftermarket decals.

This project is scheduled to be delivered to the client next week. I hope you have enjoyed this build and thanks for following along. Happy modeling!


You can see all the photos and details from start to finish in the build log at: https://davidsscalemodels.com/build-log/1-72-p-3c-orion-of-vp-8/


DSCN0296.jpg


DSCN0302.jpg


DSCN0305.jpg


DSCN0306.jpg


DSCN0307.jpg


DSCN0308.jpg


DSCN0309.jpg


DSCN0310.jpg


DSCN0342.jpg


DSCN0344.jpg
 
In just four weeks the P-3C Orion of VP-8 "Flying Tigers" is now finished. After many tedious hours of carefully applying the kit decals I was able to get them all on with only some minor issues. The biggest issue of the decals was the upper wing walkways. It seems the grey ink was affected by the top clear coat. It was actually kind of weird it was just the grey areas. These shriveled a bit. I used a few coats of Microscale solvent and they finally settled down to the surface again. With the top clear coat sealing the decals I removed the canopy masking. The underside light was just molded in the plastic so I trimmed it off and replaced it with a clear lens and painted it with clear red. The upper light was not even represented in the kit so I made it from some clear styrene rods.

Next I installed all the side windows, engine exhausts, and the propellers. I use EZ-Line for the antenna wires from the tail to the top of the fuselage and this completed the aircraft.

For the display base I started with a 16" round base and painted it medium grey. I then misted some light grey and dark grey paint to represent the cement of a flight line. The expansion joints in the cement were made using a dark grey detail pencil. I then used pastel chalk to highlight the lines and stains along the surface. The backside was covered with a sheet of HO scale grass mat to match the reference photo of the actual aircraft. I then added an aluminum etched nameplate listing the aircraft, squadron and location as the final step in this build.

This build was an interesting build. For the age of the model it went together very well. The only issue was the decals being brittle from age and the weird reaction to the clear coat on the grey walkways. If you are looking for a nice P-3 the Hasegawa kit is nice. I would recommend a newer edition so the decals are not as brittle or use aftermarket decals.

This project is scheduled to be delivered to the client next week. I hope you have enjoyed this build and thanks for following along. Happy modeling!


You can see all the photos and details from start to finish in the build log at: https://davidsscalemodels.com/build-log/1-72-p-3c-orion-of-vp-8/


DSCN0296.jpg


DSCN0302.jpg


DSCN0305.jpg


DSCN0306.jpg


DSCN0307.jpg


DSCN0308.jpg


DSCN0309.jpg


DSCN0310.jpg


DSCN0342.jpg


DSCN0344.jpg
That looks so cool, great build. Pantherman
 
I fell in love with the P-3 Orion after my uncle who worked at Pax River NAS in Maryland as a civilian took me out on the base. It was there, I saw a squadron of
P-3s. While visiting DC Air & Space Museum, I bought my first Orion model kit (Hasegawa). I found another at Syrcon last year and currently looking for aftermarket decal set for Pax River.

I know for a fact Pax River retired their last P-3 Orion and is headed to the big graveyard in AZ. P-8 Poseidons are replacing the Orions now.

Your build came out great!
 

Latest posts

Back
Top