You are using an out of date browser. It may not display this or other websites correctly.
You should upgrade or use an alternative browser.
You should upgrade or use an alternative browser.
1967 Lindberg Oldsmobile 442
- Thread starter Jimbot58
- Start date
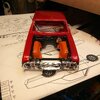
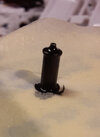
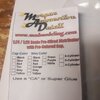
Work on the Old's 442 engine. I found this distributor detail set online from Morgan Automotive Detail, It took forever to arrive, but it looks worth the wait. This is going to be so simple! I assume I need to strip the insulation off the black wire to make the boots, You can see the base of the distributer already set in the block. It is styrene and the cap is resin, so I guess I use a drop of CA to attach the two together.
Much to do yet -oil pan (a decal is provided for the filter), starter, carb, alternator and bracket, oil filler tube..... work, work, work.
Also, I don't see where the kit provided a coil? Plus, yes I know the block should have been a dark gold, but I didn't have any. Old's blue it is!
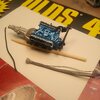
Much to do yet -oil pan (a decal is provided for the filter), starter, carb, alternator and bracket, oil filler tube..... work, work, work.
Also, I don't see where the kit provided a coil? Plus, yes I know the block should have been a dark gold, but I didn't have any. Old's blue it is!


BattleScale Collectica
Active Member
- Joined
- Jun 10, 2024
- Messages
- 90
I wonder if you could cut a small thin piece of styrene or translucent sheet for the reverse light?A question - what is the best way to do the reverse lights like these embedded into the rear bumper? Maybe some thinned gloss white and a few coats of clear gloss? And yes, my workbench is a disaster! And not quite sure what the little yellow blob is.View attachment 121756
Not a bas idea, but I don't think I have anything to use.
In the meantime, besides painting on that purple 'Cuda every night, I got back to the Oldsmobile. I have been cutting pieces off the thicker provided wire to manufacture ignition boots. I already have the fortune of owning a set of Klein wire strippers made for thin wire, Made 9 boots tonight, and that was enough for now, Hard to see these things at my age. Once I push these things into place and probably use a drop of CA to secure them, I can install it and begin routing the wires. Only 8 more teeny-tiny, itty-bitty spark plug boots to make. Not sure about the coil as the kit did not provide one. It will be buried under the huge air cleaner anyway.
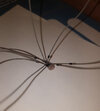
In the meantime, besides painting on that purple 'Cuda every night, I got back to the Oldsmobile. I have been cutting pieces off the thicker provided wire to manufacture ignition boots. I already have the fortune of owning a set of Klein wire strippers made for thin wire, Made 9 boots tonight, and that was enough for now, Hard to see these things at my age. Once I push these things into place and probably use a drop of CA to secure them, I can install it and begin routing the wires. Only 8 more teeny-tiny, itty-bitty spark plug boots to make. Not sure about the coil as the kit did not provide one. It will be buried under the huge air cleaner anyway.

athabascamaverick
Active Member
- Joined
- May 5, 2023
- Messages
- 135
You can get aftermarket coils from Model Car Garage (probably others too)
I went back through the kit instructions and found no mention of the coil. I finally found a photo online showing the coil positioned to the left of the distributer, So I ordered a set of two made by Detail Masters from Ebay. I also examined the '71 Revell version I have and it did indeed include the coil and also showed another omission on the part of Lindberg - the mechanical fuel pump! I'm not worried about that one as it is too far down the block for anyone but me to know it's missing.
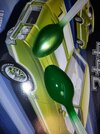
Also looking at the future build of the '71 442. Trying to figure out a color. Compare the box art color which looks pretty nasty to me. The green spoon on the right is which is what Revell color the kit calls out for, which is #61 gloss emerald green, which nowhere even close to the box art. . Pretty boring, right? The other spoon is a Mr. metallic yellow green, I don't recall the number off hand. I think my choice is clear, would you agree?
 .
.
 .
.Pantherman
Well-Known Member
- Joined
- Feb 10, 2022
- Messages
- 3,485
I agree, nice and shiny. PanthermanI like the top color.
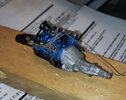
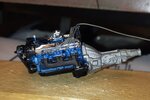
Another omission I noticed was the absence of a battery, but quickly learned the battery was relocated to the trunk in order to accommodate the scoop intake through the front grill on the W30 model.
Working on the wires still, and adding those tiny looms to the wires was a pain! The only thing worse is when it's your turn to get a 2 year old dressed for church and you have to try get her to put each foot down a different leg of her tights!
Will be adding the coil shortly, which came with PE straps which I have now lost! I'll craft something or do without. The kit should be happy it's even getting a coil!


Pantherman
Well-Known Member
- Joined
- Feb 10, 2022
- Messages
- 3,485
Great detail work. PanthermanAnother omission I noticed was the absence of a battery, but quickly learned the battery was relocated to the trunk in order to accommodate the scoop intake through the front grill on the W30 model.
Working on the wires still, and adding those tiny looms to the wires was a pain! The only thing worse is when it's your turn to get a 2 year old dressed for church and you have to try get her to put each foot down a different leg of her tights!
Will be adding the coil shortly, which came with PE straps which I have now lost! I'll craft something or do without. The kit should be happy it's even getting a coil!
View attachment 123873View attachment 123874
athabascamaverick
Active Member
- Joined
- May 5, 2023
- Messages
- 135
I hate the wire looms - they like to tear the insulation - I'm not adverse to using a piece of thread and knotting it instead
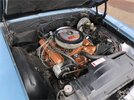
I found out why it's important to look at references: I am trying to figure out where to put the heater hoses. Every car or truck I've ever owned, 2 Fords and 4 Chevy's, had the upper heater hose exit at the front of the intake manifold. Apparently the 442 was routed out the back of the manifold:
Still wish I had tried to figure that bronze gold on my 442. Oh well, it's still an Oldsmobile Blue I used and I did find a couple of photos of a '67 with the blue used. In all fairness, the instructions were calling for blue if I remember,

Still wish I had tried to figure that bronze gold on my 442. Oh well, it's still an Oldsmobile Blue I used and I did find a couple of photos of a '67 with the blue used. In all fairness, the instructions were calling for blue if I remember,
Last edited:
I would be interested in learning more about that method.I hate the wire looms - they like to tear the insulation - I'm not adverse to using a piece of thread and knotting it instead
With working a second job, it's often hard to find time to work on projects, but have done a few things here and there on the '67 442. One error I made was to mount the nearly completed engine onto the frame, and on a trial fitting of body to chassis, I discovered that the fenders would not fit down over the engine. I had to pop it back out so I can remount it again once the body and frame are assembled. That's what test fits are all about, right?
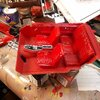
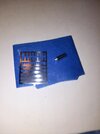
Did a little work on the interior, but still need to finish the dash, and the shifter. The dash gauges are proving to be tough as I destroyed the decals provided with the kit just trying to cut them out - the edges shattered when I got close to the edge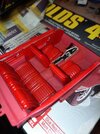 . I ended up purchasing an aftermarket set which I believe are from Best Model Car Parts. These are actually photo paper you cut out and glue with a drop of white glue.
Did a little work on the interior, but still need to finish the dash, and the shifter. The dash gauges are proving to be tough as I destroyed the decals provided with the kit just trying to cut them out - the edges shattered when I got close to the edge
 . I ended up purchasing an aftermarket set which I believe are from Best Model Car Parts. These are actually photo paper you cut out and glue with a drop of white glue.
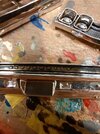
Also some work on the chrome though many of the exterior trim is provided already chromed. I'm using Alclad with the black base. These are WIP photos where I am putting down the base and need to wait to apply the chrome. I peeled back some of the masking to show the results around the windshield. Yes, a little overspray got under the tape one the one side. I forgot to rub down the tape after waiting for the base to dry. Everything gets coated with Aquagloss afterwards.
Chrome pens and Bare Metal Foil never played nice with me.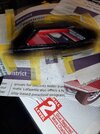
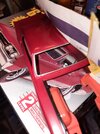
Chrome pens and Bare Metal Foil never played nice with me.


Similar threads
- Replies
- 2
- Views
- 1K

![IMG_20240625_231435[8568].jpg IMG_20240625_231435[8568].jpg](https://data.www.scalemodeladdict.com/attachments/106/106924-92be384e904f9c3633b4be220e89c019.jpg)
