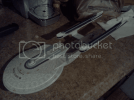
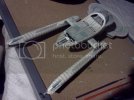
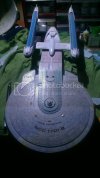
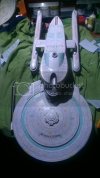
A pair of Enterprises

trekriffic said:
That's a lot of work on a small model. I think the fact the impulse engines on the B went out may be blessing in disguise depending on how much ambient light shows thru from the saucer LEDs. I'd recommend frosting the clear bits before painting them red or red-orange. A nice soft glow to me is better than overly bright engines but maybe that's just me.


yes I think you are right, it looks like there is enough ambient light, I was trying to say in the video that i was going to frost the clear parts but i was so out of it i couldn't think of the word haha


ModelMakerMike said:
Good stuff!
I like how you are working on both simultaneously.
Do you find that doing that helps you? As in, you might discover a trick on one that you can then incorporate into the other?

yes it does! I used to do just one model at a time but doing multiples helps me out because when i get frustrated with one i move to the other. Like when the strip lighting in the TOS light kit was giving me fits I just worked on the B and you see how far I got.
 
Looking good! Also I think that the photo etch from Round2 was made by paragrafix. But I could be wrong.
 
Grendels said:
Looking good! Also I think that the photo etch from Round2 was made by paragrafix. But I could be wrong.

It was designed by Paul from PGFX but another company is manufacturing it for R2.
 
Thanks for the look at your "B". The Aztek effect is better than I have seen in some time. Often people make them too obvious, too in your face- this looks very good- not blaring but also not too subtle, which I've seen too often also. Great work. Now I have something to strive for when I do my "B" and Excelsior kits (bought on original issuing and awaiting
by mutton chops to build them- for the past what? Decades?).

BP

ZOMBIEREPELLENT said:
The Acreation decals for this ship are pretty good, but have a couple of issues. The three teal bands going around the saucer, are a little too short. They leave about 1/4" at the end. I corrected the issue by cutting three small strips from the decals they give you for the warp engines and patched them in. It was barely noticeable after the fact. When I did mine, it was before they revised them for the round 2 enterprise, so I'm not sure if they changed the darker parts for the warp nacelles, they are a little short as well, but don't stand out as being terrible I guess. I sanded off all the panel lines on mine since the original studio model barely has any, and it looked much better. To me anyways

finishedenterpriseb.png

enterpriseb-1.png

IMG_20111212_175739.jpg

For the longer decals, since they're often really narrow as well, I just found it easier to let the decal soak until it came off the backing, and float the decal into place with the part in the water. I used a baking sheet when I did them. I think I actually used both solvaset and microsol/microset, both work great, and then the final model was sprayed with testors dullcoat.

If you have any problem with me posting pics, I will gladly remove them.
 
I can't exactly say I'm psyched about decaling over 90% of this model but I am close to that point. I have been working with a friend who does graphic art and we came up with this for a backlit display under the model.

stgenedit_zpsf2c81c79.jpg

The colors aren't final nor are the position of everything but it's close. I should have a video done Monday or Tuesday since I have been only working on the B.

Off to Rockingham, take care,
 
OK FINALLY!!!!! lol sorry had some issues uploading the video, but here we are!

A Pair of Enterprises Part 3

I hope to have the model of the B in the decal stage real soon. I am STILL having fitment issues with the shuttlebay on the TOS 350 so I need to go back and do MORE SANDING...........ugh.....oh well it's the end result that counts hahaha
 
man I'm sorry I haven't been around much, work is busy (everybody wants their a/c fixed) here is the next update. I have gotten into the habit of shooting smaller parts at a time so I'm actually a little further ahead than what the video shows.

A Pair of Enterprises Part 4
 
Good work!
I have seen/heard bad things about round 2 decals, and their mismatched instructions on placement.
The "B" is looking great BTW.
AND I LOVE Tamiya putty!
;D ;D
 
How about some photos?

2013-06-11045819_zps0a551a88.jpg

2013-06-11045751_zps732d37a9.jpg


I did take these before i flat coated it but as of right now the B is done!!! Well the model at least. The video that is currently uploading will let you see the base constructin starting. Happy modeling guys.


I was having some issues with files not transferring right, when i was trying to get them off my phone. I started using this program called Dropbox. Now I have no issues.
 
Nice job on the B. I got mine partially built laying in its box. The nacelles just disgusted me. I wish Polar Lights would make this kit. Anyway, I'm glad it came out so well for you.
 
dkev said:
Nice job on the B. I got mine partially built laying in its box. The nacelles just disgusted me. I wish Polar Lights would make this kit. Anyway, I'm glad it came out so well for you.


yeah i absolutely hated doing the nacelles. thanks for the comments
 
Grendels said:
Nice video on the base, it looks like you have a good shop there.

Thanks,

It's in my dad's garage. He likes doing projects so all I have to buy is the wood. And I get to learn in the process.
 

Latest posts

Back
Top