A tale of two A-wings.....

Which color should I use for the large versions engines?


  • Total voters
    6
  • Poll closed .
Solander: I know that feeling all to well. Just cut it and be done, but you end up with nothing like you wanted.......


Here is the next video, I ordered up some LED's from ebay and made a video of the different types I can use in the engine cans for the larger one. Let me know which one you think I should use:

A tale of two A-wings part 6.5: Engine LED's
 
Grendels in my opinion, which doesn't mean much, the 8mm looked best. On video it appears to have a more aesthetically pleasing look in the engine and didn't seem like it was blinding the eye. It may look different to you in person but that was my impression seeing it. I'm sure your choice will be best.
 
Glorfindel said:
Grendels in my opinion, which doesn't mean much, the 8mm looked best. On video it appears to have a more aesthetically pleasing look in the engine and didn't seem like it was blinding the eye. It may look different to you in person but that was my impression seeing it. I'm sure your choice will be best.

I am going to use the 8mm. They just look too good in the flash light housings. But one thing, you do not look directly into them. They are half watt LED's and they are VERY bright in person.

I just did another test with them and they look great in there. I will start up on wiring tomorrow.
 
Not sure what you are after John ??? Where did you actually go wrong ?

You are sure going to Town on these two.... nice to see you Enjoying yourself.... LOL

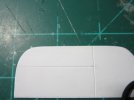
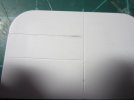
seriously... can you upload a close up of what you don't like about your last scribing job?

it would be easier to see rather than Catching it in the movie....
 
The only mistake I can see is the lack of Thunderpaws! ;D

I'm not sure, but you can probably see better in person. The plastic weld method sounds interesting. I tried it on a couple of seam lines on the Vorch'a, and it was a bit messy, but looked quite good after some persevering.
 
Here is a few photos:

20120110_5.jpg

20120110_6.jpg

I am using Mr. Surfacer to try and repair my mistakes with the scriber, but I am not sure it will work. I am thinking about just starting over and cutting out new stabilizers.

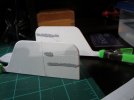
20120119_5.jpg
 
Scribing! Don't you just love it? That's one area I need to build up my skills at. You very much seemed to like the Tamiya scriber. I have the Hasagawa scriber and found it awkward to use. i.e. the blade would not conform to the dymo tape or any other hard edge. It just had a mind of it's own and decided to run off in another direction.
 
The main problem I see with using something like Mr.Surfacer for correcting self-scribed panel-lines is that it can crack dusty under the edge of the scriber when one do a rescribe.
What I've tried once (on last BSC's Tydirium) was using CA glue for the purpose. You just applie some of it to the bad area, wait while it dries, sand the excess and go again with the scriber.
This method is a bit tricky though, and You don't want the glue to be too thin - or it will soak all along the whole line which part you are correcting by capillarity effect.
Anyway, I'm sure You would deal with this little problems pretty easy and fast, as You always do, G. ;)
Keep it up, don't fall in mood, 'cause no matter the slight panels issues You're still doing great, my friend.
 
Solander said:
The main problem I see with using something like Mr.Surfacer for correcting self-scribed panel-lines is that it can crack dusty under the edge of the scriber when one do a rescribe.
What I've tried once (on last BSC's Tydirium) was using CA glue for the purpose. You just applie some of it to the bad area, wait while it dries, sand the excess and go again with the scriber.
This method is a bit tricky though, and You don't want the glue to be too thin - or it will soak all along the whole line which part you are correcting by capillarity effect.
Anyway, I'm sure You would deal with this little problems pretty easy and fast, as You always do, G. ;)
Keep it up, don't fall in mood, 'cause no matter the slight panels issues You're still doing great, my friend.

Thanks Sol, it was getting me down, and I had set her aside for a couple of weeks because of it. I think I got it worked out. Yes I put the Mr. Surfacer on it, but I can get that out pretty easily.

I think I am just going to take some very thin strips of styrene and glue them down on the scribe lines and then sand flush. That should do it up right.
 
Fill the panel lines with apoxie sculpt and try again
or just cut out new ones. Take the stabilizer and tape
it to the table.....then take a straight metal ruler and
tape that to the part. Make sure nothing is moving,
it's less to concentrate on then scribe it. The dymo tape
does not give you enough of a hard edge to run the
scriber against, especially the Tamiya one it keeps your
hand very horizontal, at that angle it's easy to cut into
the tape.
When you scribe panel lines you need to remove things
out of the equation that can possibly make the line wavy.
If it's in your mind that the tape only has 3 passes because
you will cut into it then don't use it. You don't want that on your
mind when your scribing, use something stronger than the scriber
you have in your hand as a guide.Use light pressure next to it and build it
up and you will have perfect lines, try the smaller #11 blade in the smaller
body knife and break just the teeny tiny tip off. Who cares if you have to
go back and sand the sides it's worth the end result. ;D Those are the easiest
lines your going to get to scribe on that model the rest are all on a curve......
so practice practice!!! LOL LOL
 
Thanks Micheal, I will keep this in mind when I get back to her in a few days. I have the LED's sorted for the engine cans, very bright ambers, should look good. Speaking of the engine cans, they are sanded up and ready to go together. Just need to do a bit more fine detail work and they are good to go.
 

Latest posts

Back
Top