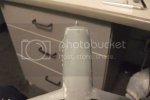
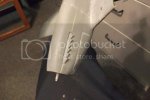
Ace Of Spades Tamiya 1/32 Scale P-51D Mustang, BUILDING HAS BEGUN!

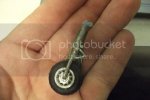
Tamiya comes with Magnets for all those optional parts... you just pull it out and slap in the other and voila !

you have a Landed or Flying Model... a feat in engineering...

Just plain Awesomeness !


I make no money Saying the Word Tamiya... LOL

but its were my money is !
 
Nice progress here, Ace.
Looks like you're moving nicely through this, now that you've gotten past a couple of snags
 
WOW :eek:...you're hammering on with this one Ace ....Looking sweet too ;)

Chris.
 
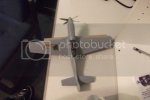
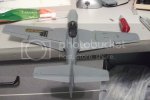
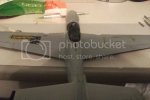
more and more of a fight... when i test fitted the prop it looked crooked, so i filed the nose till it looked straight... Aves Apoxie sculpt is truly the master of seam filling, without it at this time i would be in a serious bind. fixing up the nose took most of the modeling of the day, but the engine cowling is finally... compleet....

but this battle is long but over, the wings have also been compleet, but once again i get more issues, the Flaps when fully retracted do not set flush with the wings, they sink... its glue them in place, flaps down, or deal with it. tried to fix it, and one of the little plastic rods that allow it to go up and down broke, i was forced to glue them flush... :mad: one thing after another! o well, what ever... move on, we are almost at the home stretch... i just hope i have no issues with the Radiator scoop to marrow.

at least its starting too look like a mustang.
DSCF2258.jpg

DSCF2257.jpg

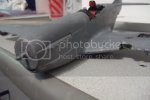
DSCF2256.jpg
 
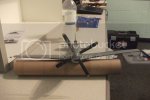
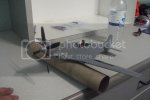
Flaps issue solved...

:) Magnets...

there where some spare magnets, and i used them, this will not only hold the flaps in place, allow then to lock flush... and adjust, but will allow me to remove them for paint... Ingenuity...

DSCF2259.jpg

DSCF2260.jpg
 
Ace, I hope you take this the right way, but I think you need to slow down and do some more dry fitting before you hit the glue. ;) ;D
 
Gundam may have a valid point, Ace.
Don't let your desire to do this one run rampant.
Take a breather or two and relax a little.
 
Gundamhead said:
Ace, I hope you take this the right way, but I think you need to slow down and do some more dry fitting before you hit the glue. ;) ;D

yes... i rushed the flaps a little too fast, i had dry fitted everything but them, LITERALLY, half the time i have spent doing this model has been dry fitting peaces and checking there placement, making sure everything is perfect, my error... is something as simple as forgetting to dry fit the flaps, LOL! i fixed the issue, and came up with a better solution!
 
Quaralane said:
Gundam may have a valid point, Ace.
Don't let your desire to do this one run rampant.
Take a breather or two and relax a little.

indeed i do my friend, time to let off the throttle a little.
 
so Aves apoxie sculpt is officially my favorite seam filler, no other compares... the engine cowl looks almost PERFECT!!! more pictures later... i am going to do some more building soon, but i don't know how much i will be able to get done today. :)

i am so happy, my dream, is slowly becoming a reality...
 
engine cowl looks really nice now...

DSCF2261.jpg

DSCF2262.jpg

DSCF2263.jpg

DSCF2264.jpg

yea... from seem lines to panel lines baby..

and for the radiator scoop, once again, got her in, had to use the Dremel though.. :p oh well who cares, its in and looks nice and neat... flaps still work, though i had to come up with a different method of attachment, it works even better than the Magnets.

HISTORY LESSON!

The P-51D Mustangs radiator may have been one of its only disadvantages, it was often compared too heavier constructed air cooled radial powered fighters. its radiator and oil cooler was vulnerable to a peace of lucky flak or small arms fire, piercing the radiator or oil cooler could result in a premature end to a scheduled flight... however this Disadvantage was often very overlooked, as other fighters shared the same issue, the Spitfire, 109, and FW-190D-9 all had the same problem... some where worse than the mustang.

however the Mustangs radiator was special... its design allowed its radiator once heated enough, to take the air passing through and create thrust! the mustangs radiator created enough thrust, too where it canceled out the drag the radiator created, this in combination, with Laminar flow wings, and a streamline Fuselage allowed the mustang to go faster and perform equal to better than many of its contemporaries without needing excessive amounts of power... allowing it to at the same time have its staggering range that would often double or quadroople other fighters in its class.
 
Yeah, nice job Ace! Thanks for the history lesson. I enjoy learning the interesting facts you pass along. Keep on keepin' on Ace!
 
the seams on the radiator and oil cooler scoop have been touched up, i sanded them with a rougher grit to get the seem lines, then a smoother grit to smooth it out and touch it up. i cannot feel the seem lines with my fingers, i will soon apply silver paint over the top of the lines, if this is not fixed, i will apply a coat of MR surficer over those seems, then sand, and check again. with the model assembly BEFORE PAINT, almost compleeted, NOTE... not yet compleet, i am working in seems more than anything right now. "so close... yet so far..." i cant close up the cockpit either untill i get the decals and a photo of amber to put on the instroment pannel... i got the harness in the best i could, should have got that in cockpit assembly. i am having issues with the pilot, i do not like the pilot that came with the kit...
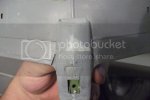
DSCF2270.jpg

the prop blades have recieved a coat of paint, the hub waits its coat of paint, notice the chips and scratches on the edge of the blades, atom saw some combat, hundreds of about thousands of missions, debris from each of his every kill, and dirt, wore away at the edge of the prop.
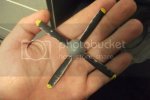
DSCF2269.jpg

i used a "dirt wash" by taking Valejo dark earth and another Valejo color, and watering it down a little, it makes it look nice, then added a chipping effect exposing some bear metal around the edges, then added some flat black to give a caked on rubber effect, from landing... after takeoff... after landing... after takeoff... on the landing gear covers, and landing gears
DSCF2267.jpg

DSCF2268.jpg

more seem lines recieve some standings and touch ups....
DSCF2271.jpg
 
Looking good Ace !
I should have your decals done by the weekend , than out to you .
I just have to finish coloring the Amber Fusion and do the individual art sizing and sheet layout.
 
I built Tamiya A/C before and didn't need Filler... !

I am somewhat surprised you needed that much !!!

Was there any Warping issues, we need to know about ?
 
RocketSilo said:
Looking good Ace !
I should have your decals done by the weekend , than out to you .
I just have to finish coloring the Amber Fusion and do the individual art sizing and sheet layout.

awesome! glad you like it.
 
schweinhund227 said:
I built Tamiya A/C before and didn't need Filler... !

I am somewhat surprised you needed that much !!!

Was there any Warping issues, we need to know about ?

yes, Tamiya is usually good about how the peaces go together, and i paid good attention too each and every part, and each and every fit. but there are so many little parts and peaces that go in, if one little thing is off... the hole thing gets thrown off... with the fit with the fusilage halves there are lots of little parts and peaces that have to be placed just right, and even then there are tight tolerances...

with the radiator, scoop i had to use a Dremell quite extensively to get it too fit in... perhaps it is the materials i am using? but its coming together...
 
Back
Top