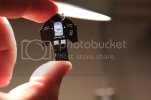
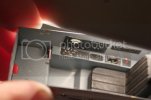
Apollo's Viper Mk.VII - 1/32, Moebius

Solander

Active Member
Joined
Jun 8, 2010
Messages
1,407
Hi, guys!
As the 2013 BSC is over, and we are all waiting with an anticipation for the voting counts and results announcement, I thought it is time to start building something new.
And as I had quite enjoyed building the Moebius BSG Mk.II Viper, I have chosen my new build to be the Mk. VII to accompany it.

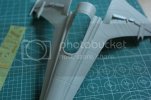
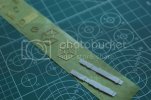
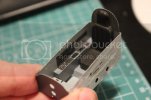
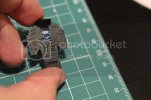
I've started with the main hull, adding the missing panel-lines near the cockpit and cutting out the intakes on the wings. I have also added some PE taken from my scratch-stash to those intakes with a desire to add some additional details inside there later.
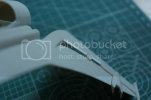
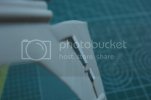
IMG_4216.jpg

IMG_4215.jpg

IMG_4214.jpg

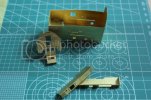
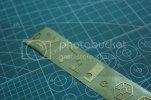
I am using the ParagraFIX PE cockpit set for this build. I had used similar PE for my Viper Mk.II and stayed very satisfied with the result - hope this time it would work quite as nice.
IMG_4213.jpg

IMG_4212.jpg

IMG_4211.jpg

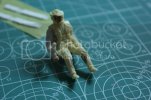
For the pilot I am making same modifications as previously - cutting out the helmet and fitting inside of there a 1/32 figure's face.
IMG_4210.jpg

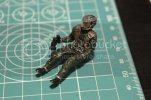
Here is how he looks now, still some washing is left to apply:
IMG_4218.jpg

And here are the cockpit components being painted
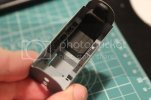
IMG_4219.jpg

IMG_4220.jpg

IMG_4221.jpg

IMG_4222.jpg

IMG_4223.jpg

I'm planning to finish them soon and turn to the engine block. Here it's current stage of completion.
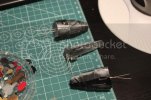
IMG_4224.jpg

More soon, folks. Cheers!
 
Hey! Great start! I'd also like to know how you managed to get the face in there. Hollowing out that helmet must have been really difficult.

Looking forward to the rest of it!
 
Excellent start on this. And that etch cockpit is LIGHT YEARS ahead of the kit version.

Just don't make the same mistake I did on my pair.
The canopy glass goes on from INSIDE the kit

Looking forward to more
 
Cool topic !

I've got mine, for a nice price so that's the kind of subject I'll follow with a lot of interest.
Great start. I'm not found of Photo-etch build (really not good at it) but it seems your cockpit will gain a lot with it. The pilot is the one from the Mk II right ?
 
Hello, guys!
Thank you so much everyone for your great kind comments!
I'm very sorry for such a long time before replying, but time is a bit rough recently, and I didn't have much time to spend on the internet overall, but hope there are changes coming in that matter soon.

danimal518 said:
Sweet! How'd you get the face in their?

roflmaoist said:
Hey! Great start! I'd also like to know how you managed to get the face in there. Hollowing out that helmet must have been really difficult.

Looking forward to the rest of it!

I've made a vid for you, guys, and everyone else who would like to see how I have installed the face inside the figure's helmet, since it is better to see once than to hear twice, right? ;)
Here it is:

Upgrading Moebius Viper Pilot Figure

Quaralane said:
Excellent start on this. And that etch cockpit is LIGHT YEARS ahead of the kit version.

Just don't make the same mistake I did on my pair.
The canopy glass goes on from INSIDE the kit

Looking forward to more

Wow, Q! Thanks so much for the input - I was going to have some serious fight with the canopyinstallment if not this your post: I have indeed been absolutely sure that the canopy goes on the outside. Thanks a ton again!

YOULI said:
Cool topic !

I've got mine, for a nice price so that's the kind of subject I'll follow with a lot of interest.
Great start. I'm not found of Photo-etch build (really not good at it) but it seems your cockpit will gain a lot with it. The pilot is the one from the Mk II right ?

Thanks, bro! 8)
Yes, this figure I'm using came from the Mk.II I had built for this year's contest. Since that was Starbuck's Mk.II I've used the Mk.VII's figure there as it had some certain optional physiological properties required ;) So the figures are switched on my Vipers builds.

Dark Kyp said:
Interresting build Sol, can't wait to see the next steps! 8)

Thank You, Kyp.
I have the next update coming in the matter of just several hours - only have to charge my camera to make the new pics and upload them ;)
 
Glad You've liked it, G!

And, as promised, here is the update:

The current stage of the build is "everything assembled and given several first coats"

Due to the highly weathered look of these fighters in the show with a kind of indistinguishable variation between weathered off bare steel, several shades of the blue-gray and light gray and greeny-blue-gray I am going to use almost every single painting technique I know to achieve the desired look.


Here I've started with the coat of primet, followed by some light preshading and a silver coat airbrushed over it.
I have then sealed all those coats with the Future, airbrushed the main coat of blue-gray with about only 15 percents of blue-green, and then sanded it down heavily to show the metallic undercoat.
That was followed by some "dusty" effect applied via the airbrush using sky-gray tone and then a 70%-gray + 30%-blue acrylic filter I've cooked with Vallejo paints.


Before installing the engines block I've given some details to the underside of the tail tip. It is barely visible behind the upper engine exhaust, but gives a nice feel of some real mechanisms existing there inside.


Following the design elements I had added to my Mk. II Viper while building it, I have added the intakes on the central stabilizer to this one as well.


And I have also added a grill to the main central intake, located behind the cockpit. It will require some additional work although, as not all of the elements are yet glued in, and require some relocation and bringing in order.


And here are the engines in place.


Next I'm going to apply the decals, and start the long road of weathering.

Thanks for looking, guys!
 
Excellent detailing as always... :D

That will be very useful for my Mk VII (got a lot to do before that happen but, who knows ?).

Didn't read all the comments, will you show it in flight or with the gears opened ?
 
Thank You, buddy!
Hope this thread would be usefull for You when it comes to dig your Mk.VII out of the stash ;)
I'm building mine "in flight" with the plans to display it alongside with my Mk. II when complete.
 

Latest posts

Back
Top