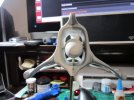
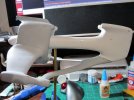
Brakiri cruiser

oh grendels...to avoid a need to reattach and reglue and mess up the final paint. youll need to sand those nubby pins down from your connections and replace it with a small brass rod or tube and join the 2 parts. trust me its the way to go cuz resin kits are my specialty. cheers!
 
punkpigpen said:
oh grendels...to avoid a need to reattach and reglue and mess up the final paint. youll need to sand those nubby pins down from your connections and replace it with a small brass rod or tube and join the 2 parts. trust me its the way to go cuz resin kits are my specialty. cheers!

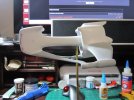
Between you and Norm, I decided to sand off those pins and replace them with Brass. I didn't get any work done this weekend, because I was thinking about this.
 
Grendels said:
Chiefpettyofficer: This ship is from Babylon 5, and was not seen that often.

Aha! Thats it. I never watched Babylon 5, maybe a gap in my education ;D
 
just watched you vid on the washing process and sanding, sound like you had fun sanding it :)
 
Thanks Spud!!

I am going to get back to this one on Monday. Life has just been in the way these last two weeks. But Monday starts a three week vacation!!! I will get lots done then.

The only progress was a trip to my LHS for brass rods and tubes. Going to start pinning her up on Monday.
 
For better or worse, here is the next update:

brakiri part 3: Bubbles everywhere....

Bubbles, bubbles, everywhere....

punkpigpen said:
oh grendels...to avoid a need to reattach and reglue and mess up the final paint. youll need to sand those nubby pins down from your connections and replace it with a small brass rod or tube and join the 2 parts. trust me its the way to go cuz resin kits are my specialty. cheers!
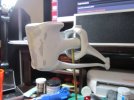
I didn't sand the pins off, Norm advised against it, but I did add extra pins to every joint. That is in the next video, not this one. I added the pins today, a bit late for the video.
 
--shakes head--
Nice work on the microbubbles. Hope the seams treat you more kindly
 
Finally the cruiser is back on the table! I usually just use some squadron putty on the small bubbles since you can start sanding it in an hour. The issue with those bubbles on your kit is because alot of the larger pieces in resin kits are in 2 or more pieces so on that underside is where the bubbles are alot. so you can ignore those completely. Your ship's body in cast in a single piece...Also depends on who's casting it. I've had a kit or 2 w/o ANY air bubbles. and then once in awhile I'm where youre at. Filling, sanding, filling sanding.
Resin kits are frustrating that way. The build doesn't get to start for awhile until those pieces are sanded or filled.
 
punkpigpen said:
Finally the cruiser is back on the table! I usually just use some squadron putty on the small bubbles since you can start sanding it in an hour. The issue with those bubbles on your kit is because alot of the larger pieces in resin kits are in 2 or more pieces so on that underside is where the bubbles are alot. so you can ignore those completely. Your ship's body in cast in a single piece...Also depends on who's casting it. I've had a kit or 2 w/o ANY air bubbles. and then once in awhile I'm where youre at. Filling, sanding, filling sanding.
Resin kits are frustrating that way. The build doesn't get to start for awhile until those pieces are sanded or filled.

You should get some Mr. Surfacer 500. I paint it on, and then sand it down. It dries up about as fast as the squadron putty, and sticks better in my opinion. It won't fill a large seam or bubble, but those small bubbles just vanish under it.

I do have a couple of resin kits with zero bubbles. They will be a pleasure to build! I get to glue up about half of the kit today. Video soon.
 
Nice to see you working on the Cruiser and that BLUE plastic kit ..??? what ever it is !

So you take your Camera everywhere ??? LOL

Anyway ! Nice job on those Micro Voids and the Pinning ! the fit is alright hey ?

Looking forward to your next update !

Have a great Week end ! Somehow I know you will ! LOL ;D
 
Yeh i know about Mr Surfacer. I've always wanted to buy some but it always seems soo expensive for small amounts.
 
Good update, Grendels. That's a couple of times I've heard Mr Surfacer mentioned and always with good results.

On the topic of flies, just take a close look at one of them when it's sitting watching you eat dinner. You'll notice that every now and then it'll rub its little hands together, like it's taunting you. 'Mmmm I'm gonna get on your food!'.
 
punkpigpen said:
Yeh i know about Mr Surfacer. I've always wanted to buy some but it always seems soo expensive for small amounts.

In the Scale you work in! (SS). I would use car "pin hole" bondo! 5$ a tube! But wear a good respirator while using! And Sanding! I get Nose bleeds... So I can't use it With a mask anymore!

The Damage is Done!
 
schweinhund227 said:
Nice to see you working on the Cruiser and that BLUE plastic kit ..??? what ever it is !

Anyway ! Nice job on those Micro Voids and the Pinning ! the fit is alright hey ?

Have a great Week end ! Somehow I know you will ! LOL ;D


The blue plastic kit is Desslok's command cruiser from Star Blazers. The first video of it is up right now. Here is the link:

http://www.scalemodeladdict.com/forum/index.php/topic,3622.0.html

In the next video for the command cruiser, I am going to go over four or five different putty techniques. Mr. Surfacer is one of them. It does a really good job of filling up small voids like I had on the front of this ship and the leading edges of the two wings. Out of curiosity a year ago, I bought some Mr. Surfacer just to try it out. I still have about 2/3 of a jar about 7 models later.

The fumes from Mr surfacer are pretty bad, it is lacquer based.

schweinhund227 said:
So you take your Camera everywhere ??? LOL

Have a great Week end ! Somehow I know you will ! LOL ;D

Almost everywhere. The video camera I use for all of my videos is about the size of my phone. So it is easy to carry with me and just tape random thoughts. Since people are commenting on them, I am going to leave them in the videos until I run out of ideas. (That will take quite a while.....)

Here is where I am in photos, video will be later next week:

20110826_1.jpg20110826_2.jpg20110826_3.jpg20110826_5.jpg


Lots of seam filling to do. That clear stuff oozing out between the joints is 5 minute epoxy. I had to use it instead of super glue because I needed 3 minutes to puzzle the pieces together properly. Super glue won't give me that kind of time.
 
Great to see it put together like that. Love the design of this ship. I wonder how long it was on screen for. Probably a good long time. B5 was always showing off the snazzy CGI (for its time).
 
Quaralane said:
Good progress, but those seams look ugly

That is what Aves is for!!! This thing will take a bit of Aves to fix those seams. That is what is up next for her!
 

Latest posts

Back
Top