You are using an out of date browser. It may not display this or other websites correctly.
You should upgrade or use an alternative browser.
You should upgrade or use an alternative browser.
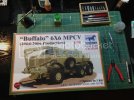
Bronco Buffalo MPCV " BoneCrusher"
- Thread starter TBadger
- Start date
adampolo13
New Member
- Joined
- Dec 7, 2011
- Messages
- 2,633
WICKED!!!! Can't wait to watch this come together.
letsgobrowns82
Active Member
- Joined
- Feb 27, 2011
- Messages
- 1,368
Sweet, I have this one in the stash so I will be be watching this for sure.
TBadger
Demolitions Expert
- Joined
- Mar 5, 2012
- Messages
- 782
Started up a few days late because of work and some family events that precipitated over the weekend....
I plan on doing essentially a page by page blog following the instructions so, as a team we can see any mistakes and adjust the procedures for future builders
Starting withe the single piece lower tub I completed the first and Second pages of the booklet
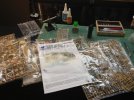
So many sprues!
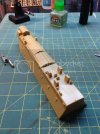
The supports in the foreground needed some finesse to install. The precut holes in the tub needed widened by just a hair to allow the tabs to fit in
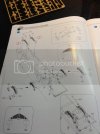
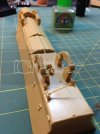
The same went for all of the precut tabs elsewhere.....just a tiny bit off the long edges with the tip of the XActo should do the trick.
More updates to follow. I have time off work, so I plan to finish construction by Christmas!
I plan on doing essentially a page by page blog following the instructions so, as a team we can see any mistakes and adjust the procedures for future builders
Starting withe the single piece lower tub I completed the first and Second pages of the booklet

So many sprues!


The supports in the foreground needed some finesse to install. The precut holes in the tub needed widened by just a hair to allow the tabs to fit in


The same went for all of the precut tabs elsewhere.....just a tiny bit off the long edges with the tip of the XActo should do the trick.
More updates to follow. I have time off work, so I plan to finish construction by Christmas!
adampolo13
New Member
- Joined
- Dec 7, 2011
- Messages
- 2,633
Great Job so far!
letsgobrowns82
Active Member
- Joined
- Feb 27, 2011
- Messages
- 1,368
Awesome that your doing this step by step to point out any discrepancies. This is going to come in handy when I start mine. ;D
TBadger
Demolitions Expert
- Joined
- Mar 5, 2012
- Messages
- 782
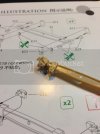
Parts E33 must be handled delicately and when gluing E55/53 together, make sure to push the hard to one side so you can maintain them as glue free and free moving as possible. As shown below.
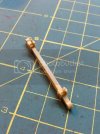
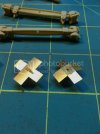
Here's the fun of putting together the brake cylinders with protective PE housings. They are pretty simple and all the PE folds very easy.
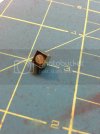
I found that placing the plastic parts together and then folding the PE around it rendered the best results. There are 4 total boxes.
TBadger
Demolitions Expert
- Joined
- Mar 5, 2012
- Messages
- 782
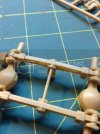
On the G Sprue there's some hex nuts that are attached to a crossmember along the top edge. Probably could have been kept on for injection but oh well
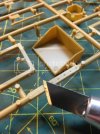
I found that applying a blob of Tamiya ETC on the location and using the dry tip of the bottle brush to lift and place the shaved head into it final place. Wicking away the excess with the brush afterwards
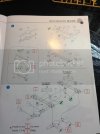
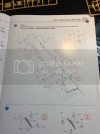
Hopefully everyone can discern the steps I followed via the attached page

I found that applying a blob of Tamiya ETC on the location and using the dry tip of the bottle brush to lift and place the shaved head into it final place. Wicking away the excess with the brush afterwards


Hopefully everyone can discern the steps I followed via the attached page
TBadger
Demolitions Expert
- Joined
- Mar 5, 2012
- Messages
- 782
The Bug has been critical in getting the job done on folding
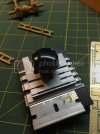
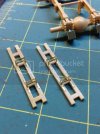
The crossbar needed drilling out just a hair to alow for easy placement....and I mean just a hair
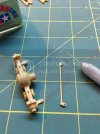
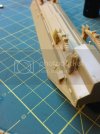
This was part of the first step....the little lip edging out past the part needed to be trimmed to allow flush fit of the blast panel
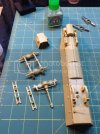
Here's all the parts from this page arranged ready to get shambled together
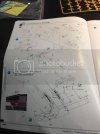
The Transfer case and connection need to be squeezed in carefully and the connection rods are easiest to attach last since they're long and unruly. I attached parts E47 to the axle first and don't follow the directions and affix the perpendicular....they need to be more parallel with the attachment point.
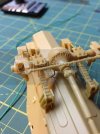
The hose attachment was made with rigid copper wire instead of sprue, just for durability sake
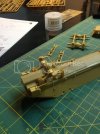
So as it stands, the front suspension is complete and the rear is soon to follow....more updates to come tomorrow!!


The crossbar needed drilling out just a hair to alow for easy placement....and I mean just a hair

This was part of the first step....the little lip edging out past the part needed to be trimmed to allow flush fit of the blast panel


Here's all the parts from this page arranged ready to get shambled together

The Transfer case and connection need to be squeezed in carefully and the connection rods are easiest to attach last since they're long and unruly. I attached parts E47 to the axle first and don't follow the directions and affix the perpendicular....they need to be more parallel with the attachment point.

The hose attachment was made with rigid copper wire instead of sprue, just for durability sake

So as it stands, the front suspension is complete and the rear is soon to follow....more updates to come tomorrow!!

