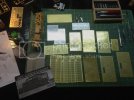
Bronco Buffalo MPCV " BoneCrusher"
- Thread starter TBadger
- Start date
letsgobrowns82
Active Member
- Joined
- Feb 27, 2011
- Messages
- 1,368
Wow there is some great detail in this kit. Its really making me want to start mine. ;D Great work so far.
TBadger
Demolitions Expert
- Joined
- Mar 5, 2012
- Messages
- 782
Got some more done this afternoon....essentially a rolling chassis now
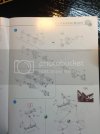
Managed to mount the rear suspension and install the support eyelets....very difficult to cut to length
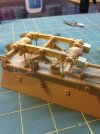
There's also another wire as shown in the instructions like the front set....stiff copper wire was used once again
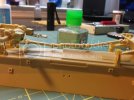
Connect the drive shafts with some spare sprue.... They're literally 10mm too short too fit into the mid-body cowl
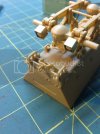
I followed it all up by mounting the rear "tow package" and squeezing in some weld lines with the cement excess
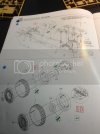

Managed to mount the rear suspension and install the support eyelets....very difficult to cut to length

There's also another wire as shown in the instructions like the front set....stiff copper wire was used once again

Connect the drive shafts with some spare sprue.... They're literally 10mm too short too fit into the mid-body cowl

I followed it all up by mounting the rear "tow package" and squeezing in some weld lines with the cement excess

TBadger
Demolitions Expert
- Joined
- Mar 5, 2012
- Messages
- 782
I skipped the wheel step since I have Def. Model's sagged wheel set, and may I add, TOTALLY worth the investment.
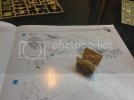
The channel in the middle of the cowl needs to be widened by 2mm and I used a cylinder file to deepen it by around 3-5mm. This allowed the connected rods to sit and the cowl to sit flush on the hull
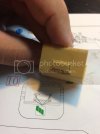
Also, as not noted in the manual, remove these nubbins with a razor or a file BEFORE you install the venting scoops
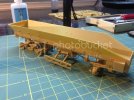
The optional side rails were straightened after this shot....not a necessary addition, but we'll see as the build continues. I'm sure the photo etch comes with the type A box armor which requires me to reroute the exhaust
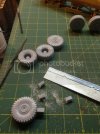
I wanted to dry fit the wheels sooooo.....if you wanna hack off these posts cleanly, just use a razor saw and nice clean strokes
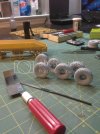
The sag makes it easy to set up for pics, that's for sure. A regular fine file helps to smooth/even out the ground contact
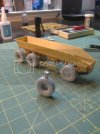
Make sure to clean resin parts in a mild detergent after they're cleaned up and fitted....room temperature water and some SimpleGreen seems to work great
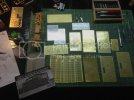
Now for my heart attack.....yeah. That's really 16 frets of PE to be added on! LionRoar kits are no joke!

The channel in the middle of the cowl needs to be widened by 2mm and I used a cylinder file to deepen it by around 3-5mm. This allowed the connected rods to sit and the cowl to sit flush on the hull

Also, as not noted in the manual, remove these nubbins with a razor or a file BEFORE you install the venting scoops

The optional side rails were straightened after this shot....not a necessary addition, but we'll see as the build continues. I'm sure the photo etch comes with the type A box armor which requires me to reroute the exhaust

I wanted to dry fit the wheels sooooo.....if you wanna hack off these posts cleanly, just use a razor saw and nice clean strokes

The sag makes it easy to set up for pics, that's for sure. A regular fine file helps to smooth/even out the ground contact

Make sure to clean resin parts in a mild detergent after they're cleaned up and fitted....room temperature water and some SimpleGreen seems to work great
Now for my heart attack.....yeah. That's really 16 frets of PE to be added on! LionRoar kits are no joke!

TRM
New Member
- Joined
- Mar 18, 2011
- Messages
- 5,024
TBadger
Demolitions Expert
- Joined
- Mar 5, 2012
- Messages
- 782
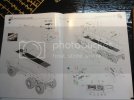
I've only done the bulk of these 2 pages except for the dashboard...all while watching Doctor Who. I'm a new fan of the series!
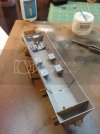
Dressed in Tamiya Fine Grey Primer
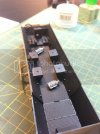
Hosed the inside with basic matte black...will add some dry brushing and dust effects once the seats are shored up
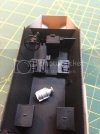
Hope to have the interior finished soon. Would like to make the cab removable so you can view the interior fully....we shall see how that turns out. Should I use magnets as a sort of latch system?
MERRY CHRISTMAS !!!
letsgobrowns82
Active Member
- Joined
- Feb 27, 2011
- Messages
- 1,368
That would be sweet if you could find a way to do that.
SecretSanta
New Member
- Joined
- Nov 13, 2012
- Messages
- 93
TBadger, this is looking nice!!!!
Glad your having fun with your Secret Santa gift!
Glad your having fun with your Secret Santa gift!
schweinhund227
New Member
- Joined
- Jun 24, 2009
- Messages
- 2,511
are you going to change the color of the "padded" Anti-Spawling fabric? Or you are going to leave it black?
Nice work on this big gal! BTW!
Nice work on this big gal! BTW!
schweinhund227
New Member
- Joined
- Jun 24, 2009
- Messages
- 2,511
Not my photo, but glad to share it if you don't have it already?

Lots of interior shots on the Web!
buffalo,MRAP,Interior. Should yield some good ones in google!
Good luck buddy!

Lots of interior shots on the Web!
buffalo,MRAP,Interior. Should yield some good ones in google!
Good luck buddy!

