Canadian Staghound

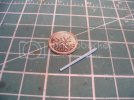
Thanks Ken, I was wondering if those things were for cleaning the main gun but I thought there would have to be something bigger at the end that would scrub the inside diameter.

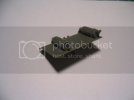
There is also something in the same place on the opposite side but is just one rod and a little bigger around.

That thing that is too small for you to see is also on the other hull side as well. Almost looks like a crank for an old style jack or something.
 
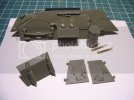
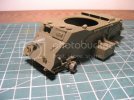
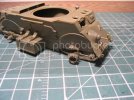
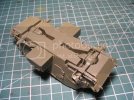
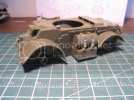
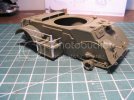
Here you can see I have the other hull side complete. I'll paint the tank and straps separately. Also pictured is the hatches to the engine ( I presume). And the exhaust.

IMG_0085.jpg

I appreciate the ready made holes in the exhaust pipes. I'm forever having to drill or ream these things out. Good job Bronco!.

IMG_0088.jpg
 
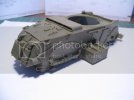
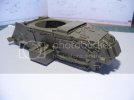
Thanks guys. I'm still picking at this. Practically all the little do-dads are separate little pieces. Makes for alot of work. On the upside, better detail. Not fussy about all the separate sides to the hull. Makes things a little finnicky to put together. Maybe this is normal? I thought this would be a quick build!!! ::) I'm not complaining but I'll be glad when it's time to paint. May have to touch up a few little gaps, but it's not going too bad so far.

IMG_0094.jpg

IMG_0093.jpg
 
Some companies will do tanks as 2 separate parts for the hull, upper and a lower. It was usually the Eastern European companies that broke that down into 5, or sometimes 8 parts instead of just the 2.

It is funny as Tamiya was always an upper hull, lower hull company....but with their new M51 Sherman....the lower hull is broken down into multiple pieces.....not exactly sure what the motivation was in that, unless they are of course going to delve into a couple of versions of the M51....which would be cool.

Looking good!
 
Looking good noname!!! I know the "I need to get to the painting" feeling!!!! Keep it going!!! ;)
 
Thanks for the encouraging words guys. I have to say, there is alot more involved in building military vehicles as opposed to car models. The Trumpeter KV-1 and KV-2 I built didn't have near as many parts (aside from tracks). But of course if you were wanting more detail you would want to get some PE or do some scratchbuiling on those.

Hopefully tonight I'll get some more of the main structure done. Still have the suspension, rest of the hull, turret and wheels to do. Then I might want to add a little scratched stowage of I'm not all worn out. ;) ;D

Oh, I must show you the precious little gun barrel. Ain't that just the cutest?

IMG_0096.jpg
 
Yeah, this is one of those kits that is frustrating and rewarding at the same time.

Rewarding because it looks so damn good when built.

Frustrating because there are so many fine parts that you spend 2-3 hours at the bench, and in the end, doesn't look like you have much to show for it!
 
That's right Scott.

Well it is coming aloooong, slowly but surely. I don't care for the two piece leaf springs but other than that it's all good. Really nice detail in the suspension.

IMG_0111.jpg

IMG_0112.jpg

Made the front wheels turned.

IMG_0115.jpg

Thanks for looking. Not too exciting yet. Still a bit of work before paint.
 
Nice work Matt , its coming on :) I always turn the wheels too ,makes for a little more interest ;)

Chris.
 
Thanks Chris, yes I agree, turning the wheels adds a little interest and realism.
 
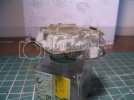
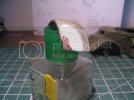
The turret needed texture. So I tried a combo of the putty and then liquid cement. Not sure it looks so great but maybe have a better idea after some primer is applied. Also added a weld seem. I sanded it down but I wonder if it is a little big yet?

IMG_0124.jpg

Also working on a fender. Ground the backside so it was thin and glued on a peice of led foil. Then applied some Tamiya putty. We'll see how this goes. ::)

IMG_0130.jpg

Getting closer.

IMG_0128.jpg

I decided to leave the tank off on this side and make room for some extra stowage like I've seen on a number of 1:1 photos. They needed the extra room for beer and girly magazines I guess. ;D

IMG_0127.jpg
 
very nice noname, i would say teh weld is a bit on the large scale but it does look good all the same :)
 
This is coming along nicely, these kits are a lot of work but man they are packed with detail.

That raised line seen on the turret isn't a weld, much like some Russian tank turrets and Sherman tank turrets that are of cast design, what you see is a seam where the sand mold was in two pieces. If you google some of these images of various cast turrets, you will see that this seam can vary in size, thickness, shape etc. and some are very prominent while others are more subtle.

I wouldn't be too concerned with it's size so much, but maybe it's perfect straightness and the weld texture could be addressed with some more sanding/shaping?
 

Latest posts

Back
Top