Dragon 1/35 Jagdpanther "Early Version"

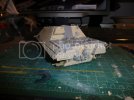
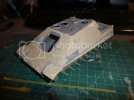
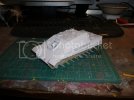
Well the putty was so forgiving, I ended using it for all the Zim. Gonna let it set up a bit before I start smoothing it out and applying the pattern. Messy, but much easier than I expected it to be.
 
Carsenault said:
Well the putty was so forgiving, I ended using it for all the Zim. Gonna let it set up a bit before I start smoothing it out and applying the pattern. Messy, but much easier than I expected it to be.

:) Boy, we need photo !!! :D
 
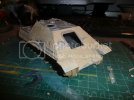
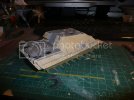
It was easy applying the putty, but not so easy getting a consistant coat. I had trouble because it was had over a large area to maintain an even density and moisture content in the putty so as a result some areas have a thinner coating with sharply defined groves, others are thicker and softer. Ill snap some pictures later. I may still redo it with Squadron White. Not too bad I suppose for my first attempt. Ill upload some pics tonight.
 
Zimmerit was applied by hand anyway, and wasn't perfectly uniform. I wouldn't worry about thick or thin, unless it is very obviously so...just adds to the scale realism.
 
Gonna stick with what I got afterall, Just got to let the stuff cure a few days before I lay on a coat of primer. Another nice thing about the wood putty zimemrit, its quite easy to chip away a few bits here and there. Most of the pics of the real Panthers and Tigers show the zimmerit to be chipped away around the edges.

072811009.jpg

072811008.jpg

072811007.jpg

072811006.jpg
 
i dont think they had it on the storage bins at the back just the back plate its self.
 
spud said:
i dont think they had it on the storage bins at the back just the back plate its self.
seen evidence for both ways. Would make sense to have it on the bins too, was applied to as many of the vertical surfaces as possible
 
spud said:
i dont think they had it on the storage bins at the back just the back plate its self.
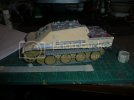
Changed it up a bit and removed the Zim from the stowage bin by the rear hatch, left it onthe ones at the back by the exhausts.
 
When you get some LOOSE Cash...

Go for Chavalier or Atak stuff.... you won't regret it !!! for those kits that require Fancy Zim !

The hardest part to do is the "REAR Plate" with all the covers and Exhausts pipes and stuff...
These guys usually give you a FULL Resin Plate already done up for you to Switch around with the
Kit Blank one...

You did a pretty good job on and around the tool racks!!!

The Early Jagdpanther had this peculiar pattern and glad you are doing one....

Keep up the good work....

I don't have the Knees to do Zimmerit myself..... I still haven't Dirty up my King Tiger I build 2 years ago... for our SMA KT GB... but it will come.... with all that NEW AK interactive goodies out there...

This was a Mixture of ATAK Zimmerit and some Self duplicated...
DSC07037_resize.jpg
 
100_0182.jpg

I bought the Cavalier resin zimm for my early JP but it only fit the old Dragon JP and not the new one so I was forced to try my hand at scratch zimm. What you see here is part Cavalier,wood filler,spot putty and wall spackling.

Where there's a will there's a way ;D
Tony lee
 
I think Im on the right track, all pun intended.

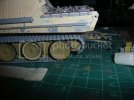
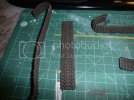
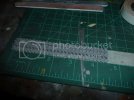
Joined the links together without glue at first using double sided tape and masking tape to hold everything together temporarily. Once I had lengths of track long enough, I used Tamiya super thin to bond the links together then set them aside to dry for a while. Cool thing is after a half hour or so, the cement has set enough to hold the parts together but is still pliable enough to bend or adjust the position of the individual lengths. I am making sections that I will be able to assemble together after painting and weathering the tracks. The road wheels are only dry fitted to aid in the postioning of the track links.

073011001.jpg

073011004.jpg

073011005.jpg

Hmmm, My home made red oxide looks a little too rosie in the pictures, more of a salmon color in real life. Still not sure if its the right color for the radiator vents interior walls.
 
Casen,

Great lookin' JP ... just remember as far as th Trax go .. The Trax didn't land on th Road wheels until th 3rd. station . Lookin' great so far ! Keep up th Good Work !!
 
Thanks.

Got the hull primed today, also did the base coat on the tracks. I used a mix of Tamiya red-brown and semi gloss black with a hint of Gunze tire black (only because I didnt have enough of the semi gloss black). Airbrushed that on and that alone really brings out the detail of the track links. I did a few random links with a slightly lighter shade of the same mix., then used what was left as a filter coat. So once that sets up I will do a wash of either rust or raw umber, then do some drybrushing with a metallic color. Do I have that order right?

058.jpg

061.jpg
 
looking real nice your doing the bit i hate the most the tracks!!!!!!!!!!!!! i hate tracks but you've done i real nice job :)


geegad
 

Latest posts

Back
Top