Fine Mold's Y-Wing Fighter

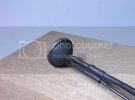
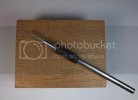
I usually use brass for my fiber bundles, but never like that... You can center them almost as well with tape.
Good to know Grendels! I've seen folks use 5 minute epoxy to attach fiber to the LED, too. I tried exoxy on a Cyclon Raider build and it worked OK - until the plastic fibers broke off. :'( I guess there was too much stress on the fiber from the bending around.

Great build log on lighting your model CheesyGrin. Thanks for sharing all the diagrams and how to images. I have not tried this yet but after being in the hobby for a number of years I do want to give it a try.
Thanks fblanton! Glad to share. Lighting is a great challenge and, when executed successfully, adds much to the final build (IMHO).

Adam Wilder is an AFV (armored fighting vehicle) modeller. He's known for his hyper-realistic painting and weathering techniques. Here's a link to one of his builds:

http://www.network54.com/Forum/110741/message/1351418460/LVT+Saipan+1944
--

Got some bench time today and made progress on the lighting. The focus today was the thruster LEDs and reflectors. I also routed the power wiring in the base. Here are the pics:

I fished a single wire through the base. Next, I soldered the wire to the two wires coming from the sub-mini jack. This allowed me to pull the wires through the base:
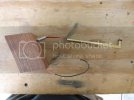
YWing_44_zps13fc9fe2.jpg

I needed to make the reflectors, well, reflective. ;) I used Model Master Buffing Metalizer paint. It's ready to airbrush and dries very quickly:
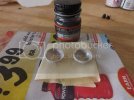
YWing_45_zpsc991dd92.jpg

This is the metalized parts painted but prior to buffing:
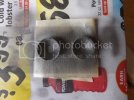
YWing_46_zpsd9b2bb31.jpg

The reflector on the right is after buffing with a Q-Tip:
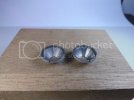
YWing_47_zps3c9dc2fb.jpg

I wanted the thruster color to be amber. So, I mixed some Tamiya Clear Red and Clear Yellow and sprayed the thruster LEDs:
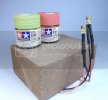
YWing_48_zps11b26b51.jpg

Heres the completed thruster assembly. The back is painted Nato Black, just to ensure no light bleeds through:
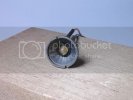
YWing_50_zps64449c56.jpg

YWing_51_zps3ba400a4.jpg

And, finally, the amber thruster all lit:
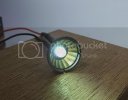
YWing_49_zps0850cb67.jpg

All that's left is to install everything in the model. Then, actual building and finishing can begin! ;D
 
Posting two updates in one day. I can't believe it. :)

After finishing the thrusters I tried to push the sub-mini jack into the receiver. Much to my dissatisfaction, the jack wouldn't seat completely. Grrrrrrrr...

YWing_54_zps4f3804f3.jpg

I needed to perform some minor surgery and hope that 1 or 2mm of shaving will resolve this dilemma. The sprocket-like detail around the female connector is what I need to shave down:
YWing_52_zps2ed0e747.jpg

I use my handy Micro Chisel. This is an indispensable modeling tool IHMO:
YWing_55_zpsedcf51a5.jpg

I roughly shave the detail down. I'll go back and clean this up prior to paint:
YWing_56_zpse5374f37.jpg

Success!:
YWing_57_zps3c9bd337.jpg

YWing_58_zpsce85d4cd.jpg


No more tonight. Monday morning beckons...
 
Definitely coming along.
Nice work with the reflectors.

Also nice problem-solving with the jack
 
LrdSatyr8 said:
Did you finish this?

Hi! No, I haven't finished yet. But such a strange timing of your question. I just restarted this project today! This project was sidetracked when I became consumed by the scratch built ED-209 armature: http://www.scalemodeladdict.com/SMF/index.php/topic,10459.0.html

Regarding the Y-Wing, I started the paint on the pilot. I'll post some pics tomorrow.

It's nice to be back to building. :)
 
Hi SMA's,

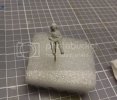
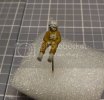
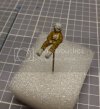
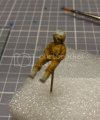
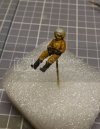
Long time no post. I decided to rekindle this project after a hiatus. So yesterday I started to paint the pilot. Here are some progress shots. He's very, very small!

YWing_59_zpse2174b9f.jpg

Base shadows:
YWing_60_zps88e83717.jpg

YWing_61_zpsc73493ce.jpg

Some highlights (sorry for the blur):
YWing_62_zps13ae45c9.jpg

Gloves and boots:
YWing_63_zps6f8a2f87.jpg

Next will be suit details and helmet. Stay tuned!
 
I kinda figured you got side tracked... happens to me all the time. Good to see you come back to finish this one! :) BTW - Loved the job you did on ED-209!
 
Quaralane said:
Looking good

Thanks! I did some detail work last night and will post some more pics later this evening.

I kinda figured you got side tracked... happens to me all the time. Good to see you come back to finish this one! :) BTW - Loved the job you did on ED-209!

Thanks man! The ED-209 is still close to my heart and I will finish! It's a ton of work and it was consuming my every non-family, non-work thought and hour.
 
Us builders can live a lonely existance and it takes a good partner to recognize the alone time when it's needed. I completely understand!
 

Latest posts

Back
Top