AKRoast
New Member
- Joined
- Oct 14, 2024
- Messages
- 29
Back into scale modeling after last doing it 40+ years ago as a pre-teen. Trying to improve on that quality ;-)
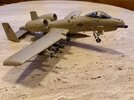
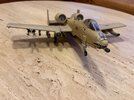
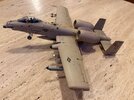
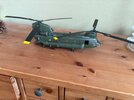
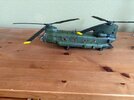
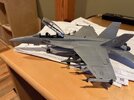
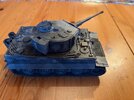
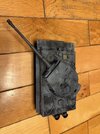
first kit was a Hobby Boss F/A-18 Super Hornet, then a Tamiya Tiger I-Late Model, then an Academy A-10C, then an Italeri HC.2/CH-47F Chinook, now working on a Tamiya Leopard II.
Here in Anchorage we have only one true hobby store (plus Michaels, which of course sucks) and Amazon. Amazon doesnt ship any flammable things to Alaska because it is all air. Many other Lower-48 online hobby stores either do not ship to Alaska, or charge more for shipping than a item costs. The local hobby store only gets a few large haz mat shipments a year, with all their paints, glue, etc, so selection is limited.
I was trying Vallejo acrylics but have not been impressed, have been Tamiya acrylics more now, and Testors enamel for some hand painted details. Air brushing skills are improving, got a spray booth now also.
I am attaching a few photos of my builds thus far.
Notes:
The A-10 kit said to add weight in a little compartment next to nose gear well, which I did in the form of several steel nuts superglued in, but it was not enough I found out way too late. Could not get enough additional weight in nose gear well without messing finished model. After these photos I added a little post to the back made out of clear plastic sprue to hold up the tail, which looks pretty good. I also lost the all-important 30mm gun muzzle, and had to recreate one with bit of plastic tank gun barrel left over and drilling a bunch of little holes. It is too big, but looks ok if you don't know that.
The Super Hornet I thought I built cockpit well just right, but the rear ejection seat ended up being too high somehow, so it is an "open canopy" version now. I wanted it to be closed canopy. It had more joint gaps also than the other kits.
The Chinook went ok, I was done weathering, had some issues with the enamel wash thinner eating thru the acyrlic gloss coat and softening the arcylic paint under it. Also was going to matte coat rattle can it as final step and picked up grey primer rattle can and started spraying it before I realized what I was doing. So had to try and fix that , so it became a very "dirty" version.
The Tiger tank I made up the angular camo which turned out pretty good. Still havent tried the typical curvy camo jobs, am on the Leopard II I am working on now though. All the poster putty, silly putty, etc mentioned in modeling guides does not seem to work, are impossible to get tight over and around details, leaves a residue, etc. The individual links on the Tiger tracks were a pain. They pressed together without anything mechanically joining them, ended up a super-glued mess but looked ok after paint and weathering.
Clear plastic parts, and the really tiny parts and decals, are my sore points thus far.
Thanks for this forum as a resource!


