Honda!
- Thread starter Grendels
- Start date
Grendels
Active Member
- Joined
- Nov 24, 2009
- Messages
- 9,092
Thank you Gentlemen, I am going to let this go a bit more before I decide. I won't really have to worry about the decals until at least Sunday.
I made some polishing videos, there are three of them, here they are in order:
It's a Honda part 12: Car polish 1
It's a Honda part 13: Car polish 2
The third part is the actual car body.
It's a Honda part 14: Car polish 3
I made some polishing videos, there are three of them, here they are in order:
It's a Honda part 12: Car polish 1
It's a Honda part 13: Car polish 2
The third part is the actual car body.
It's a Honda part 14: Car polish 3
LrdSatyr8
Member
- Joined
- Dec 21, 2012
- Messages
- 765
Hey bro... the Mequires does work... the problem is that you should have a clear coat down over the color base first. I usually used Future and I always got a mirror finish. May wanna try again on the test piece. I never tried it with Acrylic paints thou... I always used enamels! When I used the Future, I didn't spray the Future on, I would DIP the whole piece in a bowl of the Future and then let it dry. When it was dry I would then use the polishing compound. May want to give it another shot just to see the results.
(Recap... should have waited til I watched the rest of the vids! Guess you figured that out yourself! DIPPING the piece in the Future gives a totally even coat and not as much polishing is required as opposed to spraying it on. It does also help to smooth polish the piece before applying the paint. You're doing a great job here bro... love the work you've put into it!)
(Recap... should have waited til I watched the rest of the vids! Guess you figured that out yourself! DIPPING the piece in the Future gives a totally even coat and not as much polishing is required as opposed to spraying it on. It does also help to smooth polish the piece before applying the paint. You're doing a great job here bro... love the work you've put into it!)
Grendels
Active Member
- Joined
- Nov 24, 2009
- Messages
- 9,092
java said:Now that's a nice smooth shade of red,so no more resprays then?.
you had to ask that......
I was putting down tape on the body to take care of the rubber on the side and bumper and the paint on the body started flaking off, Nothing major, and I am sure I could have touched it up, but I just decided to strip and paint again!!!
I will have photos tonight.
But for now here is the next update:
It's a Honda part 15: Randomness and lighting
Temporary Tattoos and lighting...
Grendels
Active Member
- Joined
- Nov 24, 2009
- Messages
- 9,092
Grendels
Active Member
- Joined
- Nov 24, 2009
- Messages
- 9,092
Grendels
Active Member
- Joined
- Nov 24, 2009
- Messages
- 9,092
Thanks Tailor!
I am on schedule to finish this up by the due date, but I will not be able to get all of the videos up before then. I could, but that would mean uploading three a day, and most people won't watch them. So I am not going to try.
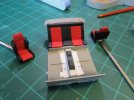
Here are a few photos I took last night:
The interior:
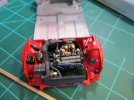
Slightly blurry engine compartment:
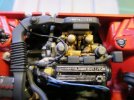
Close up:
Front suspension, I still need to clean up the paint on this and the engine a bit. The suspension was the hardest part of the build. On each side was six parts that had to come together at the exact alignment or it would not go together correctly. Just like a real suspension.
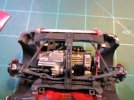
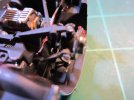
With a cat hair:
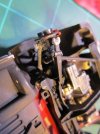
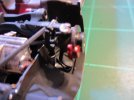
Rear suspension:
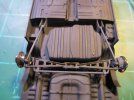
I am on schedule to finish this up by the due date, but I will not be able to get all of the videos up before then. I could, but that would mean uploading three a day, and most people won't watch them. So I am not going to try.
Here are a few photos I took last night:
The interior:

Slightly blurry engine compartment:

Close up:

Front suspension, I still need to clean up the paint on this and the engine a bit. The suspension was the hardest part of the build. On each side was six parts that had to come together at the exact alignment or it would not go together correctly. Just like a real suspension.


With a cat hair:


Rear suspension:

ModelMakerMike
"It's Slobberin' time""
- Joined
- May 28, 2011
- Messages
- 1,838
Great Job, John....
That is looking fantastic. I really like how sharp the seats look!
All your efforts on this are really paying off!
That is looking fantastic. I really like how sharp the seats look!
All your efforts on this are really paying off!
Grendels
Active Member
- Joined
- Nov 24, 2009
- Messages
- 9,092
Thanks all, I will have some more photos tonight. I only have a few parts left for paint. And not much paint at that.
Then I can do the electronics and the base. Plenty of time for that. Two days left and I don't have to work.
Even leaves time to finish up the Mercury 9...
Then I can do the electronics and the base. Plenty of time for that. Two days left and I don't have to work.
Even leaves time to finish up the Mercury 9...
Grendels
Active Member
- Joined
- Nov 24, 2009
- Messages
- 9,092
Thanks Biskup and Wouter!
Here is the next video update, I won't have the videos done by the end of the contest, but I will have the car done, last bit of paint will hit it tonight.
It's a Honda part 18: Electronics and primer
Here is the next video update, I won't have the videos done by the end of the contest, but I will have the car done, last bit of paint will hit it tonight.
It's a Honda part 18: Electronics and primer
LrdSatyr8
Member
- Joined
- Dec 21, 2012
- Messages
- 765
Sorry to hear about the speaker grills but why didn't you just cut a piece of black silk out and glue it over the round section? That should take care of the problem, no risk of damaging the plastic and you get a much finer bit of detail. You can "tuck" the edges between the outer ridges and just make sure they hold fast with CA and zip kicker. I'm sure you won't see much of the damage after its all together thou. Its coming together nicely bro!
Grendels
Active Member
- Joined
- Nov 24, 2009
- Messages
- 9,092
I didn't think about that at the time, but if you look at the above photos, you can see that I got it fixed up right.
Here are the photos I promised:
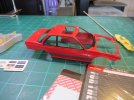
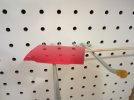
I am not going to use the electronics I outlined in the above video. I have the time to get them installed, but since I have changed directions, with the car, no need for them now. It just wouldn't look right.
Here are the photos I promised:


I am not going to use the electronics I outlined in the above video. I have the time to get them installed, but since I have changed directions, with the car, no need for them now. It just wouldn't look right.
Similar threads
- Replies
- 1
- Views
- 1K
- Replies
- 8
- Views
- 2K
