Honda!

Mr Miyagi was wrong it's not wax on, wax off, it's spray on ,castrol super clean off. ;)

That honda is a real troublemaker i hope the respray goes well this time.
 
Thanks all. The respray went very well. Not so much the interior, I tried to flock the seats yesterday and it appears that not all flocking is created equal.....

Have to strip that and redo, nothing I can't handle between now and the end of the contest.
 
Nice update John....
Glad to see that you finally got a coat of paint that you like.
I swear by off the shelf rattle can paints...especially Car Paint, or touch up paint that you can get at an auto supply store... Cuz you have to figure they are intended to be pretty much idiot proof since they are a Non-specialized item....Such as a "Hobby paint"....and it's been my experience that they are all fairly quick drying too.
And since they are car colors, they come in a wide array of colors....mostly metallic. I like using them for Zoids, Super Robots, Gundams, and BB-Gundams. I really like some of the Graphite and Gunmetal colors. ;D ;D ;D
 
Thanks Mike, when I started having trouble with the Tamiya gloss red (X-7) I said to myself, I am switching to rattle can. I have had very little trouble painting rattle can on something like this.

Here is the promised photos:

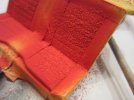
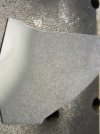
Flocking experiment:
IMG_1369.jpg

And not so good:

IMG_1370.jpg

That got stripped off last night, and is no longer there. Spent an hour and a half with superclean and tooth picks to get every last speck of that crud off.

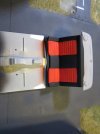
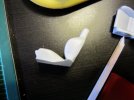
I flocked the front seats as well here is a shot before the flocking:
IMG_1363.jpg

And after removal of the flock

IMG_1371.jpg

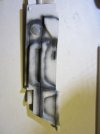
Door panels got some pre-shading:

IMG_1366.jpg

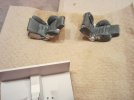
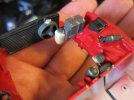
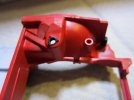
Last of the detail paint for the engine bay:
IMG_1377.jpg

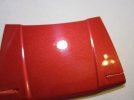
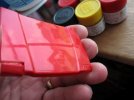
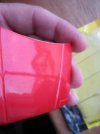
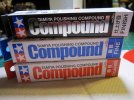
and I did an experiment with Tamiya polishing compound:
IMG_1375.jpg

This is kind of a before shot, it is not the same piece as the after shot, but the same effect was achieved:
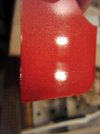
IMG_1372.jpg

And the after shots:

https://lh5.googleusercontent.com/-MH2HUDweJBU/UZuNgOTAbHI/AAAAAAAADsE/zvg-TcmuWgM/w919-h689-no/IMG_1373.JPG
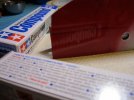
IMG_1374.jpg

In this photo you can see why I had to use a different after piece. The directions say to wipe down with water when done, so I grabbed what I thought was water, it wasn't it was lacquer thinner and just destroyed the piece. You can see it to the right.
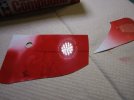
IMG_1379.jpg

I did do a good video on the polishing compounds and I compared them to one you can buy at a local auto parts store. The tamiya worked far better. Details in the video, but it will be a few days before I can get that video up. I have about a five video backlog and can only put up videos every other day or so.

I have quite a bit of the painting done, and after today I should have the rest done as well. So by next week at this time it should be finished.
 
What did you use for your flocking bro? I found good results with... wait for it... electric razor dust! It works really well and all I did was spray some elmers glue on the piece beforehand and then dropped it in a bag of razor dust and shook it up real good for coverage. Came out looking pretty good.
 
Masterful airbrushing, John (thats about the previous video update)
and WOOOOOOW! the result of using the polishing compound looks outstanding - I would have never guessed that it is a plastic detail if I hadn't known beforehand, it looks soooo like a real metallic car's surface.
Outstanding!
Will be waiting for the video on your polishing experience, as I have a few cars in my stash to build, and I am definitely going to follow your steps, my friend ;) ;)
 
I really admire your patience with the paint-job. That on-and-off business would have me raving mad by now. I would've chucked this thing in the bin the second time around, probably.
I hope it's working out this time!
Cheers,
Guido
 
LrdSatyr8 said:
What did you use for your flocking bro? I found good results with... wait for it... electric razor dust! It works really well and all I did was spray some elmers glue on the piece beforehand and then dropped it in a bag of razor dust and shook it up real good for coverage. Came out looking pretty good.

For the first one I got it from Elm City Hobbies (The grey one), Now that stuff is good, but the second one (the red one) I got from Hobby Lobby, and it is just awful. It is far too grainy, while the other one is more like lint.

Solander said:
Masterful airbrushing, John (thats about the previous video update)
and WOOOOOOW! the result of using the polishing compound looks outstanding - I would have never guessed that it is a plastic detail if I hadn't known beforehand, it looks soooo like a real metallic car's surface.
Outstanding!
Will be waiting for the video on your polishing experience, as I have a few cars in my stash to build, and I am definitely going to follow your steps, my friend ;) ;)

I was very surprised by the polishing compound. I did the last video set on it last night where I tried out three different gloss coats to see what worked best as well as not polishing up between coats. It will be in a video soon, I am going to start cranking out the Honda videos so that they can finish up by the end of the contest.

Tailor said:
I really admire your patience with the paint-job. That on-and-off business would have me raving mad by now. I would've chucked this thing in the bin the second time around, probably.
I hope it's working out this time!
Cheers,
Guido

That is one thing I do have is patience. When things go wrong, and it seems to be what this model does, I just start it over. So far it has been a wise decision each and every time....

The rattle can worked out really well, and I am going to do the detail painting up today on the body shell. Once done, I can clear coat and polish! Then a few decals....

Bizarre said:
Great progress, John. Like your videos and follow them on youtube!

Thanks!!
 
I hope you didn't damage the body when you dropped it :)

As for polishing compound don't worry and use the automotive one :) It works great :)
 
Biskup said:
I hope you didn't damage the body when you dropped it :)

As for polishing compound don't worry and use the automotive one :) It works great :)

I did try one of the automotive, but the Tamiya works much better, I will have the first part of that video up later today. But to hold you over, here are a few photos:

Step one of the directions is now done.

IMG_1382.jpg

Back seat is done:

IMG_1385.jpg

A few photos of the polished hood:

IMG_1386.jpg

IMG_1387.jpg

IMG_1388.jpg

They are not the best photos.... I will try to get better up later, and the video shows the hood off better.

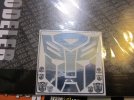
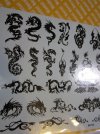
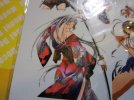
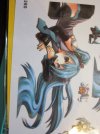
Also I have thought about putting something on the hood, which one should I use?

IMG_1389.jpg
IMG_1390.jpgIMG_1391.jpgIMG_1393.jpg

Or should I just leave it blank. I know what my wife and friends think so I thought I would ask the modeling community.....
 
Well blank is good but if you will decide to put something on then the girl with sword look great :)
 
Following the tuning honda community = Dragons

Folowing my taste one of the anime chicks
 

Latest posts

Back
Top