Italeri M1A1 Abrams "Super Kit"

EHOG

New Member
Joined
Apr 19, 2013
Messages
70
Hey All!
I'm starting my next project and since I havn't seen a build of this kit I thought I would share as I go along.

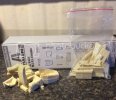
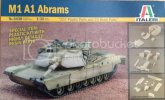
I ordered the Italeri M1A1 Abrams "Super Kit" with resin interior details and was excited to see it come in the mail yesterday.
ed49aa90-ebbd-4551-9141-bbb65ced3281_zps73c0319a.jpg
321009bc-0525-48b4-a583-d0e5d7a6e684_zps509104bd.jpg

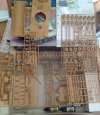
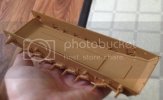
I quickly got to starting on step one, assembling the lower hull. It comes in three peices, the floor, and two sidewalls with suspension molded in place. (small let-down because I confused features of this kit with what I assume was a dragon kit when ordering)
I found the sprues to be a little large at the tree to part joint but Ill just have to pull out the hobby saw to avoid patchwork in the future.
so here is what I was able to acomplish in the time I had available.
ce5715ba-fa94-42f2-86dd-a5b44a4f600e_zps2acc13b4.jpg

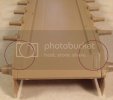
I found that the parts of the hull did not line up quite right towards the rear of the tank. While annoying it is most certainly fixable. image_7problem_zps88640196.jpg
Sadly for me, thats all I had time to accomplish in the time I had to put at it yesterday. More to come.
Questions, comments, criticisms always welcome. Thanks for joining me.
 
this will be interesting, ive seen this kit but i wouldn't spend the money on it
 
Spud, From what I'm seeing so far, that is a good plan. I think it'll turn out decent in the end but getting to that end is going to be a trial. There is alot of clean up to do around the parting seams of every part I have encountered, save for the resin.
This is deffinately going to challenge my growing skills.

CSOwl, I had planned on detailing this later on but since you asked I can do it now.
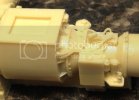
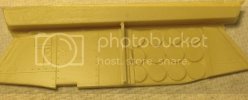
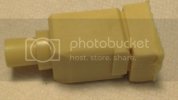
There are, as advertized on the box, 23 resin peices. there are two molds with 3 peices attached to each.
photo_zps4da12f64.jpg

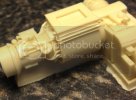
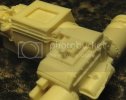
The power plant is the largest and most detailed piece in the set.
image_1_zpse01f2518.jpg
image_2_zps341eaabc.jpg
image_3_zps071cf233.jpg
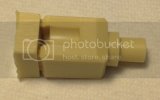
The battery pack is cast quite well also.
image_18_zpsf74b3c25.jpg

There is not much cleanup to be done save for the MASSIVE sprue stock that must be cut, trimed, sanded off
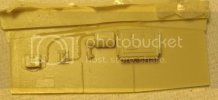
Other pieces include the drivers compartment and the turret interior.
Drivers compartment
image_5_zps720e5249.jpg
image_6_zpsfbbb4569.jpg

Turret Detail
image_14_zps57f4905a.jpg
image_15_zps428ec992.jpg
image_16_zpsa720f692.jpg
image_17_zpsea1faede.jpg
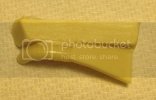
One of the most glaring deficiencies in the kit itself was the breech of the main gun. It seems to me they lost interest at this point because it is completely lacking in any detail. If you have time and money, Voyager makes a nice upgrade for this.
image_10_zps49621ad7.jpg
image_12_zps188a1c75.jpg
I couldnt find a picture of the actual M256 Breech but I know there is more detail to them than a stepped semi-circular cut out. but on the other had this will not be very visible once assembled.

In my opinion, the resin is the best part of this model so far. The hull has had fit issues and there is cleanup galore. I may have been better off with a Tamiya or Dragon with some detail sets. Too late now.

Join me next time for "Abrams Flying Lessions" ... Just kidding. Im not that frusterated.... Yet
Questions, comments, Complaints are always welcome. Thanks for dropping by.
 
Bad news on this kit. I will have it finished but the glaring deficiencies that this kit has presented as it is going together has made it impossible for me to make it accurate to what I wanted to build.
Also, I have nothing good to say about this kit. It has been miss-fit upon miss-fit moving through the instructions.
Such being the case, and to keep from sounding negative all the time, I have decided to finish it off as best as I can and post a concluding post with pictures.
If anyone has any qestions, feel free to ask.
 
Hey guys, time to update this,

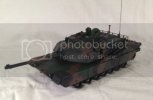
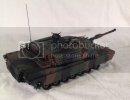
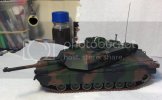
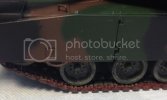
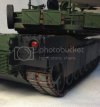
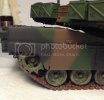
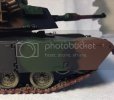
Things have been going well since I threw accuracy to the wind. I got it painted and assembled. I used a Barrel Depot Aluminum barrel and a set of Spade Ace workable track links. Also I have ventured into the world of pigments for the rusting on the links.
So without further delay, Here are the pics!! ;D
photo1_zpsa462eac4.jpg
photo2_zpsc2991db8.jpg

IMG_1031_zps2c82fb18.jpg
IMG_1032_zps263f58c7.jpg
IMG_1033_zps7d1cb6b8.jpg
I used Archer's Modern U.S. Military Stencil dry transfers for the lettering
IMG_1034_zps4b7ac807.jpg
IMG_1035_zps0dd096f4.jpg
IMG_1037_zps9d1613f3.jpg

As you can see I have started the weathering, I am waiting on funds for the other filters and washes I need to order before I can finish,
I wont lie, I will be glad to see this one behind me.

Thank you for joining me, questions, comments and complaints welcome.
 
Dude! No interior shots? All that fine resin? All that good interior detail? Wassup with that?

It looks fine from the outside. Shame that Italeri put in a silk purse with a sow's ear, apparently? I had always been curious about this kit when I saw it on the market.

Were the tracks the same hideous, stiff, one-piece nightmares that they've cheated us with since the 70s? The track weathering looks pretty good, by the way!
 
The detail on the resin was good, I would have loved to have done it up but the dimentions of the walls and all that were just to wrong to mess with, I do have some pics that I can post of the build, I chose not to post them because I have nothing good to say about the actual design of the resin other than the detail was crisp and kind of right. It really does strike me as they put very little effort into making the interior correct from any standpoint.
And yes the main tracks come in something like 8 pieces per side. I couldnt see them working the way I wanted them to or having the look I was going for so I ordered the Spade Ace set, It cost around $49 USD to have them shipped to Maine.
That was an awesome investment with the shipping time being the only downfall. It took almost 4 weeks to get them.
I will post some pictures of the resin but keep in mind that I had a major case of the "screw its" when going through this kit. Also, I still have to paint and detail the engine which is possibly the only saving grace to this kit. The engine I have to admit is the most acurate thing short of scratchbuilding it.
 
After all your trial and tribulations she came out lookin real good.
 
You did well considering the issues with the kit. The resin details are nice. Please post the pics of the engine, I like to see how it turned out. I have several M1A1 in the stash and thinking of maybe adding a engine to one of my kits. The three tone NATO color scheme is spot on in my opinion. I really like how the colors blend together or transition from one color to the next. Great Job!!!

Karl
 
Thanks for the compliment guys. This was my first Nato Tri-color and I am happy with how it turned out.

Right now I am waiting on funds for the grime washes I need to do the engine correctly, also some of the primer peeled up when I pulled the engine cover off the other day so I have some touch up to do but I should have it done by the end of the month.
 
EHOG said:
The detail on the resin was good, I would have loved to have done it up but the dimentions of the walls and all that were just to wrong to mess with, I do have some pics that I can post of the build, I chose not to post them because I have nothing good to say about the actual design of the resin other than the detail was crisp and kind of right. It really does strike me as they put very little effort into making the interior correct from any standpoint.
And yes the main tracks come in something like 8 pieces per side. I couldnt see them working the way I wanted them to or having the look I was going for so I ordered the Spade Ace set, It cost around $49 USD to have them shipped to Maine.
That was an awesome investment with the shipping time being the only downfall. It took almost 4 weeks to get them.
I will post some pictures of the resin but keep in mind that I had a major case of the "screw its" when going through this kit. Also, I still have to paint and detail the engine which is possibly the only saving grace to this kit. The engine I have to admit is the most acurate thing short of scratchbuilding it.
Good god, man--what a nightmare, and a huge loss with the tracks and all just for finishing this kit! You'd have been wiser to just order a new Dragon/DML kit and build it OOB!

I'll bet ha what they did was contract out the resin design and production, with the result being poor communication and design between the two entities. It sounds like that would be a realistic reason for things being so awry?
 
That or they didnt look online for referance pics. I found free resourses that showed how wrong it was. They should have used google.

Here are some of the short comings I can think of.
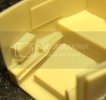
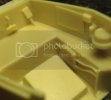
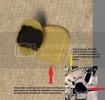
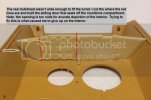
The corner where the munitions door is located in the turret was completely wrong by design.
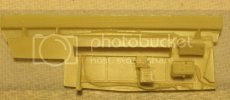
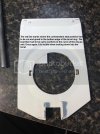
The rear bulkhead in the turret was too narrow.
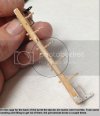
What else can I think of off the top of my head... Oh! The breech on the main gun was way to small and out of scale with no detail what so ever.
Also since the breech was shorter than it needed to be the main gun would not elevate a proper amount.
It was just a nightmare trying to use the interior.
 
Someone asked for pics of the resin and I figure I'll throw in some of the problems I encountered.
Please forgive the sideways pictures, Photobucket is messing with me tonight.

IMG_1002_zpsa056ebd5.jpg
IMG_1001_zps840dc18a.jpg
IMG_0993_zpsd324f4e3.jpg
IMG_0992_zps729b261e.jpg
IMG_0990_zpscdba2c94.jpg
IMG_0991_zpsc7e93478.jpg
IMG_0970_zps489cfeba.jpg
I have some more pics that I will post as soon as I get them off of my camera. These are off my phone. As far as finished product goes, I am still waiting on funds and creativity to finish the washes and repair to the paint. Sorry this one is draging out so long.
Questions, Comments, Obersvations always welcome.
 
Kudos to you for fighting through it all, outside looks great! I appreciate your frustrations with the interior. Maybe the engine and Trans is salavagable for another build down the road with another brand. Either way, hats off to you for you perseverance, I would of opened the window and seen if it was one of the rare versions of the flying M1's :)
 
Thanks again for the compliments. I almost did give this one flying lessons but some how I set it back down gently and kept working. I have some more pics of the wrongness. PM me if you want to see them. I have no desire to post them.
My next post will be the final pics with all the weathering and details finished. Dont know when that will happen though, I was just notified rent is gonna go up so we shall see.
 

Latest posts

Back
Top