Jagdturret
- Thread starter urumomo
- Start date
urumomo
Well-Known Member
- Joined
- Mar 18, 2013
- Messages
- 7,777
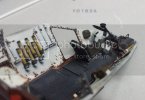
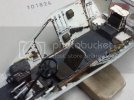
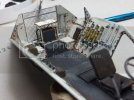
Stowage for the additional battery -
1/2 and 3/4 mm brass tubing and 1.5 mm styrene angle , CA only for the brass :
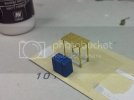
It was assembled and painted while stuck to this piece of card ,
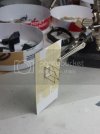
... then sliced free with a palette knife :
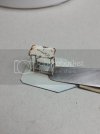
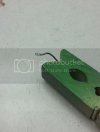
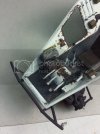
Battery cables were made from .5 mm annealed steel wire .
The end of the wire was flattened and drilled for the battery post :
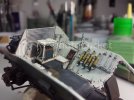
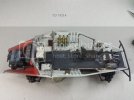
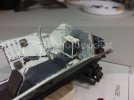
1/2 and 3/4 mm brass tubing and 1.5 mm styrene angle , CA only for the brass :

It was assembled and painted while stuck to this piece of card ,

... then sliced free with a palette knife :

Battery cables were made from .5 mm annealed steel wire .
The end of the wire was flattened and drilled for the battery post :


urumomo
Well-Known Member
- Joined
- Mar 18, 2013
- Messages
- 7,777
;D Thanks Q ,
I'm adjusting some of the chipping and doing some touch-up in the lower hull ,
the upper half of the hull doesn't have very much in it ..
But more stuff to never be seen again :
:
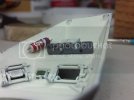
. . . ;D heh heh - that initial blob of green looks pretty sad on that vision block
I think I should add the head , or forehead , pads that are part of the vision block assemblies on the real-deal :
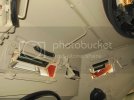
Hobby Boss did a good job on those things -- operable , and that's the only detail missing ???
I'm adjusting some of the chipping and doing some touch-up in the lower hull ,
the upper half of the hull doesn't have very much in it ..
But more stuff to never be seen again

. . . ;D heh heh - that initial blob of green looks pretty sad on that vision block
I think I should add the head , or forehead , pads that are part of the vision block assemblies on the real-deal :

Hobby Boss did a good job on those things -- operable , and that's the only detail missing ???
BeebleBrox
Well-Known Member
- Joined
- Apr 9, 2012
- Messages
- 365
Looks real, can almost hear the sound of the metal when knocked upon. Those brown food canisters (?!) could have a wash and additional pinwash around straps end edges.
urumomo
Well-Known Member
- Joined
- Mar 18, 2013
- Messages
- 7,777
;D that sounds positive ,
The mess tins ? .. OK .
Things look so different when I put it on the monitor ( I'm sure I'm not alone there )
I'll take pix and then see stuff to fix , then go back to it with the mag-visor and it seems like it looks good .
I don't see the same issue that was so apparent on the monitor
So I've been slowly adding tiny amounts of color .
The mess tins ? .. OK .
Things look so different when I put it on the monitor
I'll take pix and then see stuff to fix , then go back to it with the mag-visor and it seems like it looks good .
I don't see the same issue that was so apparent on the monitor
So I've been slowly adding tiny amounts of color .
urumomo
Well-Known Member
- Joined
- Mar 18, 2013
- Messages
- 7,777
.. . all right , I did a wash of yellow ochre then some black on the mess-tins , but it appeared to do nothing - ( it was looking groovy when it was wet 8) ,, but was too muted when dry )
so I added some " sap green ", a pretty brite lime-green , as a filter on the body of them :
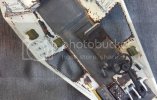
They're not as washed out as that pic suggests
you can see the contrast here :
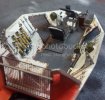
.. . but they can use a tiny bit of black ( or maybe I'll use a blue ) to bring out the detail .
BTW , I'm using watercolor , tube paint for most of this weathering .
I think the rust and chipping is looking more convincing . Any and all input welcome
so I added some " sap green ", a pretty brite lime-green , as a filter on the body of them :

They're not as washed out as that pic suggests
you can see the contrast here :

.. . but they can use a tiny bit of black ( or maybe I'll use a blue ) to bring out the detail .
BTW , I'm using watercolor , tube paint for most of this weathering .
I think the rust and chipping is looking more convincing . Any and all input welcome
urumomo
Well-Known Member
- Joined
- Mar 18, 2013
- Messages
- 7,777
These little beauties arrived today ;D
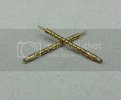
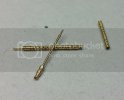
They're from Aber , along with a couple of MG 42 barrel sets from Adlers Nest for use with the infantry .
.. just in time for completion of the gun mount .
I stripped and re-painted the 2 cm gun ( slight change but it's definitely an improvement )
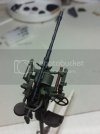
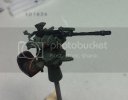
So now on to it's weathering and the infrared optics and coaxial MG 34 ..


They're from Aber , along with a couple of MG 42 barrel sets from Adlers Nest for use with the infantry .
.. just in time for completion of the gun mount .
I stripped and re-painted the 2 cm gun ( slight change but it's definitely an improvement )


So now on to it's weathering and the infrared optics and coaxial MG 34 ..
BeebleBrox
Well-Known Member
- Joined
- Apr 9, 2012
- Messages
- 365
What method do you use to strip paint?
Barrels looks crisp!
Barrels looks crisp!
urumomo
Well-Known Member
- Joined
- Mar 18, 2013
- Messages
- 7,777
Just rubbing alcohol (isopropyl ). 70 % concentration , but any nominal concentration will solve acrylics .
.. . you can use diluted isopropyl to do weathering and chipping -- but you need to stay on top of it obviously .
I'll use it to remove color with a brush and then dunk it in water and hose it off to stop any further dissolution .
Again - that's just another one of those trial and error exercises -- but it's very useful . Kinda fun too ;D
I always primer with the modified oil-base like my favorite Rust-Oleum so it it doesn't affect the primer coat .
Round one on this barrel , I used a coat of the wax based " gunmetal " in this AK formulation atop the primer -
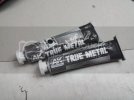
... it's very silvery ...
Then used filters of blue and black acrylic .
It can produce very interesting effects . I had it looking pretty groovy at one point during the second round ( but the silver of the original gunmetal was subdued , just thru abrasion since waxes are solved with mineral spirits ) but it looked too blue shifted when photographed and I lost a lot of the contrasts when I hit it with more black .
It's just one of those things that requires experimentation . I was trying to arrive at something that wasn't just a gloss or semi-gloss black . ( oops )
)
I might strip it and re-do it again -- it's molding is so off , it's gonna get replaced before Huffinstrasse hits Broadway so it will make good practice fodder .
.. . you can use diluted isopropyl to do weathering and chipping -- but you need to stay on top of it obviously .
I'll use it to remove color with a brush and then dunk it in water and hose it off to stop any further dissolution .
Again - that's just another one of those trial and error exercises -- but it's very useful . Kinda fun too ;D
I always primer with the modified oil-base like my favorite Rust-Oleum so it it doesn't affect the primer coat .
Round one on this barrel , I used a coat of the wax based " gunmetal " in this AK formulation atop the primer -

... it's very silvery ...
Then used filters of blue and black acrylic .
It can produce very interesting effects . I had it looking pretty groovy at one point during the second round ( but the silver of the original gunmetal was subdued , just thru abrasion since waxes are solved with mineral spirits ) but it looked too blue shifted when photographed and I lost a lot of the contrasts when I hit it with more black .
It's just one of those things that requires experimentation . I was trying to arrive at something that wasn't just a gloss or semi-gloss black . ( oops
I might strip it and re-do it again -- it's molding is so off , it's gonna get replaced before Huffinstrasse hits Broadway so it will make good practice fodder .
urumomo
Well-Known Member
- Joined
- Mar 18, 2013
- Messages
- 7,777
... without stripping it ,
I've just been spraying it with a pthalo blue watercolor mixed with Vallejo gloss varnish and thinned with water :
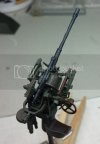
- -- looking more like blued steel .
There's a thin filter coat of Vandyke brown in the mix . But I'm unsure how much impact it has after being over-sprayed with the blue filter .. this camera has no chance of capturing what you can see with the naked eye .
I took about 30 pics to finally get the one above .
Got to love digital film ;D - so much cheaper and lighter 8)
I've just been spraying it with a pthalo blue watercolor mixed with Vallejo gloss varnish and thinned with water :

- -- looking more like blued steel .
There's a thin filter coat of Vandyke brown in the mix . But I'm unsure how much impact it has after being over-sprayed with the blue filter .. this camera has no chance of capturing what you can see with the naked eye .
I took about 30 pics to finally get the one above .
Got to love digital film ;D - so much cheaper and lighter 8)
urumomo
Well-Known Member
- Joined
- Mar 18, 2013
- Messages
- 7,777
Rite 8) - quick post ,
Not a lot of production but some ...
We get to see our friend MG Mc Bendy-Snout again :
good candidate for a nose-job
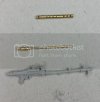
I've been experimenting with this AK burnishing fluid .
It definitely turns the brass ' black ' , really a dark brown / umber , but the oxide layer is very delicate .
It easily rubs away ,
I ended up rubbing most all of it off prior to painting the MG34 ,
So what you see in the pix is just the acrylic paint straight atop the brass , though the barrel inside the cooling jacket remained blackened ..
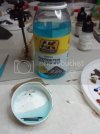
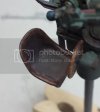
Been working on weathering the seats ,
 I see you fuzz -- I'm A coming for you
Currently assembling the infrared equipment ,
here's the set-up for now - -- I'll need to scratch out some trigger linkage for the MG ,
and add some forward mounting brackets so it's not just resting in the mount ...
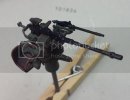
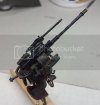
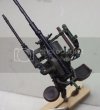
I used the same mix of black and blue water-color + gloss varnish on the MG ,, I'm really liking it ,
Even without any primer beneath it . maybe because of it .
the butt-end isn't painted , I had it stuck in some Blu-tac equivalent for airbrushing
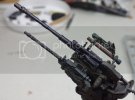
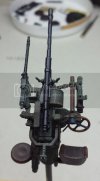
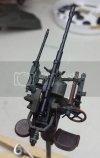
Not a lot of production but some ...
We get to see our friend MG Mc Bendy-Snout again :
good candidate for a nose-job

I've been experimenting with this AK burnishing fluid .
It definitely turns the brass ' black ' , really a dark brown / umber , but the oxide layer is very delicate .
It easily rubs away ,
I ended up rubbing most all of it off prior to painting the MG34 ,
So what you see in the pix is just the acrylic paint straight atop the brass , though the barrel inside the cooling jacket remained blackened ..

Been working on weathering the seats ,
 I see you fuzz -- I'm A coming for you
 Currently assembling the infrared equipment ,
here's the set-up for now - -- I'll need to scratch out some trigger linkage for the MG ,
and add some forward mounting brackets so it's not just resting in the mount ...


I used the same mix of black and blue water-color + gloss varnish on the MG ,, I'm really liking it ,
Even without any primer beneath it . maybe because of it .
the butt-end isn't painted , I had it stuck in some Blu-tac equivalent for airbrushing


BeebleBrox
Well-Known Member
- Joined
- Apr 9, 2012
- Messages
- 365
Simply top notch!
I got lot to learn of your detail work..
No turning back to Mc Bendys after this?
Interesting gun color formula, got to try it.
I got lot to learn of your detail work..
No turning back to Mc Bendys after this?
Interesting gun color formula, got to try it.
urumomo
Well-Known Member
- Joined
- Mar 18, 2013
- Messages
- 7,777
;D Thanks Beeble
You should definitely experiment with it ,
It's about 10 parts black to 1 part blue -- if even . That blue is mega-potent :
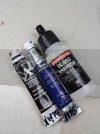
I need to tone down the blue on the 2 cm , but spraying that mix directly atop the brass of the MG barrel gave it a cool hue .
That was my intended route with the 2 cm gun , applying a metallic base on the primer'd plastic ,
But that AK True Metal has too much body ,, and I ended up muting most of it during the process of stripping and re-painting it ,
I think I'll prime the other two guns from the kit and do some more experimenting ..
You should definitely experiment with it ,
It's about 10 parts black to 1 part blue -- if even . That blue is mega-potent :

I need to tone down the blue on the 2 cm , but spraying that mix directly atop the brass of the MG barrel gave it a cool hue .
That was my intended route with the 2 cm gun , applying a metallic base on the primer'd plastic ,
But that AK True Metal has too much body ,, and I ended up muting most of it during the process of stripping and re-painting it ,
I think I'll prime the other two guns from the kit and do some more experimenting ..
urumomo
Well-Known Member
- Joined
- Mar 18, 2013
- Messages
- 7,777
Wow -- two weeks since my last update ,, 
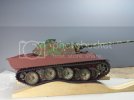
And two months since we last saw the Panther K : ,
,
I finally got the front end figured out to the point I could get the upper hull primer'd :
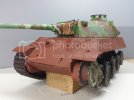
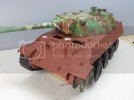
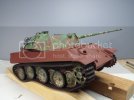
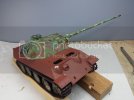
Need to build the radioman's periscope and armor shroud -- similar to the drivers ( only square ) ,
) ,
I initially wanted to adapt two standard periscopes for the install , but I never could get it to work without increasing the size of the blister to TOO BIG for the 100mm armor requirement ,
so it has to be a purpose built creature ...
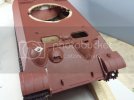
Those cleats on the glacis are for the barrel travel-lock that I appropriated from the Jagdtiger 8)
I need to correct quite a few of those slotted , flat-head screws around the perimeter of the access plate :
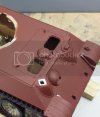
. .. I used a " heat pen " with the concomitant bit ( http://hlj.com/product/TWDHP-1000 with http://hlj.com/product/BRFB423 ) , but I had issues - -- - need more production time with it to get the feel for it ,
It has temperature settings on the power supply , but I'm pretty sure there is no feed-back loop , so it just sends a steady current to the tip .
So with the thing sitting idle , the equilibrium temp the tip reaches is way too high for the styrene .
It has a sweet spot for sure ,
but it's hard to hit and maintain .
I tried dumping heat to a heat-sink and just unplugging the thing when I knew it was hot enough ...
There ain't all that much there in that picture , but I did so much of it over and over and over

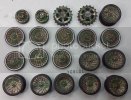
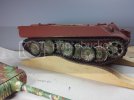
After re-watching that latest WOT Panther vid and looking at period film and stills ,
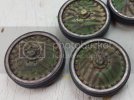
I decided to make the center-line wheel rims shiny -
I used the AK True-Metal in steel , dulled down with the weathering :
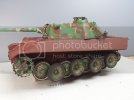
Lots of building to do - and stuff to fix .
But I want to do some camo on the hull
more fun than all this micro construction and epoxy and putty work ...
TIRED OF THE TAMIYA WHITE !!!!!!!!
Primer will be cured enough for acrylics tomorrow ;D ;D
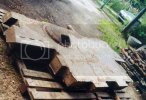
something you don't see too often ,
And two months since we last saw the Panther K :
I finally got the front end figured out to the point I could get the upper hull primer'd :


Need to build the radioman's periscope and armor shroud -- similar to the drivers ( only square
I initially wanted to adapt two standard periscopes for the install , but I never could get it to work without increasing the size of the blister to TOO BIG for the 100mm armor requirement ,
so it has to be a purpose built creature ...

Those cleats on the glacis are for the barrel travel-lock that I appropriated from the Jagdtiger 8)
I need to correct quite a few of those slotted , flat-head screws around the perimeter of the access plate :

. .. I used a " heat pen " with the concomitant bit ( http://hlj.com/product/TWDHP-1000 with http://hlj.com/product/BRFB423 ) , but I had issues - -- - need more production time with it to get the feel for it ,
It has temperature settings on the power supply , but I'm pretty sure there is no feed-back loop , so it just sends a steady current to the tip .
So with the thing sitting idle , the equilibrium temp the tip reaches is way too high for the styrene .
It has a sweet spot for sure ,
but it's hard to hit and maintain .
I tried dumping heat to a heat-sink and just unplugging the thing when I knew it was hot enough ...
There ain't all that much there in that picture , but I did so much of it over and over and over
After re-watching that latest WOT Panther vid and looking at period film and stills ,
I decided to make the center-line wheel rims shiny -
I used the AK True-Metal in steel , dulled down with the weathering :


Lots of building to do - and stuff to fix .
But I want to do some camo on the hull
more fun than all this micro construction and epoxy and putty work ...
TIRED OF THE TAMIYA WHITE !!!!!!!!
Primer will be cured enough for acrylics tomorrow ;D ;D
something you don't see too often ,

BeebleBrox
Well-Known Member
- Joined
- Apr 9, 2012
- Messages
- 365
That true metal looks really good on those rims. Got to get some of that too.
urumomo
Well-Known Member
- Joined
- Mar 18, 2013
- Messages
- 7,777
Cool 8) ,
It's interesting stuff -- An enamel with a wax body .
I think it is the closest I'll get to that newly abraded steel ,, , at least going by the Panther wheels in the vid :
Thoughts ?
Critique ?
I wish they offered a smaller amount -- that 10 dollar tube will long outlast me and my model building
Maybe they'll offer a 1/2 or 1/3 tube for a proportional price if it sells well ...
Buy some
Check it out
They have over a dozen flavors ( maybe ??? ) ,
I want to check out some more ( I have steel , aluminum , brass & gunmetal ) , but 10 bucks ? --- I'll wait till I see a specific need . " iron " is next for me ;D
It's interesting stuff -- An enamel with a wax body .
I think it is the closest I'll get to that newly abraded steel ,, , at least going by the Panther wheels in the vid :

Thoughts ?
Critique ?
I wish they offered a smaller amount -- that 10 dollar tube will long outlast me and my model building
Maybe they'll offer a 1/2 or 1/3 tube for a proportional price if it sells well ...
Buy some
Check it out
They have over a dozen flavors ( maybe ??? ) ,
I want to check out some more ( I have steel , aluminum , brass & gunmetal ) , but 10 bucks ? --- I'll wait till I see a specific need . " iron " is next for me ;D
BeebleBrox
Well-Known Member
- Joined
- Apr 9, 2012
- Messages
- 365
Lots of bolts in those wheels, why? Would not half of them do?

