You are using an out of date browser. It may not display this or other websites correctly.
You should upgrade or use an alternative browser.
You should upgrade or use an alternative browser.
Jagdturret
- Thread starter urumomo
- Start date
urumomo
Well-Known Member
- Joined
- Mar 18, 2013
- Messages
- 7,279
slow going . 
The Panther group is standing -- I'm working on one more fig that may or may not be added up against the tank :
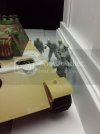
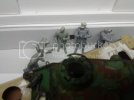
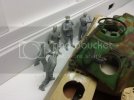
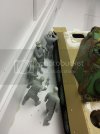
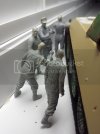
I want the Kriegsmarine officer leaning against the wall , so I need to tweak his ankles , toe-down :
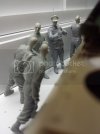
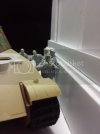
There's been a lot of little tweaks with moving arms and legs , plus putty work at too many joints ,, even the unmodified joints .
.. . I added this maniac :
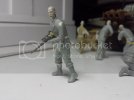
I re-worked his legs and waist to put him mid -turn
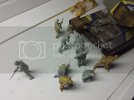
And I've been playing with the positions of the assault team ( the guys with the tape on their backs are the flamethrower operators ) :
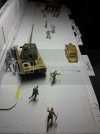
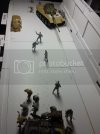
This is ( was ) Francesca's car . She's the druggist's mistress :-* . He left with her the night prior and left her car there .
The fire-fight erupted at 04:47 and the dio's current time is 09:47 :
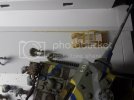
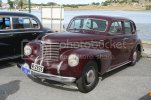
This is an older couple's car that are staying at the hotel .
They will get lucky and have only one bullet hole .... and subsequent flat tire ...
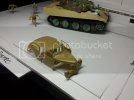
I intend to paint her like this -- if not exactly :
A 2-Sprue Kit TM :
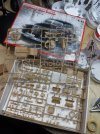
Hopefully it all fits well . My first ICM kit . Looks pretty good from what I can tell by just a cursory inspection . I've seen several other ICM kits that I'd pay money for
P S
Look how level the engine deck on my kitty is sitting , with one track up on the sidewalk and the other down on the street :
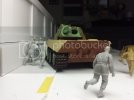
;D ;D 8)
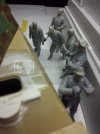
The Panther group is standing -- I'm working on one more fig that may or may not be added up against the tank :


I want the Kriegsmarine officer leaning against the wall , so I need to tweak his ankles , toe-down :


There's been a lot of little tweaks with moving arms and legs , plus putty work at too many joints ,, even the unmodified joints .
.. . I added this maniac :

I re-worked his legs and waist to put him mid -turn
And I've been playing with the positions of the assault team ( the guys with the tape on their backs are the flamethrower operators ) :


This is ( was ) Francesca's car . She's the druggist's mistress :-* . He left with her the night prior and left her car there .
The fire-fight erupted at 04:47 and the dio's current time is 09:47 :

This is an older couple's car that are staying at the hotel .
They will get lucky and have only one bullet hole .... and subsequent flat tire ...

I intend to paint her like this -- if not exactly :

A 2-Sprue Kit TM :

Hopefully it all fits well . My first ICM kit . Looks pretty good from what I can tell by just a cursory inspection . I've seen several other ICM kits that I'd pay money for
P S
Look how level the engine deck on my kitty is sitting , with one track up on the sidewalk and the other down on the street :

;D ;D 8)
urumomo
Well-Known Member
- Joined
- Mar 18, 2013
- Messages
- 7,279
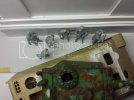
. . . started into the " Gen 2 " stuff --- :
I'm not impressed . I still don't see the advantage to a single piece torso . Maybe they think they can expand the detail in molding it this way ...
Since I'm using Hornet heads , I had to fill the top of the torso with Aves to facilitate this .
These guys took LONGER to clean and assemble .
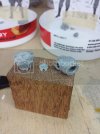
And they do the epaulets separate
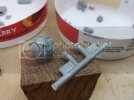
.. . you can use those styrene ones OR the PE ones . : . No , this is not a better way .
No .
Oh well , there's only the four of 'em
Them 4 and a couple of others are in this next group , figuring out a map ..
wanted this one guy leaning against the Panther - with one foot up on the sidewalk . ( got a great face for him - " Pffft . We gotta move ? I just got comfortable .. " ) )
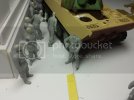
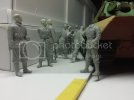
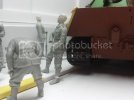
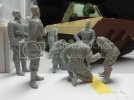
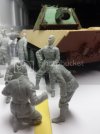
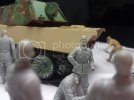
getting these 3 figured out so I can get their heads on right :
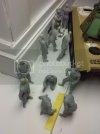
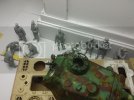
After their heads are on in a few -- I'm moving back to the Panther .
........ I got this here super cool truck for the repair crew helping the 222 :
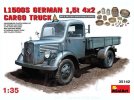
" Stow that grenade , Soldier !! Where's your rifle ? !! "
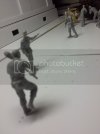
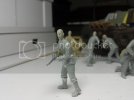
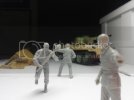
He's Way Too Happy about this whole thing .....
I'm not impressed . I still don't see the advantage to a single piece torso . Maybe they think they can expand the detail in molding it this way ...
Since I'm using Hornet heads , I had to fill the top of the torso with Aves to facilitate this .
These guys took LONGER to clean and assemble .

And they do the epaulets separate

.. . you can use those styrene ones OR the PE ones . :
No .
Oh well , there's only the four of 'em
Them 4 and a couple of others are in this next group , figuring out a map ..
wanted this one guy leaning against the Panther - with one foot up on the sidewalk . ( got a great face for him - " Pffft . We gotta move ? I just got comfortable .. " ) )


getting these 3 figured out so I can get their heads on right :


After their heads are on in a few -- I'm moving back to the Panther .
........ I got this here super cool truck for the repair crew helping the 222 :

" Stow that grenade , Soldier !! Where's your rifle ? !! "


He's Way Too Happy about this whole thing .....
urumomo
Well-Known Member
- Joined
- Mar 18, 2013
- Messages
- 7,279
The flamethrowers are 2 man teams .
Each has a rifleman with him . I added another rifleman and adjusted their lay-out :
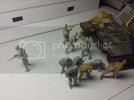
I have this new guy looking back , at Maniac yelling at Scepter-Boy ;D :
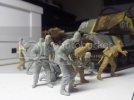
But I don't really like something about it . His face -- or posture .? .... :-\ :
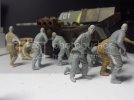
..... . .think I'll be swapping out that head ...
Each has a rifleman with him . I added another rifleman and adjusted their lay-out :

I have this new guy looking back , at Maniac yelling at Scepter-Boy ;D :

But I don't really like something about it . His face -- or posture .? .... :-\ :

..... . .think I'll be swapping out that head ...
urumomo
Well-Known Member
- Joined
- Mar 18, 2013
- Messages
- 7,279
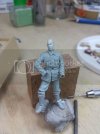
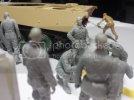
.. . . for anyone keeping score at home ,
I shortened his neck and turned his head for the better .
I thought his neck was too long yesterday , but I figured I'd wait and see how I felt later . Well :
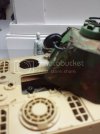
Back to the hull roof ,
I found I need to add material on the glacis bump-out for the driver's periscope assembly .
It would allow only 35 mm of armor thickness for the radius section .
- adding holes for positive anchorage for the next 1.5 mm layer of milliput :
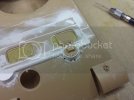
I think I'll give the new radius a slight vertical slope this time ...
The radioman's side can remain the same . He has 2 periscopes siamesed together that he can shutter between his single viewer . One looking right-front and the other looking left-front .
I shortened his neck and turned his head for the better .
I thought his neck was too long yesterday , but I figured I'd wait and see how I felt later . Well :


Back to the hull roof ,
I found I need to add material on the glacis bump-out for the driver's periscope assembly .
It would allow only 35 mm of armor thickness for the radius section .
- adding holes for positive anchorage for the next 1.5 mm layer of milliput :

I think I'll give the new radius a slight vertical slope this time ...
The radioman's side can remain the same . He has 2 periscopes siamesed together that he can shutter between his single viewer . One looking right-front and the other looking left-front .
urumomo
Well-Known Member
- Joined
- Mar 18, 2013
- Messages
- 7,279
Part II has arrived ,
Perfect timing ;D .. .I'm starting the Panther's interior ..
( weird edit ~ 7:50 mark , driver's view-port hatch ? for scope mag ? ??? )
Never seen that travel stop atop the cupola for the TC's hatch before ...
for full screen : https://www.youtube.com/watch?v=vB-Rt0GRipo
[youtube]https://www.youtube.com/watch?v=vB-Rt0GRipo[/youtube]
BeebleBrox
Well-Known Member
- Joined
- Apr 9, 2012
- Messages
- 365
How is it going?
Im looking forward to see some paint on the figures.
Of topic, I was cleaning out the attic and found a box full with forgotten stash! A dragon King tiger, a Corsair and some figure sets. What a nice surprise!
Im looking forward to see some paint on the figures.
Of topic, I was cleaning out the attic and found a box full with forgotten stash! A dragon King tiger, a Corsair and some figure sets. What a nice surprise!
urumomo
Well-Known Member
- Joined
- Mar 18, 2013
- Messages
- 7,279
Ah ha -- Bandanna Man has returned 8)
Yeah - What happened to the " British Dudes " ? They should be done , no ? ;D
I'm probably not starting any paint-work on the figures until I have everyone standing .
.... . only about 30 more to go ( truly )
It's been really busy around here this week , just not on Huffinstrasse
So what figure kits did you find up in your attic ?
BeebleBrox
Well-Known Member
- Joined
- Apr 9, 2012
- Messages
- 365
Ok, massive project!
The dudes are done, will post pix this weekend. Made a photobooth the I will try out. I will post some pix on the treasure I found at the attic as well.
---Edit---
And here are the pix.
http://www.scalemodeladdict.com/SMF/index.php/topic,13267.0.html
---Edit---
The dudes are done, will post pix this weekend. Made a photobooth the I will try out. I will post some pix on the treasure I found at the attic as well.
---Edit---
And here are the pix.
http://www.scalemodeladdict.com/SMF/index.php/topic,13267.0.html
---Edit---
urumomo
Well-Known Member
- Joined
- Mar 18, 2013
- Messages
- 7,279
;D Part 3
Really helpful for me . Adds a lot of clarification to info I have for the interior .
He gives a great practical example for why I'm attempting to stow ready rounds in the turret .
... . and more info new to me : The extended driver position
for full-screen : https://www.youtube.com/watch?v=aZhJl7cHs78
[youtube]https://www.youtube.com/watch?v=aZhJl7cHs78[/youtube]
urumomo
Well-Known Member
- Joined
- Mar 18, 2013
- Messages
- 7,279
Thanx , geegad ;D
Glad you're still checking in
Like I say , this way I only have to do a dio every 10 years
Right now it's looking like the final count will be 8 vehicles and around 80 people ,,, and all the hard-scape .
Should be posting some progress tonight .
Hopefully Photobucket is working , Fightnjoe remarked about his Photobucket combat in his last post and I STILL need to finish trying to upload some pix for a client . Last few times I checked , the bucket was still screwy
see you soon ,
Ciao
urumomo
Well-Known Member
- Joined
- Mar 18, 2013
- Messages
- 7,279
Rite .
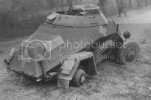
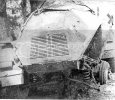
I started into the 222 :
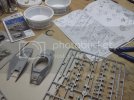
The rear-left tire is the only tire to survive the fire-fight ,
so I'm building that suspension assembly OOB ;
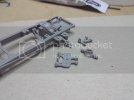
.. But the other three wheels will be removed ,
With a bottle-jack under the rear-right A-arm and the entire front end elevated -- exact jack(s) / cribbing TBD , but the front A-arms will be unsupported .
-- so , the suspension springs need to be fully expanded up front and the ones at the right- rear will be compressed .
Initially I thought about replacing the cast " springs " with some steel springs cut to size ;
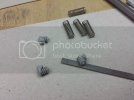
But then decided that drilling out the centers and cutting the spirals loose from their mounting brackets would be more direct and hopefully easier
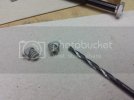
I drilled them out in three steps .
~ 40 % ,~ 80 % then the full 2.7 mm
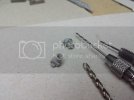
Tedious and phalanx cramping - - well phalanges muscle cramping , ,, holding that tiny plastic node and I had to grip the final drill bit without a pin vise , since I didn't have one large enough and the cordless drill was WAY too dangerous
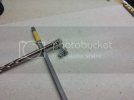
they're ready for their shock absorbers :
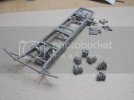
You need one of these Hobby Boss kits or the like to go this route ,
The Tamiya kit :
:
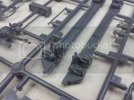
:

But ,, It's Tamiya , the parts probably fit better ;D
You need to pay attention with the assembly of this HB kit the fit is kinda sloppy as far as any indexing goes
I need to scratch-build the wheel hubs/brake drums :
Fortunately , Hobby Boss constructs the wheels from separated halves with separate , rubber tires :
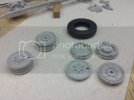
So I can trim the inner hub portion of the molding away and form up the outer face with Aves Epoxy Sculpt ..
.. and add the little tiny wheel studs .. 8)
I'll be using these resin wheel/tire castings instead of the Hobby Boss rubber --- the HB tires are actually a little under-size --
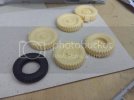
Again , the Tamiya kit is no help here :
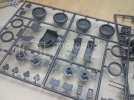
But it was cheap --- I think I paid 15 bucks for it .
I actually saw one on E-bay that someone was asking $110 for . ?! ;D .. Pfffft
. . .. maybe if there was weed in the box ...
. . Maybe it was signed by Mr Tamiya himself
I started into the 222 :

The rear-left tire is the only tire to survive the fire-fight ,
so I'm building that suspension assembly OOB ;

.. But the other three wheels will be removed ,
With a bottle-jack under the rear-right A-arm and the entire front end elevated -- exact jack(s) / cribbing TBD , but the front A-arms will be unsupported .
-- so , the suspension springs need to be fully expanded up front and the ones at the right- rear will be compressed .
Initially I thought about replacing the cast " springs " with some steel springs cut to size ;

But then decided that drilling out the centers and cutting the spirals loose from their mounting brackets would be more direct and hopefully easier

I drilled them out in three steps .
~ 40 % ,~ 80 % then the full 2.7 mm

Tedious and phalanx cramping - - well phalanges muscle cramping , ,, holding that tiny plastic node and I had to grip the final drill bit without a pin vise , since I didn't have one large enough and the cordless drill was WAY too dangerous

they're ready for their shock absorbers :

You need one of these Hobby Boss kits or the like to go this route ,
The Tamiya kit

:
But ,, It's Tamiya , the parts probably fit better ;D
You need to pay attention with the assembly of this HB kit
I need to scratch-build the wheel hubs/brake drums :


Fortunately , Hobby Boss constructs the wheels from separated halves with separate , rubber tires :

So I can trim the inner hub portion of the molding away and form up the outer face with Aves Epoxy Sculpt ..
.. and add the little tiny wheel studs .. 8)
I'll be using these resin wheel/tire castings instead of the Hobby Boss rubber --- the HB tires are actually a little under-size --

Again , the Tamiya kit is no help here :

But it was cheap --- I think I paid 15 bucks for it .
I actually saw one on E-bay that someone was asking $110 for . ?! ;D .. Pfffft
. . .. maybe if there was weed in the box ...
. . Maybe it was signed by Mr Tamiya himself
urumomo
Well-Known Member
- Joined
- Mar 18, 2013
- Messages
- 7,279
I finally found a great miter-box and back-saw 
https://www.scalehobbyist.com/catagories/Tools/thin-slot-miter-box-w-saw-42tpi/ZNA00035241/product.php?kw=zona
First time I've been able to cut super small ( 1 mm and smaller ) brass stock with consistent accuracy
I added a stop-block and a pinch-pall to it ,, pretty much required -- unless you're some kinda alien - robot - Freaka zoid with magnesium claws
The 42 TPI blade is the ticket -
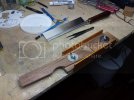
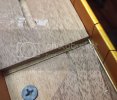
I screw it to the bench with a quick twist of that 1" drywall screw
These 1 mm brass pieces below are all exactly 1.84 mm .
YEP
They have zero variation -- I'm not kidding ;D
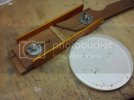
So that works for me !
https://www.scalehobbyist.com/catagories/Tools/thin-slot-miter-box-w-saw-42tpi/ZNA00035241/product.php?kw=zona
First time I've been able to cut super small ( 1 mm and smaller ) brass stock with consistent accuracy
I added a stop-block and a pinch-pall to it ,, pretty much required -- unless you're some kinda alien - robot - Freaka zoid with magnesium claws
The 42 TPI blade is the ticket -


I screw it to the bench with a quick twist of that 1" drywall screw
These 1 mm brass pieces below are all exactly 1.84 mm .
YEP
They have zero variation -- I'm not kidding ;D

So that works for me !
BeebleBrox
Well-Known Member
- Joined
- Apr 9, 2012
- Messages
- 365
Greate work
That miter-Box looks handy
" . . .. maybe if there was weed in the box ... "
;D
That miter-Box looks handy
" . . .. maybe if there was weed in the box ... "
;D
urumomo
Well-Known Member
- Joined
- Mar 18, 2013
- Messages
- 7,279
;D Hey geegad ,
I'm kinda all over the place with production on this .
I've been figuring out details and fabricating odds & ends - - I'm trying to get this Panther K roof and hatch mods assembled right now , so I can post a cohesive narrative
I want to have the K 's roof done and the 222's chassis ready over the weekend .
So hopefully some more Panther pix tonight - late -- seems Photobucket is unburdened a bit in the wee hours 8)

