King Tiger group build?

Here's what I mean Scott;

Family061.jpg

A street in Oosterbeek. . .The road will be large brick and the sidewalk area will be smaller bricks. . .
The small circle is for the tree.
Yeah I know it has changed from the original. . . .
For the base cover I am using vinyl spackle paste. I will scribe the brick work free hand.
 
Well, I'm truly up and running.
So the diorama my King T is based on the battle in Stavelot (Battle of the Bulge) .
Please note its only based on and not necessarily accurate, but hey I wanted to do a ambush / building dio.
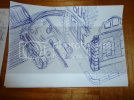
Putting the idea onto paper.
P1000495.jpg
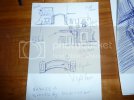
Planning some of the buildings detail.
P1000496.jpg
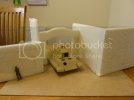
Putting the idea into 3D. The figure was used to create the right scale for the buildings, as well as a 1/35 scale ruler.
P1000505.jpg
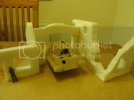
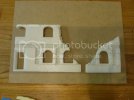
Cutting and sanding the foam begins.The upstairs window to the right of the arch will have the ambush team waiting to pounce.
P1000510.jpg
Any how more later, please bare with me as this is my first diorama.
Joolz
 
Joolz - awesome. Mac - awesome. This is sooooo cool.

I am so impressed by this. I gotta tell you, this intimidates me. Not building the kit, but trying to depict an actual plausible scene. I've been watching war documentaries, reading, googling. There is so much to learn...

On another note, the loft is finished. Just need to add some furniture. My target date for the first vid, is OCT 1st. Late , I know, but I do have about 15 excuses.
 
Intimidating! I thought I had it down then Backbreaker steps in!
I wonder why I have not attempted a dio before? This is fun!
And messy, which is why it is fun I suppose!
 
LOL, all part of the learning curve. I think we are all going to enjoy this build.
 
You have to start sometime!
It is fun. . .I already learned I should have tinted the spackle before I put it down, duh!
 
Glad u all like it !
Coz I've spent the last few weeks doing exactly what Scott has been doing; reading, watching and googling.
This is my 1st dio and as Mac said its so much fun and I've not even started the messy bits yet.
One thing I have learned is there are so many ways of achieving the same goal.
I must admit that I'm going down the use what you have route! LOL
 
Put down the spackle then carve your own bricks, it is easy. . .
Well, it is, but it is also very tedious, and my eyes hurt. . .
Family071.jpg

Family072.jpg

By using spackle you can also cover up mistakes and try again. . .
After the street, I move on to the sidewalks and yard. . .
 
I wouldnt be intimidated by anything Scott. There are hundreds of different settings for a beast such as a king tiger. I reccoment the books "Tigers in combat" for anyone looking to build a Tiger 1 or King tiger. Thousands of photos across 2 volumes. One volume concentrates on SS tiger units and the other coveres regular army units. Theres a wealth of info and ideas in these 2 books. They are also indespensible for ideas and details for things like field modifications and settings. Documentaries are great but i find they all repeat the same footage that 500 other WW2 shows have used. photobooks are more informative since they allow you to take one scene and study it for all the details and atmosphere in the scene.
 
Intimidation!? Never! Completion is the goal.
This is a very fun project so far. Though I am falling behind on the kit portion. . .
 
Well this is called Scale Model Addict isn't it? I can't stop!
I used some two part epoxy putty to put on some Zim. . .not too sure of the results yet, it doesn't seem to want to harden up. It is Tamiya two part FYI.
So back to the dio part. I put some more bricks in, primed the base then painted some of the bricks and applied a wash.
Family074.jpg

Family075.jpg

Family076.jpg

Family078.jpg

And one with two of the figgers in place to get an idea of their placement ;
Family079.jpg

The bricks are just kind of scattered around for an idea of what I want.
I have some lumber and other scattered junk I will add later.
I really do hope to get to the Tigers wheels and tracks to get an idea of how I want the suspension to sit
 
Great work Mac, the street surface looks awesome! :eek:

Well started cutting some of the detail into the foam, using a knife and some mini files/rasps and then running a pencil over the cut areas to create the detail. Amazing how 4hrs just fly's by. Looking forward to doing the other buildings and creating a mount for the base.
P1000514.jpg
P1000524.jpg
P1000525.jpg

Later! ;D Joolz
 
Hi Mac,
Its extruded polystyrene insulation that's used in the construction industry.
Got it off E-bay 2' x 2' x 3" slabs that I had to make thinner (approx 1/2", 5/8" thick) using a hot wire cutter.
Joolz.
 

Latest posts

Back
Top