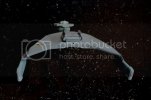
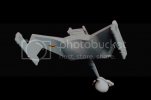
Klingon D7 Battle Cruiser Reissue by AMT
- Thread starter trekriffic
- Start date
trekriffic
Well-Known Member
- Joined
- Jan 6, 2012
- Messages
- 1,021
Well yesterday I got her sanded and ready for her grey primer coats. Would have gotten more done today if not for needing to run over to Urgent Care with the wife to wheel my father-in-law over across the way to the Emergency room to look at this swollen leg...
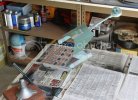
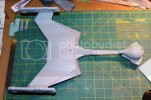
Here she is after her first grey primer coat. I used Tamiya Fine Surface Primer...
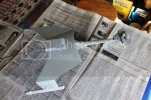

She only needed about a half dozen spots touched up with sanding, Mr Surfacer and/or Tamiya putty, followed by more fine grit sanding. And I kept finding these little stray specks of AVES putty here and there that needed to be picked off and sanded so as not to leave a tiny divot behind. This process is what I have heard people like Steve Neill call "pointing up" I think.
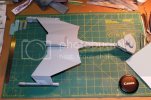
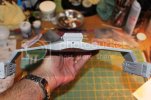
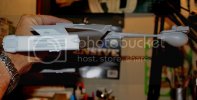
Anyway, here she is cleaned up after her second coat of grey primer:
The next step is to shoot the undersides with white primer before mixing up the color coats.
Tomorrow I have to go back to hospital though to see how my father-in-law is doing after a night of blood thinners to help keep any more blood clots from forming in his upper leg. The doctors want to keep him at the hospital few nights since it's possible for a blood clot to break loose and go to his lungs which could be fatal. So until his condition improves I'm afraid you won't be seeing many progress pics for a few days. I'm sure you all understand.
Take care of each other and I'll be back soon guys!

Here she is after her first grey primer coat. I used Tamiya Fine Surface Primer...


She only needed about a half dozen spots touched up with sanding, Mr Surfacer and/or Tamiya putty, followed by more fine grit sanding. And I kept finding these little stray specks of AVES putty here and there that needed to be picked off and sanded so as not to leave a tiny divot behind. This process is what I have heard people like Steve Neill call "pointing up" I think.
Anyway, here she is cleaned up after her second coat of grey primer:


The next step is to shoot the undersides with white primer before mixing up the color coats.
Tomorrow I have to go back to hospital though to see how my father-in-law is doing after a night of blood thinners to help keep any more blood clots from forming in his upper leg. The doctors want to keep him at the hospital few nights since it's possible for a blood clot to break loose and go to his lungs which could be fatal. So until his condition improves I'm afraid you won't be seeing many progress pics for a few days. I'm sure you all understand.
Take care of each other and I'll be back soon guys!
ModelMakerMike
"It's Slobberin' time""
- Joined
- May 28, 2011
- Messages
- 1,838
Well, I hope the Father in Law is okay...
The ship is looking mighty sharp and clean! Good Job!!!! ;D ;D ;D
The ship is looking mighty sharp and clean! Good Job!!!! ;D ;D ;D
Glorfindel
Active Member
- Joined
- May 2, 2011
- Messages
- 1,504
Beautiful. Very very clean.
trekriffic
Well-Known Member
- Joined
- Jan 6, 2012
- Messages
- 1,021
Back at it last night and at lunchtime today...
I masked the upper engineering hull and the top of the command deck with Tamiya tape:
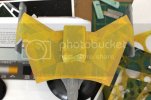
For the upper command deck I took some measurements and drew out the shapes in pencil:
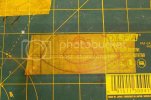
Then I cut the mask with my xacto knife and stuck it down. It was prettyy close. Only a few extra tape bits added to cover little gaps:
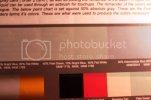
I'm using the color scheme favored by Custom Replicas. I used their mixing chart as my guide:
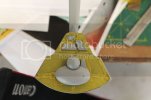
Demarcations were drawn on a piece of tape and stuck to the side of the paint bottle to denote mixing ratios:
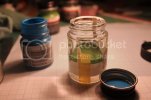
The recipe called for 50% flat white, 40% pale green, and 10% bright blue but it seemed too dark to me so I added more flat white until I got the tone I thoght looked right
After masking the ship was sprayed with Testors flat white. This is the base for the pale blue-green colors:
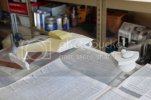
Here's the ship after it's first coat of what I'll call palest blue-green. This is the color of the bulb, upper command deck structures, and flared side blocks on either side at the base of the neck:
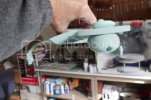
The rest of the paler blue-green was airbrushed on the lower hull and warp engines:
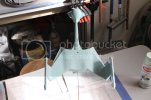
The bulb was completely masked as well as the flared bits at the base of the neck and the hull was sprayed with a slightly darker shade of the pale blue-green:
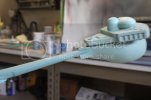
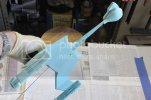
The color is very close to that shown in this photo:
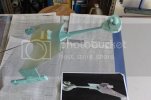
Close up of the bow deflector tunnel. The photo showed me a little speck at the base of the port disruptor blister I needed to clean up. It has since been scraped off and retouched:

Next step is to remove the rest of the masking tape from the upper hull surfaces and mix up the dorsal color. This will be a 50/50 mix of Model Master Intermediate Blue and Flat White enamel.
Thanks for reading along.
P.S. For those wondering about my father-in-law, he is doing better but is still in the hospital.
Hopefully he'll be discharged before the weekend. The swelling in his leg has gone down quite a bit.
I masked the upper engineering hull and the top of the command deck with Tamiya tape:

For the upper command deck I took some measurements and drew out the shapes in pencil:

Then I cut the mask with my xacto knife and stuck it down. It was prettyy close. Only a few extra tape bits added to cover little gaps:

I'm using the color scheme favored by Custom Replicas. I used their mixing chart as my guide:

Demarcations were drawn on a piece of tape and stuck to the side of the paint bottle to denote mixing ratios:

The recipe called for 50% flat white, 40% pale green, and 10% bright blue but it seemed too dark to me so I added more flat white until I got the tone I thoght looked right
After masking the ship was sprayed with Testors flat white. This is the base for the pale blue-green colors:

Here's the ship after it's first coat of what I'll call palest blue-green. This is the color of the bulb, upper command deck structures, and flared side blocks on either side at the base of the neck:

The rest of the paler blue-green was airbrushed on the lower hull and warp engines:

The bulb was completely masked as well as the flared bits at the base of the neck and the hull was sprayed with a slightly darker shade of the pale blue-green:


The color is very close to that shown in this photo:

Close up of the bow deflector tunnel. The photo showed me a little speck at the base of the port disruptor blister I needed to clean up. It has since been scraped off and retouched:

Next step is to remove the rest of the masking tape from the upper hull surfaces and mix up the dorsal color. This will be a 50/50 mix of Model Master Intermediate Blue and Flat White enamel.
Thanks for reading along.
P.S. For those wondering about my father-in-law, he is doing better but is still in the hospital.
Hopefully he'll be discharged before the weekend. The swelling in his leg has gone down quite a bit.
trekriffic
Well-Known Member
- Joined
- Jan 6, 2012
- Messages
- 1,021
Today's update...
I mixed up some Testors Flat White with ModelMaster Intermediate Blue and aiirbrushed the upper surfaces.
I still hadn't attached the upper slanted panels to the sides of the hangar/impulse deck housing since I wanted to spray some of the final color on the backside of those pieces and the sides of the housing before gluing them on.
I placed pieces of Tamiya tape on the backs of the panels and the sides of the housing beforehand so no paint would cover where I needed to apply the glue.
After the paint had dried a few hours (while I went to COSTCO and grazed the sample stations) I glued the panels in place.
I expected some gaps and wasn't disappointed by good ol' AMT!
I used a syringe filled with Perfect Plastic Putty, a water based fine surface filler, to inject the putty into the gaps:
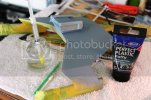
Then I cleaned up any residue using a q-tip and a microbrush.
The result was so clean and neat I didn't bother with sanding:
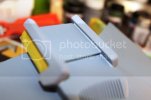
After waiting about 30 minutes for the putty to dry I gave her a quick once over with 600 grit sanding film and shot her with another slightly darker mix of the intermediate blue/white enamel.
I also added 2-3 drops of purple to the mix this time although the effect of the purple isn't really noticeable:
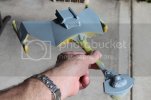
She was dry to the touch after an hour.
Thanks for reading!
I mixed up some Testors Flat White with ModelMaster Intermediate Blue and aiirbrushed the upper surfaces.
I still hadn't attached the upper slanted panels to the sides of the hangar/impulse deck housing since I wanted to spray some of the final color on the backside of those pieces and the sides of the housing before gluing them on.
I placed pieces of Tamiya tape on the backs of the panels and the sides of the housing beforehand so no paint would cover where I needed to apply the glue.
After the paint had dried a few hours (while I went to COSTCO and grazed the sample stations) I glued the panels in place.
I expected some gaps and wasn't disappointed by good ol' AMT!
I used a syringe filled with Perfect Plastic Putty, a water based fine surface filler, to inject the putty into the gaps:

Then I cleaned up any residue using a q-tip and a microbrush.
The result was so clean and neat I didn't bother with sanding:

After waiting about 30 minutes for the putty to dry I gave her a quick once over with 600 grit sanding film and shot her with another slightly darker mix of the intermediate blue/white enamel.
I also added 2-3 drops of purple to the mix this time although the effect of the purple isn't really noticeable:

She was dry to the touch after an hour.
Thanks for reading!
trekriffic
Well-Known Member
- Joined
- Jan 6, 2012
- Messages
- 1,021
Update...
Peeled off all the masking tape Friday evening. Saturday I glued on the silver vents on the sides of the impulse/hangar deck housing. I also painted the stairsteps on the sides of the command deck. I also went back over the whole ship with a keen eye and pointed up any spots that needed it with a brush and some of the thinned basecoat colors.
Sunday, after much thought, I decided I wanted it to look a little more like what was seen on screen, which was basically grey, so I mixed up a batch of Light Ghost Grey, Flat White, Floquil Flat Base, and about 70% thinner and gave the entire hull an airbrushing with the mix. It served to mute the colors and impart a grey cast to the ship so I have something in between the two toned pale green, blue-grey look and the monotone grey seen on TV. It also helped to blend and unify the whole look of the ship without obliterating the two tone scheme.
Here are some pics:
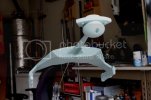
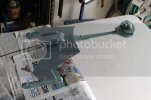
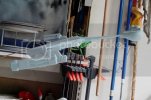
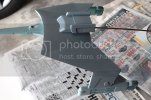
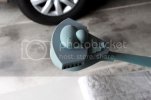
Now while the miodel has a dead flat finish I have to decide if I want to do any weathering with pastel chalks or leave it clean. The studio model had none but even if I just did a little weathering in the recesses I think it would help to suggest shadows and impart a sense of large scale. If not for the fact the model as seen on screen was unweathered it woudl be an easy decision. I'm open to suggestions fellow addicts so please weigh in with your thoughts about the weathering question.
Peeled off all the masking tape Friday evening. Saturday I glued on the silver vents on the sides of the impulse/hangar deck housing. I also painted the stairsteps on the sides of the command deck. I also went back over the whole ship with a keen eye and pointed up any spots that needed it with a brush and some of the thinned basecoat colors.
Sunday, after much thought, I decided I wanted it to look a little more like what was seen on screen, which was basically grey, so I mixed up a batch of Light Ghost Grey, Flat White, Floquil Flat Base, and about 70% thinner and gave the entire hull an airbrushing with the mix. It served to mute the colors and impart a grey cast to the ship so I have something in between the two toned pale green, blue-grey look and the monotone grey seen on TV. It also helped to blend and unify the whole look of the ship without obliterating the two tone scheme.
Here are some pics:


Now while the miodel has a dead flat finish I have to decide if I want to do any weathering with pastel chalks or leave it clean. The studio model had none but even if I just did a little weathering in the recesses I think it would help to suggest shadows and impart a sense of large scale. If not for the fact the model as seen on screen was unweathered it woudl be an easy decision. I'm open to suggestions fellow addicts so please weigh in with your thoughts about the weathering question.
Glorfindel
Active Member
- Joined
- May 2, 2011
- Messages
- 1,504
Looking nice and sanitary. Clean build is a great build. I like what your doing here Trek.
trekriffic
Well-Known Member
- Joined
- Jan 6, 2012
- Messages
- 1,021
Update on my weathering adventure... or how to turn a mess into something perhaps better...
So I broke out the Tamiya pastel chalks, a sponge applicator, microbrushes, cotton swabs, and a cloth for wiping and got to work:
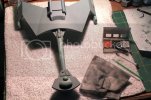
I scraped the gunmetal colored chalk in the container with the edge of my xacto blade and rubbed the powder into the finish with the sponge applicator. I found moistening the tip of the applicator helped the chalk to stick better:
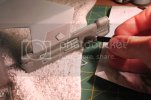
For narrow spaces I used a fine tipped microbrush to get the chalk in there:
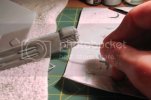
Using a cloth I rubbed the chalk into the finish. In the case of too much weathering I moistened the cloth and swiped the surface to remove the chalk. You can also use the same technique to create streaks:
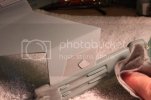
Here's where the mess started...
After I got the weathering to where I liked it I shot the model with Dullcote to seal it.
Unfortunately, I didn't have any fresh cans so I used a can about 1/3 full. While spraying I held the can too close and over the model (again if I'd had a fresh can I could have held it back further from the model) and the Dullcote puddled on the tip and a big drop of it fell onto the wing of the secondary hull!
I saw it pretty quick and brushed it out with a wide artists brush as best I could but you could still see brush strokes after it dried.
So I tried sanding it out but that removed too much of the weathering and it looked like a big blotch on the wing.
Crap!
So I decided to repaint the upper wing using what was left of the intermediate blue/white paint leftover from airbrushing.
One thing led to another and I ended up repainting everything (including the lower surfaces and engines with the pale jade green) but the command bulb using 1" wide and 1/2" wide flat brushes.
I was cognizant to try and not to leave any brush strokes as I went by mixing in a little thinner with the paint as I applied it.
After it dried I wet sanded using 320 and 600 grit sanding films until I had gotten rid of most of the remaining brush strokes while giving the surface of the model a little more texture than it had before which was a nice result.
Unfortunately, this also eliminated most of the weathering underneath so last night I went back and re-weathered the entire hull (except for the command bulb).
Then I got an idea.
Using what was left of the enamel ghost grey and adding a little voodoo grey to it I mixed up a thinned down batch of paint and airbrushed it over the top of the weathering like I had done once before to mute the contrast between the grey-blue and blue-green colors. I let that dry and this morning went back and wet sanded it using the grey and red sanding films. This allowed more of the original colors to show thru as well as some of the weathering. It also imparted a worn, distressed look to the hull finish similar to what I've seen done with antique furniture. Overall, I like the look I ended up with. It's still fairly subtle but it definitely looks like this ship has seen some hard years of service to the Empire...
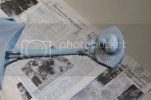
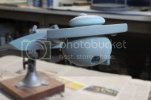
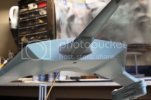
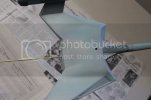
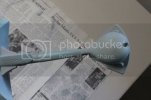
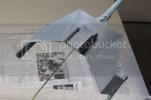
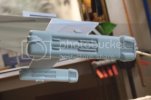
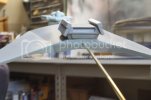
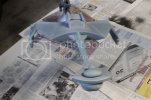
Next up... sealing with Glosscote and mylar tape...
So I broke out the Tamiya pastel chalks, a sponge applicator, microbrushes, cotton swabs, and a cloth for wiping and got to work:

I scraped the gunmetal colored chalk in the container with the edge of my xacto blade and rubbed the powder into the finish with the sponge applicator. I found moistening the tip of the applicator helped the chalk to stick better:

For narrow spaces I used a fine tipped microbrush to get the chalk in there:

Using a cloth I rubbed the chalk into the finish. In the case of too much weathering I moistened the cloth and swiped the surface to remove the chalk. You can also use the same technique to create streaks:

Here's where the mess started...
After I got the weathering to where I liked it I shot the model with Dullcote to seal it.
Unfortunately, I didn't have any fresh cans so I used a can about 1/3 full. While spraying I held the can too close and over the model (again if I'd had a fresh can I could have held it back further from the model) and the Dullcote puddled on the tip and a big drop of it fell onto the wing of the secondary hull!
I saw it pretty quick and brushed it out with a wide artists brush as best I could but you could still see brush strokes after it dried.
So I tried sanding it out but that removed too much of the weathering and it looked like a big blotch on the wing.
Crap!
So I decided to repaint the upper wing using what was left of the intermediate blue/white paint leftover from airbrushing.
One thing led to another and I ended up repainting everything (including the lower surfaces and engines with the pale jade green) but the command bulb using 1" wide and 1/2" wide flat brushes.
I was cognizant to try and not to leave any brush strokes as I went by mixing in a little thinner with the paint as I applied it.
After it dried I wet sanded using 320 and 600 grit sanding films until I had gotten rid of most of the remaining brush strokes while giving the surface of the model a little more texture than it had before which was a nice result.
Unfortunately, this also eliminated most of the weathering underneath so last night I went back and re-weathered the entire hull (except for the command bulb).
Then I got an idea.
Using what was left of the enamel ghost grey and adding a little voodoo grey to it I mixed up a thinned down batch of paint and airbrushed it over the top of the weathering like I had done once before to mute the contrast between the grey-blue and blue-green colors. I let that dry and this morning went back and wet sanded it using the grey and red sanding films. This allowed more of the original colors to show thru as well as some of the weathering. It also imparted a worn, distressed look to the hull finish similar to what I've seen done with antique furniture. Overall, I like the look I ended up with. It's still fairly subtle but it definitely looks like this ship has seen some hard years of service to the Empire...


Next up... sealing with Glosscote and mylar tape...
trekriffic
Well-Known Member
- Joined
- Jan 6, 2012
- Messages
- 1,021
Similar threads
- Replies
- 5
- Views
- 598

