Leif Ericson Galactic Cruiser
- Thread starter trekriffic
- Start date
NecronautDrummer
Member
- Joined
- Sep 25, 2011
- Messages
- 804
Man, I can't state enough how cool this build quality is!!
BTW, the Tamiya Flat Base stuff.... I've seen lots of people make the same mistake. The fix is to apply some sort of clear coat (enamel or acrylic; flat, satin or clear, I don't think it matters) over it, and the fogging disappears.
BTW, the Tamiya Flat Base stuff.... I've seen lots of people make the same mistake. The fix is to apply some sort of clear coat (enamel or acrylic; flat, satin or clear, I don't think it matters) over it, and the fogging disappears.
trekriffic
Well-Known Member
- Joined
- Jan 6, 2012
- Messages
- 1,021
NecronautDrummer said:Man, I can't state enough how cool this build quality is!!
BTW, the Tamiya Flat Base stuff.... I've seen lots of people make the same mistake. The fix is to apply some sort of clear coat (enamel or acrylic; flat, satin or clear, I don't think it matters) over it, and the fogging disappears.
Yes. Most of it disappeared with a coat of Future, thankfully. What I coudln't get rid of I touched up with some of the Tamiya spray lacquer decanted and brushed on.
trekriffic
Well-Known Member
- Joined
- Jan 6, 2012
- Messages
- 1,021
Karlov1985 said:
Killer ! just Killer
my man ! what do they put in your Water over there ???
LOL
Thanks man! The tap water in Fremont is pretty high quality actually.
trekriffic
Well-Known Member
- Joined
- Jan 6, 2012
- Messages
- 1,021
Quaralane said:Really liking those impulse engines
Thanks! They turned out pretty well I think.
Here are some pics from yesterday's work...
The slots in the hull where the ion engine tabs fit were moved back about 1/16" so the wing now slides into the rear engine fin slot:
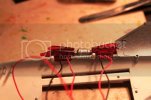
Pieces of Evergreen strip were cut to fill the gaps left from moving the engines back.
Fiber runs from the forward wall landing light holes were gathered and wrapped with foil tape then inserted into a tube where a high brightness white LED was mounted between the hangar control tower LEDs:
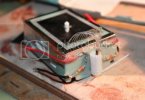
The side wall landing light fiber runs as well as the side windows will be lit by an LED mounted facing downward:
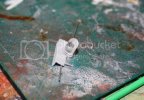
The LEDs for the fibers runs were mounted after gluing the hangar bay to the upper hull. The side wall LEDs have shrouds made from stacking two dental floss hubs together with CA.
The shrouds will glow allowing the windows to illuminate:
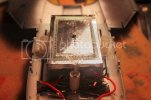
All LED leads were soldered and a test showed all seven LEDs operated perfectly (whew)!
The blue LEDs for the impulse engines:
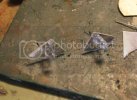
Light boxes were glued together with CA from sheet styrene and lined with adhesive backed aluminum foil:
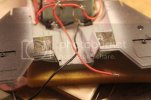
The finished impulse engine light boxes:
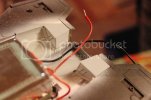
I'll wrap some more foil tape around the outside of the light boxes over the seams as an added light block.
Next step is to finish the fiber runs.
Then I'll finish the wiring in the lower hull for the ion engines, solder the leads from the upper hull to the leads in the lower hull (some trickiness involved with that), and glue the upper and lower hulls together.
Before that though I'm toying with the idea of making some tiny crew silhouetttes out of foil and sticking them behind a few of the windows in the hangar bay and the oval windows in the neck.
I think that would really enhance the realism of this model.
Thanks for reading!
ModelMakerMike
"It's Slobberin' time""
- Joined
- May 28, 2011
- Messages
- 1,838
This thing is going to be absolutely beautiful when completed.
I am amazed at the amount of detail work you're putting into it!
;D ;D ;D
I am amazed at the amount of detail work you're putting into it!
;D ;D ;D
The Nylon Gag
New Member
- Joined
- Nov 14, 2011
- Messages
- 829
This thing is fantastic buddy, 
loving the details your adding
Gag
loving the details your adding
Gag
ScreamingSamuraiStudio
New Member
- Joined
- May 13, 2009
- Messages
- 257
WOW..absotively posilutely fantastic!!
ModelMakerMike
"It's Slobberin' time""
- Joined
- May 28, 2011
- Messages
- 1,838
ScreamingSamuraiStudio said:WOW..absotively posilutely fantastic!!
I thought I was the only one who said "Absotively, posilutely" !!!!
-Great minds?
schweinhund227
New Member
- Joined
- Jun 24, 2009
- Messages
- 2,511
Nice to see you go, All out on this kit! Keep up the good work!
trekriffic
Well-Known Member
- Joined
- Jan 6, 2012
- Messages
- 1,021
Here are the latest pics from today...
I took some clear acrylic rod and spun it in my dremel using a scribing tool like a lathe to make a round observation dome to sit just behind the bridge.
I thought it would be useful for the crew to have a point where they could look directly aft over the stern of the ship:
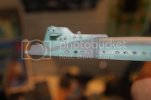
You can also see where some of the windows were blacked out as I figured not every cabin light would be on all of the time in the ship.
I also cut some tiny figures out of foil tape and stuck them behind a few of the windows in the neck as well as some of the observation windows in the launch bay.
The figures show up as shadows behind the ports and windows which were painted on the inside with acrylic fluorescent overcoat.
The overcoat glows well when light hits it and makes the windows more opaque; otherwise, the Envirotex was so clear you could see the inside of the hull which I didn't really want.
Even sanding didn't work to make the windows less transparent.
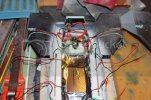
The wiring is finished for the lower hull. There are basically 1 negative and 2 positive leads to solder to leads from the upper hull:
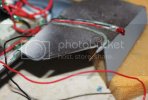
Laser cannons and flashing formation lights finished...
.50mm fiber was run thru a channel in each wing to metal barrels made from resin syringe needles.
The needles were the perfect size to fit the fiber strands.
I also carved channels to wire up red and green flashing LEDs connected in series and mounted in the nexus of each wing:
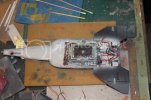
The lower hull ready to be sealed up.
You can see how the fibers from the laser cannons run forward to a piece of clear styrene sheet mounted in front of the main forward facing LED.
The fibers really pick up the light well and the wing-mounted lasers really glow nicely at their tips!
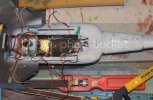
The upper hull almost ready for gluing to the lower hull. Lots of wires. Still need to finish attaching the fiber runs to the light for the rear wall of the launch bay:
Closeup of the fiber runs for the launch bay landing lights.
A 1/16" section was sawed out of the center of the tubes on the sidewalls then glued back together to allow the upper and lower hulls to mate properly:
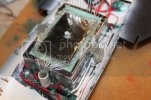
Upper hull showing rear wall of launch bay:
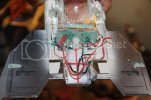
I had to mount a fourth LED for the rear wall landing lights. Once the epoxy has set up good and solid I'll bend the fibers over and wrap the ends with aluminum foil tape before trimming the ends flush with my scissors.
Then I'll fill the LED tube with 5 minuter epoxy and glue the fibers into the top of the tube.
Since I had an extra LED in the stern now I decided to add a red light to the top of the stern hull plate.
A hole was drilled in the hull and another in the side of the LED tube and red acrylic rod was inserted thru the stern and into the tube.
Now I've got a red glowing light in the stern of the ship that I didn't plan on having before the lighting modifications were needed.
Nice!
My next pics should show the hull halves finally sealed up!
Thanks for reading!
I took some clear acrylic rod and spun it in my dremel using a scribing tool like a lathe to make a round observation dome to sit just behind the bridge.
I thought it would be useful for the crew to have a point where they could look directly aft over the stern of the ship:

You can also see where some of the windows were blacked out as I figured not every cabin light would be on all of the time in the ship.
I also cut some tiny figures out of foil tape and stuck them behind a few of the windows in the neck as well as some of the observation windows in the launch bay.
The figures show up as shadows behind the ports and windows which were painted on the inside with acrylic fluorescent overcoat.
The overcoat glows well when light hits it and makes the windows more opaque; otherwise, the Envirotex was so clear you could see the inside of the hull which I didn't really want.
Even sanding didn't work to make the windows less transparent.
The wiring is finished for the lower hull. There are basically 1 negative and 2 positive leads to solder to leads from the upper hull:

Laser cannons and flashing formation lights finished...
.50mm fiber was run thru a channel in each wing to metal barrels made from resin syringe needles.
The needles were the perfect size to fit the fiber strands.
I also carved channels to wire up red and green flashing LEDs connected in series and mounted in the nexus of each wing:

The lower hull ready to be sealed up.
You can see how the fibers from the laser cannons run forward to a piece of clear styrene sheet mounted in front of the main forward facing LED.
The fibers really pick up the light well and the wing-mounted lasers really glow nicely at their tips!

The upper hull almost ready for gluing to the lower hull. Lots of wires. Still need to finish attaching the fiber runs to the light for the rear wall of the launch bay:

Closeup of the fiber runs for the launch bay landing lights.
A 1/16" section was sawed out of the center of the tubes on the sidewalls then glued back together to allow the upper and lower hulls to mate properly:

Upper hull showing rear wall of launch bay:

I had to mount a fourth LED for the rear wall landing lights. Once the epoxy has set up good and solid I'll bend the fibers over and wrap the ends with aluminum foil tape before trimming the ends flush with my scissors.
Then I'll fill the LED tube with 5 minuter epoxy and glue the fibers into the top of the tube.
Since I had an extra LED in the stern now I decided to add a red light to the top of the stern hull plate.
A hole was drilled in the hull and another in the side of the LED tube and red acrylic rod was inserted thru the stern and into the tube.
Now I've got a red glowing light in the stern of the ship that I didn't plan on having before the lighting modifications were needed.
Nice!
My next pics should show the hull halves finally sealed up!
Thanks for reading!
trekriffic
Well-Known Member
- Joined
- Jan 6, 2012
- Messages
- 1,021
Got some more work done today; mostly duirng my lunch break. One of the virtues of working from home!
First thing was to bundle the fibers for the rear wall landing light together, wrap them with foil tape, and stick them down into the LED illumination tube on the rear wall with Devcon 5-minute epoxy:
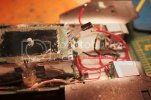
After the epoxy set up I plugged the lower hull into the stand and then clamped the upper hull in my portable vice positioning it so the wires were close enough to solder together.
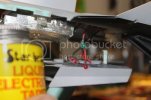
Once the soldering was done I coated the solder joints with Liquid Electrical Tape to insulate them. That stuff stinks but it sure does the trick!:
Before gluing the hulls together I turned on the power and checked the lights. Before that though I heeded Lloyd Collins' warning over on The Tholian Web forum and made sure I had my blast goggles on and stacked some sandbags up between me and the model...
Then came the moment of truth... I flicked the switch and ... BOOM! There was a loud concusive blast rendering me momentarily unconscious. Once the smoke had cleared I found myself lying in a heap acrosss the street from what used to be my garage...
Just kidding folks... ;D
The impulse engines lit up NICE! Just a beautuful blue glow thru the PE mesh; the photo really doesn't show how blue they are but you get the idea:
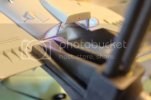
And my litttle stern light made from red acrylic rod glows too!
The lights in the launch bay all work now:
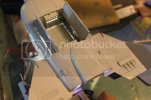
One confession I have to make to stupdity is, when I did a dry run last night, I noticed the forward control room wasn't lighting up!
:'(
FRACK thought I! What the heck???
Found out I'd unhooked the main positive wire from the circuit for those two LEDs when I installed the LED to light the rear wall landing light fibers.
I'd had to remove a red wire that was in the way of the LED tube and forgotten to reconnect it.
:-[
Once I resoldered the wire the windows sprang back to life!
To quote C3PO, "Thank the maker!"

The side wall windows lit up:
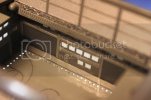
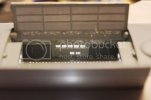
You can't see it in this poorly focused photo but there are crew silhouettes visible behind the windows.
I also noticed some of the paint had flaked off the one launch door so will need to retouch some spots with the brush.
The upper and lower hulls finally are glued together and clamped:
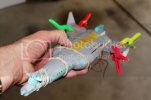
Next it'll be time for a little seam filling and sanding.
Then it'll be time to mask off the windows and impulse engines.
I'll also need to figure out how to cover the launch bay opening so no uwanted paint gets in there.
Then will follow the priming.
Then maybe more seam filling and sanding.
Then more priming.
Repeat as needed...
Thanks for following along everyone!
First thing was to bundle the fibers for the rear wall landing light together, wrap them with foil tape, and stick them down into the LED illumination tube on the rear wall with Devcon 5-minute epoxy:

After the epoxy set up I plugged the lower hull into the stand and then clamped the upper hull in my portable vice positioning it so the wires were close enough to solder together.
Once the soldering was done I coated the solder joints with Liquid Electrical Tape to insulate them. That stuff stinks but it sure does the trick!:

Before gluing the hulls together I turned on the power and checked the lights. Before that though I heeded Lloyd Collins' warning over on The Tholian Web forum and made sure I had my blast goggles on and stacked some sandbags up between me and the model...
Then came the moment of truth... I flicked the switch and ... BOOM! There was a loud concusive blast rendering me momentarily unconscious. Once the smoke had cleared I found myself lying in a heap acrosss the street from what used to be my garage...
Just kidding folks... ;D
The impulse engines lit up NICE! Just a beautuful blue glow thru the PE mesh; the photo really doesn't show how blue they are but you get the idea:

And my litttle stern light made from red acrylic rod glows too!
The lights in the launch bay all work now:

One confession I have to make to stupdity is, when I did a dry run last night, I noticed the forward control room wasn't lighting up!
:'(
FRACK thought I! What the heck???
Found out I'd unhooked the main positive wire from the circuit for those two LEDs when I installed the LED to light the rear wall landing light fibers.
I'd had to remove a red wire that was in the way of the LED tube and forgotten to reconnect it.
:-[
Once I resoldered the wire the windows sprang back to life!
To quote C3PO, "Thank the maker!"
The side wall windows lit up:


You can't see it in this poorly focused photo but there are crew silhouettes visible behind the windows.
I also noticed some of the paint had flaked off the one launch door so will need to retouch some spots with the brush.
The upper and lower hulls finally are glued together and clamped:

Next it'll be time for a little seam filling and sanding.
Then it'll be time to mask off the windows and impulse engines.
I'll also need to figure out how to cover the launch bay opening so no uwanted paint gets in there.
Then will follow the priming.
Then maybe more seam filling and sanding.
Then more priming.
Repeat as needed...
Thanks for following along everyone!
ModelMakerMike
"It's Slobberin' time""
- Joined
- May 28, 2011
- Messages
- 1,838
That's an amazing amount of work, and I am sure it will look fantastic, all finished.
I noticed that the floor of the Landing bay looked a little like a basketball court....or at least it did in one pic.

I wish I had the patience to do that sort of work.
I noticed that the floor of the Landing bay looked a little like a basketball court....or at least it did in one pic.
I wish I had the patience to do that sort of work.
Similar threads
- Replies
- 7
- Views
- 1K
- Replies
- 5
- Views
- 480
- Replies
- 29
- Views
- 3K
- Replies
- 7
- Views
- 732
