M4A1 Sherman newb build.

fubar

New Member
Joined
Nov 10, 2011
Messages
502
OK as my A-Wing project has hit trouble with it's fibre optics and my Cromwell is lost somewhere in the Royal Mail postal system it's time to start a side project to keep my addiction at bay. lol

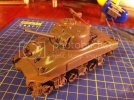
This time i'm going to make a Tamiya 1/48 M4A1 Sherman, this is my first ever tank build (i dont count the Tiger i made when i was about 11 :p) so any tips or thoughts are more than welcome as i'm still very new to this hobby.
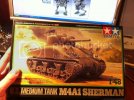
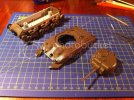
IMG_1103.jpg

I want to make this a fairly straight forward build, and use my airbrush for the first time and try my hand at some weathering effects, nothing too heavy just beginners stuff really on dirtying up a tank. I have an Olive drab paint set that came with the airbrush i will use and i bought a couple of the excellent looking AK weathering sets which i'm really looking forwards to trying out.
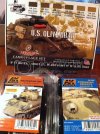
IMG_1109.jpg

I've decided to go for paint scheme C, the 7th Armoured Div, France, Summer '44 as i also plan on painting up my Cromwell for a similar period and i can use this build as a practice.
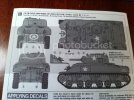
IMG_1107.jpg

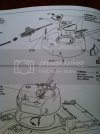
First thoughts about the kit are that it looks very nicely cast with some very fine details, after looking at the plans i have a few noob questions which will prolly sound daft to you guys but i'll ask them anyways. ;D

The plans seem to indicate that you should paint the wheels and sprockets before assembling up the suspension assemblies, is this correct?

Do you fit all the small doodads like tools and headlights before spraying up the whole model?

Whats a poly cap for? I thought they were for use on moving parts but the tracks on this are solid parts glued in place. ???
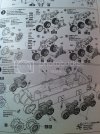
IMG_1105.jpg

Any ways i plan to start into this tonight and with the xmas break coming up i hope to have plenty of time to work on this before Santa gets here with my crate of Ales. ;)

TTFN Matt
 
Love that Lifecolor set. 8)

fubar said:
The plans seem to indicate that you should paint the wheels and sprockets before assembling up the suspension assemblies, is this correct?

Do you fit all the small doodads like tools and headlights before spraying up the whole model?

It's a personal choice really, I tend to assemble as much as possible in bare plastic to avoid glue marks in my paint etc. and paint the entire kit once assembled... tracks/tires are usually the only thing I leave off.

Others paint as they go.

fubar said:
Whats a poly cap for? I thought they were for use on moving parts but the tracks on this are solid parts glued in place. ???

If done correctly, the poly cap will allow you to spin the sprocket/tire on the axle, which will be very helpful if you choose to paint the teeth/tire after the kit is completely assembled.
 
To be honest i'd never heard of Lifecolor before but when i bought the airbrush and compressor kit you got to choose a paint set to go with it so i figured that would be most useful to me. ;D

Most of my other paints are either Tamiya or Citadel.

TTFN Matt
 
Managed to get in a couple of hours modelling tonight. :)

So far i've got the transmission cover and rear panels assembled up, everything is fitting perfectly so far.....i wonder how long thats going to last?

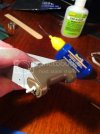
IMG_1120.jpg

IMG_1122.jpg

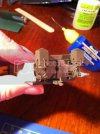
I'm now onto assembling the suspension gear and drive gears.

IMG_1123.jpg

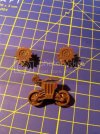
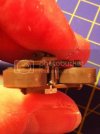
Think i'll leave the model in four main parts for painting, lower hull, upper hull, turret and tracks. Is there a knack for sanding away the mold lines on the wheels because so far it's taken me ages just to prep two wheels! Using sand paper or needle files just feels awkward some how and i'm sure i'm missing a much easier way to do it. ::)

IMG_1124.jpg

TTFN Matt
 
I just started this same kit myself....it's my first armor build also, so I'll be learning right along with you! Everything fit perfectly for me. I have most of the main assembly done, and I'm fiddling around with a PE set right now
 
Wow you guys are spot on, this all fits together great. :eek:

Guess i'm used to AMT/ERTL kits where nothing fits the way it should. :p

@redraider56. Cool little kit aint it, so what PE set did you get and what scheme are you painting yours in?

TTFN Matt
 
I got Voyager's PE set since it was the cheapest I found and I'm going with option C for the markings. I got a stowage set from Legend and also some Tamiya figures so I can make a little mini dio with it. I'll get a thread going one of these days
 
LOL...posted earlier, but must have been bumped! Nice work so far Fubar!!!! ;D Making some decent progress!!!

As for the wheels...I took a toothpick and or a dremel bit that would fit into the wheel hole and then stuck it into my dremel on LOW speed. Used a needle file then some sandpaper...like a mini-hanheld-lathe!!! ;) Worked like a charm at bringing them seams down!

Keep ti going here!!! 8)
 
Thats a cool idea using the Dremel to sand the seams down....why didn't i think of that. *smacks forehead* ;D

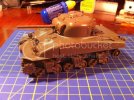
Well i put the first day of my hols to good use......i finished the build part of the kit bar a few things like tracks. All three main sub-assemblies are done and ready to paint. You were dead right that kit was a pleasure to build compared to my usual sci-fi kits. 8)

IMG_1128.jpg

IMG_1131.jpg

I do have a few questions i was going to ask you more experienced tank modellers.

1. What do you make aerials out of because i would like to fit one to the aerial bracket.

2. Which colour should i use to prime the model, i was going to use white but have a sneaking feeling i should use black instead?

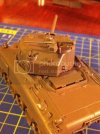
3. I haven't fitted the .50 cal on the turret because it just feels wrong, is that really how the gun would have been mounted? It looks like its blocking the commanders hatches and he can only fire the gun to the rear as the MG mount looks fixed to the rear of his hatch!

IMG_1132.jpg

Merry Xmas Matt
 
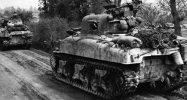
Yea, thats how the .50 is mounted. The pintle (its mount) could be rotated 360 degrees. The entire commander's hatch (cupola) could be rotated as well and since the pintle attaches to the cupola, the .50 wouldn't always be at the rear, depending on the rotation of the cupola. Also, the tank commander would not always be the guy firing the .50. Another solider could be standing behind the turret and fire it when the hatch was closed. Just do a google search of the M4A1 and you'll find pictures with the gun and cupola in different positions. Hope this helps!

Here's one pic that shows the hatch open with the barrel of the .50 pushed to the side to allow the doors of the hatch to open

US-Sherman-06.jpg
 
Looks really good! Nice and clean.

An easy way to make aerials is stretched sprue, I've used tons of different things over the years and still go back to stretched sprue for it's ease of use and cost (free lol)

You can prime any color you like, I personally choose black because it also acts as a pre shade.

That .50 call is mounted correctly, the whole hatch assembly swivels in the turret allowing the weapon to be located anywhere around the entire perimeter.

HTH
 
redraider56 said:
I just started this same kit myself....it's my first armor build also, so I'll be learning right along with you! Everything fit perfectly for me. I have most of the main assembly done, and I'm fiddling around with a PE set right now

About a year or so ago, it was my very first armor build as well.
This kit has only one flaw (as fas as I'm concerned).
It's in 1/48.....way to small for these tired eyes!
But it's a great little kit. ;)
 
Thanks guys, well i just couldn't go to bed knowing that i could fit those last bits now. ;D

I swung the .50 to one side and gave it a slight tilt downwards. I looked at lots of pics on google and most seemed to have no visible aerial so i've just fitted the bracket for now, i may well still add an aerial at a later date.

IMG_1134.jpg

IMG_1135.jpg

TTFN Matt
 
Looks terrific. Really clean. Coming for nothing much other than sci-fi I totally get your...WOW THIS ISN'T ERTL...thing. With the exception of Fine Molds kits most of the sci-fi stuff is alot of work.

A build that goes together easily is alot of fun...get right to painting in no time. Great to see you taking this on.
 
Very clean work ! not a glue mark in sight ;D


i think the best advice i can give you for weathering is take your time, and take plenty of breaks as when you come back to it you may notice something thats needs attention.....but most important of all just have a good time ;D


merry christmas,

shane.
 
Thanks guys. :)

I really enjoyed making this model, i just hope i can do a half decent paint job as painting is deff my weakest link. :p

The plan is to start painting boxing day, hangover permitting ;D, and i'll just start off with a basic coat of Olive Drab from that Lifecolor paintset. After that well i have no idea how to procede so it'll be a mini holiday adventure of sorts. 8)

Cheers *raises a beer*

Matt
 
Great job so far Matt, in the future, i found out the hard way, i paint the road wheels seperately because the out side of the wheels are black, for a more realistic look take some gray and start adding flat black until you get a good dark gray that looks more like rubber. After you get the tank painted with the od green, give it a coat of future clear, tracks off. Add your decals, then give it another coat of future to seal your decals. after that its time to weather the tank as you want. theres tons of ways to weather, washes, oils, pigments, ect. What i did thanks to a real pros advice is go on youtube type in Armor model weathering, theres tons of vids on weathering armor. Keep posting pics as you go, these guys will help you in any way you need. Good luck, and welcome to the darkside. Merry Christmas!!
Tom
 
Norm posted a great vid on painting the wheels a while back with an ab, I also think ken put in his method in the topic

right here
 
Hope you all had a great day.....i did. ;D

IMG_1148.jpg

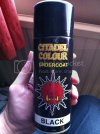
Now on with the serious stuff, is this stuff any good for primering my 'Ronson' or should i just stick with Tamiya black? As far as i know this Citadel paint is a normal acrylic!

IMG_1214.jpg

Right i'm off to find YouTube painting vids. ;)

TTFN Matt
 

Latest posts

Back
Top