Marder III Ausf.M
- Thread starter Chris S
- Start date
Chris S
Its a bit like being handcuffed to a lunatic !
- Joined
- Feb 14, 2011
- Messages
- 4,573
Thanks for looking in chaps 
Yes ,Cyberhobby is Dragon ,and the fit and build are top quality ...as soon as ya know where the parts go ;D
As above mate ,the build is very good
Chris.
noname said:I think it is generally understood that Dragon's instructions are on the sucky side. How is the fit? I have a Marder III Cyberhobby kit. I wonder if they are similar? Isn't Cyberhobby a branch of Dragon or sumpin' like dat?
Yes ,Cyberhobby is Dragon ,and the fit and build are top quality ...as soon as ya know where the parts go ;D
geegad said:Lookin good the detail on this kit is looking very good what's it like to build??
Geegad
As above mate ,the build is very good
Chris.
Hey, Chris, wasn´t this vehicle the one that gets ambushed in a narrow street in the "Saving Private Ryan" movie??? More or less at the end of the movie, in the final battle...
This is a really very versatile model!
Where are you going to depict it?? East Front? West Front?
Keep posting, please!
RG
Chris S
Its a bit like being handcuffed to a lunatic !
- Joined
- Feb 14, 2011
- Messages
- 4,573
Hey Biskup ...I'll try not to keep you waiting too long buddy  , got the tracks al done ,so they're drying up at the minute .
Jelly ,couple of good questions fella . I think ( if I recall correctly ) the one in Private Ryan was maybe a Ausf H ??...but I stand to be corrected ;D...As for the camo ....Im thinking Russian front ,I want to try a whitewash over the Dark Yellow ...simply because I havent tried it yet :-\..but we'll see how it goes
Chris.
panzerace007
New Member
- Joined
- Dec 17, 2010
- Messages
- 2,118
CHRIS,
Looks like you have a great start so far !! I look forward to seein th White Wash !!
That scene from 'Ryan sounds familiar ... I'm just tryin to Job My memory ... & look on YouTube for it ..... I guess I could always PoP th DVD in & watch it !!
Looks like you have a great start so far !! I look forward to seein th White Wash !!
That scene from 'Ryan sounds familiar ... I'm just tryin to Job My memory ... & look on YouTube for it ..... I guess I could always PoP th DVD in & watch it !!
Chris S
Its a bit like being handcuffed to a lunatic !
- Joined
- Feb 14, 2011
- Messages
- 4,573
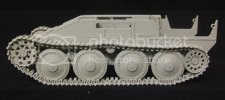
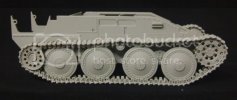
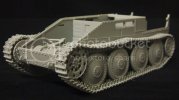
Righto  ....I got my tracks done , bit fiddly but not too bad ,they went together quite quickly with no fuss . What I do is make a top run and a bottom run .Once the lengths are made up I run some liquid poly up the middle of the track then let them sit and dry off for a while .Once the glue is in a 'flexible' state I set the track on a strip of Tamiya tape which makes it easier to position the track on the tank ,The tape lets you pull the track round the sprockets without it all falling apart .I then leave the tape on till the glue sets up .


You can see in this pic where the join between top and bottom is on the front of the sprocket ,this will cloes up when I do the final fit of the tracks once painted

So now this lot can come off to get painted .
Thanks for looking.
Chris.


You can see in this pic where the join between top and bottom is on the front of the sprocket ,this will cloes up when I do the final fit of the tracks once painted

So now this lot can come off to get painted .
Thanks for looking.
Chris.
ShutterAce
Active Member
- Joined
- Mar 31, 2011
- Messages
- 1,043
Nice and clean. 
