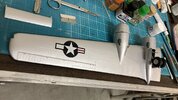
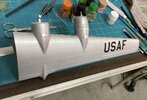
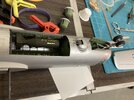
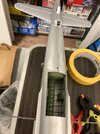
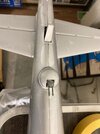
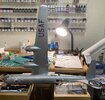
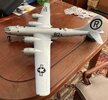
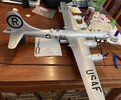
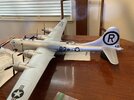
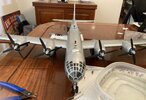
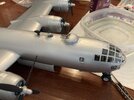
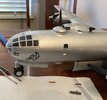
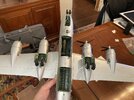
Monogram 1/48 B-29 Superfortress Enola Gay (COMPLETED)
- Thread starter TimM63
- Start date
Down Time
Well-Known Member
- Joined
- Dec 17, 2022
- Messages
- 1,756
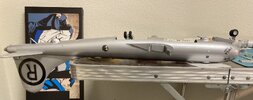
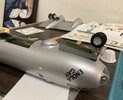
Ruh-RohThe Enola Gay markings ("R" on tail, number 82, and "Enola Gay") are vinyl stickers and a pain in the a$$. If they aren't right the first time there is no getting it wet and rearranging it.
The rest of the marking are water slide.
Jakko
Well-Known Member
- Joined
- Oct 9, 2024
- Messages
- 1,145
If you haven't put them on yet (or if you have, then here's a tip for the next model that's like thisThe Enola Gay markings ("R" on tail, number 82, and "Enola Gay") are vinyl stickers and a pain in the a$$. If they aren't right the first time there is no getting it wet and rearranging it.
For larger stickers, you can do the same but only peel the backing paper off a little so you can put the first part of the sticker in the right position and press it in place, then slowly peel the paper off while pressing the sticker down just above it.
This is basically how large stickers, like on signs, windows or cars, are put on — no reason it wouldn't work on a model
TimM63
Well-Known Member
- Joined
- Mar 6, 2023
- Messages
- 2,311
Thank youHI I LOVE this B29 build an very detailed in side the fusalarge brilliant work sir keep it coming
chrisb
Rimmer
Well-Known Member
- Joined
- Oct 3, 2024
- Messages
- 292
If you haven't put them on yet (or if you have, then here's a tip for the next model that's like this) you can float self-adhesive stickers on with water. Wet the surface well, with a plant mister for example, so there's a layer of water on it. With a small sticker, you can then take it off the backing paper and float it on the water so it's in the right position, then carefully press it down onto the surface with a cloth. This squeezes the water out from where you press, so the adhesive takes hold. Start at one side of the sticker and work your way to the other, carefully so you don't get any folds or creases in it.
For larger stickers, you can do the same but only peel the backing paper off a little so you can put the first part of the sticker in the right position and press it in place, then slowly peel the paper off while pressing the sticker down just above it.
This is basically how large stickers, like on signs, windows or cars, are put on — no reason it wouldn't work on a model
That's how I've been putting the sticky-back Zimmerit from Tamiya on my Tiger I. It works a treat.
TimM63
Well-Known Member
- Joined
- Mar 6, 2023
- Messages
- 2,311
Thanks for the tip. As of now I just have the small "82" stickers to put on the nose. All the others are on and look fairly good.If you haven't put them on yet (or if you have, then here's a tip for the next model that's like this) you can float self-adhesive stickers on with water. Wet the surface well, with a plant mister for example, so there's a layer of water on it. With a small sticker, you can then take it off the backing paper and float it on the water so it's in the right position, then carefully press it down onto the surface with a cloth. This squeezes the water out from where you press, so the adhesive takes hold. Start at one side of the sticker and work your way to the other, carefully so you don't get any folds or creases in it.
For larger stickers, you can do the same but only peel the backing paper off a little so you can put the first part of the sticker in the right position and press it in place, then slowly peel the paper off while pressing the sticker down just above it.
This is basically how large stickers, like on signs, windows or cars, are put on — no reason it wouldn't work on a model
Down Time
Well-Known Member
- Joined
- Dec 17, 2022
- Messages
- 1,756
Sure as heck it's a big bird!!!
Down Time
Well-Known Member
- Joined
- Dec 17, 2022
- Messages
- 1,756
Seeing the "R" on the tail, being the first nuclear bomber, I wonder if in Kubrik's Dr. Strangelove ATTACK PLAN "R" was an ode to the mission....
Down Time
Well-Known Member
- Joined
- Dec 17, 2022
- Messages
- 1,756
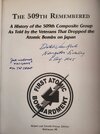
Forgot to add that my friend gave the book to meThis is in a book sent to my buddy who I am doing the diorama for from Jack Widowsky himself. I have the return address on the package it was sent in.
View attachment 128561
TimM63
Well-Known Member
- Joined
- Mar 6, 2023
- Messages
- 2,311

