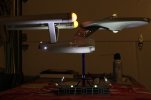
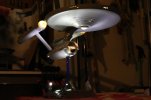
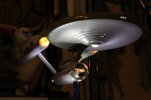
My Another 1/350 TOS Enterprise Build Thread

Thanks everyone. I appreciate the support of my fellow addicts immeasurably. 8)

Today's pics...

Here are a few pics from the stuff I finished last night.

The hangar bay dome. It has this sort of blue-greenish glow to it. Very much like the on screen look I think:
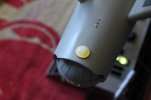
9371578775_3ee182065b_b.jpg
IMG_4786 by trekriffic, on Flickr

The lower sensor dome. I think the ribbing looks about right. Visible but not too dark. I still need to attach the "nipple" or "ion pod" in the center:
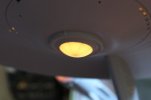
9374354002_dd273682ef_b.jpg
IMG_4782 by trekriffic, on Flickr

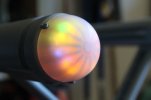
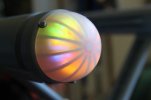
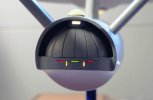
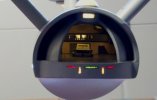
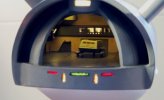
Nothing new but just had to show a couple of up close shots of the bussard dome. The first one is stationary and the second is a still of it in motion:
9374353872_722fa24cb2_b.jpg
IMG_4790 by trekriffic, on Flickr

9374353754_016523ee16_b.jpg
IMG_4793 by trekriffic, on Flickr
 
Quaralane said:
Gorgeous work, Trek

I say the same

The lighting is incredible, love the stand & it's spotlights

I couldn't even attempt anything this clean

J
 
I'd second Jaitea:
working with say SW-style ships and aproaching the weathering stage you have an option of not only geting your model closer to the "original", but also to hide all of the mistakes under the layers of washes and pigments :)
Trek is absolutely another story: here, especialy on the TOS-era ships absoluteprestine condition is required to be kept through the whole process of construction.
And You've done it brilliant so far, trekriffic, bravo!
 
Thanks for the kind words everyone. It's nice to know one's work is appreciated by fellow addicts like yourselves.

As far as keeping the surface pristine, I will actually be doing some weathering with pastel chalks. Unlike other Trek ship the original Enterprise had some noticeable weathering; albeit, not as much as currently exhibited after the 1991 "restoration". I will strive to be subtle but there will be "soot" streaking on the saucer and secondary hull leading edges as well as some longer streaks on the nacelles. The deflector dish; however, will remain pristine. As it's function is to deflect particles it makes sense to me that nothing should be able to penetrate the deflector field it creates to stain it or it's rings.
 
Amazing work on this 1/350 Enterprise.

Can't wait to see it with the full decals :D
 
Update...

Here's where I'm at with the base...

I glued styrene sheet to the underside of the stand with Testors liquid cement. Holes were drilled and slots carved out for the screws that will hold it to the wooden base yet allow it to be removeable:

9403738520_92939a34a6_b.jpg
IMG_4820 by trekriffic, on Flickr

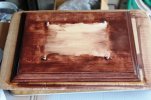
The wooden base after 4 coats of Varathane mahogany stain and 2 coats of Varathane liquid plastic coat. It will get one more plastic coat before it's done:

9403738174_7124b04aa0_b.jpg
IMG_4842 by trekriffic, on Flickr

Next... windows...

Yipee!
I came up with an idea that will help me prolong this build since it's been such a blast so far!
I have noticed that several of the windows-almost all, in fact, are recessed and don't sit quite flush with the hull after gluing from the backside.
I think this is due to the curvature of the window backplate not exactly matching the curvature of the hull.
It is not an issue where I cut the windows off the backplate; such as the windows flanking the shuttle bay where the fit was so tight the backplate thickness prevented me from closing up the hull.
Anyway, what I did was to cut small rectangular window panes from thin clear styrene sheet:

9400977063_e380e277ea_b.jpg
IMG_4836 by trekriffic, on Flickr

Using tweezers I inserted the clear window panes into the openings on top of the existing window inserts. I glued the new panes in using Krystal Klear for the white windows and Elmer's Clear Glue for the black ones. For round ports I merely filled them flush with the hull using Krystal Klear:

9400977171_0d55988c8c_b.jpg
IMG_4834 by trekriffic, on Flickr

You can see the difference in this photo. The new window pane is installed in the window to the far left. The others have not been dealt with yet. The glue is still wet in this pic:

9400977265_b13fc0024e_b.jpg
IMG_4825 by trekriffic, on Flickr

Here is a completed row of illuminated windows.
I think it's a significant improvement from before with the windows in their deep recesses:

9400976803_949582bcb3_b.jpg
IMG_4846 by trekriffic, on Flickr

I estimate it should only take me another week to finish the rest of the windows which should be about when I have funding and can order my set of painting masks from Orbital Drydock.
 
Found out something interesting... when I turn the impulse engines on using the pushbutton switch the light in the saucer dome over the bridge flickers and goes out. When I turn the impulse engines off the dome light comes back on. I surmise that there is only enough amperage available for the two N ports on the saucer PC board to power 2 LEDs as the N ports were intended to only power 1 impulse engine LED each per port. So I have 2 LEDs for the impulse engines running off one N port and 1 for the dome light running off the other N port for a total of 3 LEDs on the N ports. So I have to choose having the impulse engines off with the dome lit or the impulse engines on with the dome dark. But not both lit. This is a bit confusing since the impulse LEDs are wired in series and should only be using 20 mA between them. So if the board is supplying 20 mA per port we should be fine but perhaps that's not enough current so somehow the N port tied into the impulse engines is stealing current from the other N port...whatever...at this stage I'm not about to try prying the B-C deck off the saucer (it's glued on with CA) to rewire the dome light so I'll just live with it. At least the dome light isn't burned out as I initially feared.
 
Saturday update...

Finally finished the base:

9430865213_0e92d748b3_b.jpg
IMG_4885 by trekriffic, on Flickr

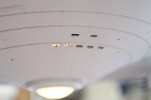
Finally finished adding extra thickness to the windows. The shadowcasters are pretty cool thanks to PargGrafix. I love Paulbo's stuff:

9433638348_e39feb0e5d_b.jpg
IMG_4847 by trekriffic, on Flickr9430865577_0d86776560_b.jpg
IMG_4853 by trekriffic, on Flickr

9433638202_5e54076b44_b.jpg
IMG_4854 by trekriffic, on Flickr
9430865429_d289904167_b.jpg
IMG_4860 by trekriffic, on Flickr
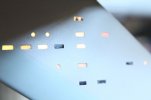
More shuttlebay pics. This tiime using a tripod. More shadowcasters in the back observation gallery:

9433637936_933bc18a6c_b.jpg
IMG_4881 by trekriffic, on Flickr
9433638024_fdc2a437b9_b.jpg
IMG_4880 by trekriffic, on Flickr
9433638172_1b882b3313_b.jpg
IMG_4878 by trekriffic, on Flickr
Intercoolers were masked with liquid mask and painted Canadian Voodoo Grey
on the front and back. Still need to peel the dried masking film off:

9430865211_7cc73b1b68_b.jpg
IMG_4884 by trekriffic, on Flickr
Impulse engines ala the remastered version:

9430865101_a391a5911c_b.jpg
IMG_4883 by trekriffic, on Flickr
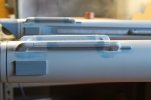
More bridge pics...

9430864891_e8900c440a_b.jpg
IMG_4907 by trekriffic, on Flickr
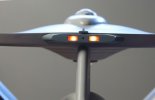
9430864785_7b554a7c8f_b.jpg
IMG_4915 by trekriffic, on Flickr
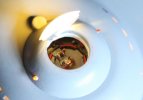
Hard to tell in this image but that's Balok's puppet from "The Corboomite Maneuver" oj nthe main viewscreen:

9433637612_76fb1937e7_b.jpg
IMG_4913 by trekriffic, on Flickr
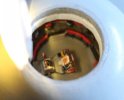
Some low light pics:

9430865487_c72b96bccd_b.jpg
IMG_4863 by trekriffic, on Flickr

9433637698_2fdd4c5aa3_b.jpg
IMG_4892 by trekriffic, on Flickr
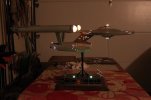
Nice shot of the engines:


IMG_4906 by trekriffic, on Flickr
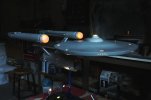
Tomorrow I start on some weathering. Once I've finished weathering I'll install the deflector rings and dish and the "nipple" on the lower sensor dome...
 
Now for some real fun... WEATHERING! ::)

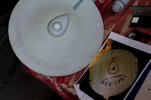
Finished weathering the upper saucer yesterday. Went with rust, orange rust, and soot. It's fairly subtle; more so than the studio model I think. Used the photo of the original as a guide with the exception of the green. I don't plan on adding any green to the weathering on my model.

9460095326_bf54d9d2da_b.jpg
IMG_4924 by trekriffic, on Flickr

9460095118_ea4047e06f_b.jpg
IMG_4931 by trekriffic, on Flickr
9457313985_4103c35c42_b.jpg
IMG_4927 by trekriffic, on Flickr\
 

Latest posts

Back
Top