Not so Accurate Miniatures RAF Mk1 pony

Glorfindel said:
I hear what your saying Chris. I've watched three or four video's on YouTube about decanting and am still a little gun shy about it. That'll be another first I'm willing to learn about. All for this hobby.
Spray cans contain a mixture of pigments, carrier, solvent, and propellant. The propellant is a liquid that boils at room temperature at normal pressures. The pressure inside the spray can is high and keeps the propellant in liquid form. This propellant is what makes decanted spray paint difficult to handle and why we out-gas after decanting. The easiest and cleanest way to decant spray paints is to fit a pipette tube to the protruding tip of the spray nozzle and spray into a new container. The tapered shape of the pipette tip means you can cut a nice tight-fitting adaptor. There is a minimum of overspray as the spray collects against the slippery walls of the pipette and slides into your bottle. Do not fill the bottle past 70% full.
Place the bottle with freshly decanted paint down gently and do not touch for at least one hour. Do not put the cap on the bottle.

The propellant boils at room temperature which creates pressure to spray. It also makes handling the paint outside a pressure can difficult, messy, and even dangerous. Proper out-gassing will reduce the pitfalls of decanted paints to those of normal store-bought bottled paints. Leave the lid off the jar of freshly decanted paint and let propellant boil off for at least one hour. Don't try to stir the paint or add anything like thinner or ball bearings; the slight temperature rise caused by these activities will cause the paint to boil vigorously, overflowing the bottle onto the floor and sputtering into the air. Just touching the bottle with your fingers and cause an eruption. The heat from your fingers will cause the paint to boil. The friction of your finger along the side of the glass will create enough heat. I speak from bitter experience.

Allow at least one hour at room temperature (above 70% Fahrenheit) for the propellant to boil off. A longer out-gassing period is better. I usually wait overnight. I have forgotten about an open bottle of decanted paint for an entire weekend with no noticeable loss of sprayability.The paint bottle should not appear frosty or feel cool.
Once the bottle has reached room temperature you may cap it.

Good out-gassing goes a long way toward minimizing handling problems. Since I have learned the Zen of overnight out-gassing, I no longer have messy troubles. I have left freshly decanted Tamiya paint in open jars for over 36 hours with no discernible thickening.

Inadequately out-gassed lacquer will boil at room temperature so be careful handling it; open only in an area where it's OK to spill paint everywhere! Including all over yourself! Cover the jar with an absorbent towel and crack the lid open the tiniest amount. You should be able to see bubbles before you hear hissing. Basically, if you hear hissing you've lost and paint is going to be going places other than your model.
 
At risk of running this thread off topic, may I ask, why decant can paint?

I can see doing this if a specific color is not available in a bottle but other than that, i'm at a loss.
 
Moon Puppy said:
At risk of running this thread off topic, may I ask, why decant can paint?

I can see doing this if a specific color is not available in a bottle but other than that, i'm at a loss.

In a way, it's kind of an old school thing to decant spray paint. Back in the day, an accurate colour match wasn't always available out of the bottle. These days people do it if they want to spray a lacquer-based paint other than an acrylic or enamel. I'm led to believe that car modelers do this a lot in order to get a pefect colour match for a specific make and model. Personally, I've only ever done it once to paint an R/C plane and I did it because I wanted an accurate colour with the durability of a lacquer. It was a hassle to clean up afterward so I'd probably only do it again if there was no other way to source a colour.
 
Ah...OK. And I can answer my next question, don't spray from a can to control the spray better. Thanks...back to our Pony... ;D
 
How did you get that Mr. Surfacer so think? I have the same stuff and it goes on thin. Am I doing it wrong?
 
glennonrp there are 3 different Mr. Surfacers. 500, 1000, and 1200. 500 is the thickest of the trio with 1200 being the thinnest. 500 can fill in minor gaps, scratches, pin holes, resin air bubbles, and even many narrow seams. The pics of the 500 your seeing in previous post are directly after the product has been applied. Given 10-15 minutes and it will dry but also shrink as it evaporates. Eventually a second application sometimes will be applied to assure good coverage. I don't think your doing anything wrong. You just need to apply it one, perhaps two more times to get the results your looking for. Hope this helps.
 
Nice progress, I think you did a great job on the seam work! It's always great seeing the colors go on the model.
 
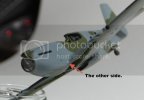
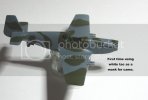
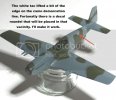
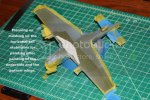
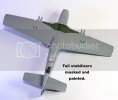
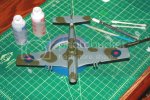
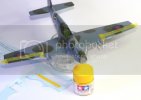
This weeks update. First time at several things during this build. Scribing with dymo tape on a model and not scrap styrene, re-drilling holes that are supposed to be there that I sealed up, camo masking....YEEEHAAA....with blue tac (white stuff in my case) and painting camo period. Never did that before and although it's nowhere close to perfect I did get a kick out of it.

Maskingpainted.jpg
Maskedpainting2.jpg
Maskingpainting3.jpg
maskingpainting4.jpg
Maskingpainting8.jpg

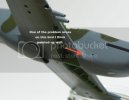
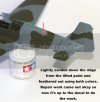
Any suggestions on how to fix this? I'm all ears. My plan was to very lightly, with a very high grit sand paper, buff down the ridge to smooth again. I'll need to register where the roundel lines up so I can cover this gaff up with the decal. Actually now that I think about it maybe I'll do the sanding thing then by hand touch up any areas that extend past the roundel. Ideas?

Maskingpainting5.jpg
Maskingpainting7.jpg

For this paint job I matched the color call outs from this source.
http://www.ipmsstockholm.org/magazine/2000/01/stuff_eng_profile_mustang4.htm
The bottom 6 Mustangs on screen appear to use the same colors. Ocean Grey/Dark Green on the upper surface and Medium Sea Grey downstairs. The Ocean Grey has a definite blue hue to it that doesn't appear in any references I've seen. Anyway belly color is next perhaps on Sunday.
Then it's a little Future with the AB and decal time. I can smell dinner cookin'.
 
I had to do some similar touchups on one of my USAAF Mustangs, Glorfindel. I had a couple of spots where masking tape lifted some paint. I was able to repair this without remasking and spraying, by mixing a thinned mixture of the color and brushing it on. It was acrylic, so I was able to use the layering technique that guys do with figures, building up the color with repeated thin layers, till it looked right.
 
Yip ..Baron is right ,thin coats with a brush should blend in nice ,I've done it myself ;) looks like your roundel might be in the right place too .

Chris.
 
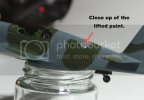
Guys do you think I'm in the right frame of mind of using a high grit sanding film to work down the ridge I can feel with my finger. From a distance you don't necessarily see it but when your up close it's like yikes! What in Wholly Moses is going on there? The ridge is roughly a 1/3 of a mil to the touch. High enough to leave a shadow line. I'm thinking that paint pooled up where the tac met the fuselage and peeled up when I removed it. As a matter of fact I'm sure of it. Have to watch those strokes with the spray can.
Baron by building up the layers is it like a bit of dry brushing those thin layers with an unloaded brush? To me it seems that's what your suggesting. 2-4 coats might do the trick.
And yes Chris looking at my references the top of the roundel looks as if it can easily cover this spot. I think I can save this here thing.
 
Yeah ,if there is a noticable edge there then give it a quick rub out ,it will only annoy you if you dont ;)

Chris.
 
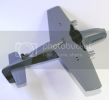
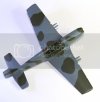
A little Sunday evening update. Finished up some masking for the belly of the beast and ran some Tamiya Medium Sea Gray 2 RAF (AS-32) from the spray can. This time I sprayed light coats to avoid any further mishaps with the paint lifting off with the masks. I think I have learned. Still love my AB more.
Maskedup1.jpg
Maskedup2.jpg

Not a fan of this masking thing, but thy will be done!

masking3.jpg
Masking4.jpg
masking8.png
Masking5.jpg
Masking7.jpg
masking6.jpg

I'll AB some Future tomorrow evening and let it cure a couple of days. I'll try and bang those decals after work during the week. Stay tuned for an early update this week. Rid'em cowboy!
 
Very nice :) very neat . Good job on the repair too ,I think it will look fine ;)

Chris.
 
Looks good Glorfindel. Yours along with the other great mustang builds here at SMA are inspiring me to to build a mustang also. Decals, you're almost done this one. :)
 
Nice recovery on the pulled-up paint, Glorfindel! To answer your question, what I did was not quite like drybrushing, but more like filling the pulled-up area with thin layers of paint, till it was more or less even with the surrounding area. I learned the hard way to do it with very thin layers; I first tried touching up with unthinned paint, which was too thick, and didn't quite match the surrounding colors.
 
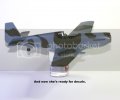
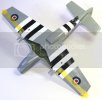
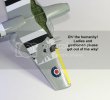
Ok today's update. Decals for the pony during the week. So I started and finished in mostly agony but I'll see her through. First course went down fine with little trouble...

Decals1.jpg

....then came the leading yellow strips on the front edge of the wings.


Decals3.jpg

Yeah, it basically would not bend to the contour of the front of the wing and started tearing. I didn't even bother with the second one as I felt going into this build that decals wrapping around curves like that usually don't survive. At least not this set since according to the box was produced in 1993. But I assumed all along that I would be AB these stripes in sooner or later.
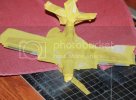
So now shes all taped up!

Decals4.jpg
Decals5.jpg

Looks like a mess now....

Decals6a.jpg

...until....

Decals6.jpg

KAAAAAAAAAAAAAAHN!!!!!!! :mad:

Decals7.jpg
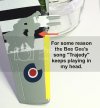
Bee Gees - Tragedy

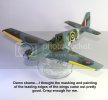
Last night I AB Future over the decals to seal them in and the only thing I can see is that I didn't build it up enough on that wing. I could swear I layered on enough to do the trick. Anyway as you can see the Tamiya masking tape pulled off the decal in a mass disaster. So now my plan is to clean up the area and re-apply my clear coat, let that cure, mask then AB the effected black stripes first, then do the same for the white stripes to bring the bottom back to life. I already have a headache thinking about the damaged roundel. Is that Insignia Blue? Anybody know this color? Looks like Navy Blue to me.
I can fix this but it's definitely going to push completion back perhaps an additional week. Dang I could smell the roses and see the light at the end of the tunnel with this one. Chris S I was so looking forward to possibly do a pin wash, in your manner, for the panel lines on Sunday at some point.
Like I said....I'll see her through.

Decaling8.jpg
 
:eek: :eek: OH MAN !!!! Im sure you were gutted ! ,One thing I never do is mask over decals ,Im always scared of exactly that happening ,but in saying that ,its an easy fix ,not hard to mask up and blow in .Not sure of the blue ,I'll have to check that for you . The rest is looking good by the way ;)

Chris.
 
Back
Top