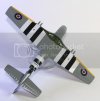
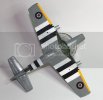
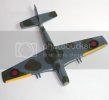
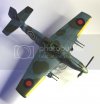
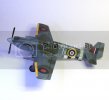
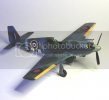
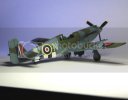
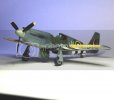
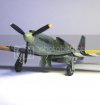
Not so Accurate Miniatures RAF Mk1 pony

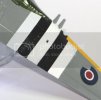
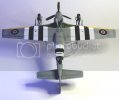
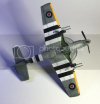
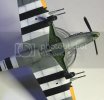
Yeah Chris I really wanted to stick a fork in my eye. But not to worry....I already re-applied Future over the effected areas, masked off for the black striping and AB in the black. No problems with the removal of the masking tape over the decals this time. Looks so much better already that it makes me wonder why I didn't apply all the stripes with the AB in the first place. These old decals are looking really funny. I'm not sure if older decals do this but it's like some of them have this gritty texture to it. Reaction to Future? Paint? I doubt the paint. Humidity? We've had no rain here on Long Island NY.The roundels on top have two or three rough patches each as does the bottom roundels. A bit of roughness on the striping by the tail too. Don't know if this is normal but I don't think there's much I can do about those now. I'm still determined to finish her up though.
 
Well ,it could be the decals ...some decals are just rubbish ,not much you can do apart from replace them .but sometimes if you have small particles of dust below the decal it wil be noticable ,or if your paint has a rough texture to it ,that will cause the same effect ,but looking at your paint ,its more likely just the decals ,once you seal them with a couple of clear coats they may even out a bit and wont look patchy ;)

Chris.
 
Chris at the end of the day I'll be okay with it. New steps, new trial and errors. The masking tape over the decals like you said were my main enemies here. Funky decals....well that's something else and out of my control. Now there are plenty of AM decals out there for me but that would mean getting all my previous work off. It most likely would mean completely stripping the model clean of paint and starting the process again. A task I would like to avoid.
On a better note I did manage to find the blue roundel color with a bit of research. About halfway down the page is the "Colors" section of the roundels.
http://en.wikipedia.org/wiki/Royal_Air_Force_roundels

Seeing the BS and FS numbers there I cross referenced here.
http://www.paint4models.com/paintchart/paintconversionchart20100101d.htm#
And came up with two choices my LHS may have in stock. First the Tamiya Blue X-04 (which I doubt he'll have) and the Humbrol Lufthansa Blue 198. The Humbrol I have a good chance of scoring.
Suddenly things are looking up! ;D


[attachment deleted by admin]
 
Too bad about the troubles Glorfindel. Otherwise, it looks great! I'm sure you will overcome the issues. Your seamwork and filling looks really good.
 
I commend you for sticking with it. That were me it would have taken a test fight off a 200ft cliff.
 
Not so bad....I'd go back and mask and airbrush the invasion stripes. I prefer to paint them on, anyway, rather than use decals. You can add an element of variation to them if you paint, as opposed to the crisp uniformity of decals. They were painted on, mostly by hand, using whatever tools and paint was on hand, and in many cases, at the very last minute before a sortie.

Anyway, congratulations on recovering and picking right back up again! ;)
 
the Baron said:
Not so bad....I'd go back and mask and airbrush the invasion stripes.

I totally agree with Baron, the decal lifting sucks - but painting them on would look better. If you decide to paint new stripes; I'd take some tape and use it to gently lift the remaining invasion stripe decals before painting new ones - just so you don't have further problems when you mask to paint the stripes.

Another option is just to get some after market decals for the stripes Or maybe print some of your own?

Jason
 
MP, f thumbs, Myke, Baron and JMac thank you all for the kind words and encouragement.
So this morning with java in hand I decided to finish up the repairs on the white stripes. No tape issues today as the 17 coats of Future and mouthful of Advil helped keep the remaining decals in place. Yes, I opted to repair on top of the decals, not try and lift them completely and repaint them all new. This in my opinion is a bush league move but I want to keep this build moving on.

Newstripes.jpg
Newstripes2.jpg

At this point the air brushing on the stripes is finished but I'm not completely satisfied with the outcome. How can I be? I just AB over torn decals. So I decided to add a little creativity, or artistic licensing as we here like to call it, by using my #2 shader and applying a stipple effect over the black stripes on both the repaired side stripes and the good side. I need to do both sides to make them look like equals. I'll do the same with the white stripes on both sides to give them both an equally applied paint job.
Sunday I'll see if I can tackle the blue on the roundel. I'm hoping my LHS has the color I need. If not I'll be purchasing some Tamiya blue something from him and mixing in something else to match it as close as my aging eyes can muster.
That's this weeks edition of "As this Pony Fly's".
Anthony
 
That repair came out good Glorfindel ,good save :) I was trying to find the colour of the Blue for you ,but havent found it yet ,I know a fella that built a mossie a few years back and painted the roundels on with the AB ,he put his mixtures in the blog he did ..but now I cant find it ,I sent him an email ,but no reply yet . I reckon Tamiya Dark Blue isnt far away ,at least a good starting point .

Chris.
 
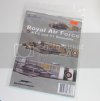
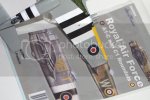
Well this morning I went to pick up blue paint to patch up the damaged roundel and low and behold! I see the AM decals box and after thumbing through it for 30 minutes I found this.

newdecals5.jpg

So I dropped $10 down on this because I was uncertain the blue would match and believed it would be a better route. I know I said I would paint it but the idea of lifting the remaining decal and replacing it outright intrigued me. I had success!

newdecals4.jpg
newdeacls1.jpg

So now with all these extra roundels on hand I decided to lift and replace the two on the top of the wings and eliminate some of the rough texture/crinkling they were showing. The red spots on the roundels are about 3mm larger then the kit decals red spots. As the subject title says "Not so Accurate Miniature pony"....

newdecals2.jpg

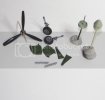
I also worked on and finished up most of the fiddly bits.

newdecals6.jpg

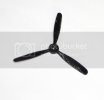
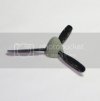
Did some chipping on the prop then mocked it up in the spinner. Still have to paint the yellow tips on the blades of the prop.

newdecals7.jpg
newdecals8.jpg

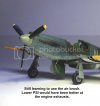
I also need to paint the engine exhausts. Color call outs say burnt metallic copper or something. Any clues as to what a better color would be? I might just mix my own slurry to do this.
Next up a final shooting of a coat of Future to seal everything in and a pastel pin wash in the panel lines to show them off. Now I can truly see the finish line.
 
Great job on the decs :) she's looking nice now ,dont forget to chip the yellow when you paint the tips ;)
For the exhausts ,I would paint them black then a gentle dry brush of copper ,not to heavy with the copper though ,just enough to show ....its pretty close :)

Chris.
 
Glorfindel said:
...So this morning with java in hand I decided to finish up the repairs on the white stripes...

That's the secret ingredient, to get just the right amount of "jittery" to your touch, to make the stripes look hand-painted ;D

Seriously, though, well done on the recovery!
 
It's become "Personal"......so stick with it. Dogged determination will see you through.
GOOD LUCK!!!! Bill
 
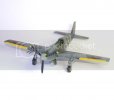
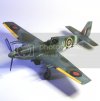
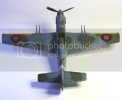
Thanks Chris, Baron, Panzerman. This afternoon I attached most of the bits and pieces with the exception of the pitot tube (don't even know what that thing is for) and canopy. I also applied a coat of Model Master Flat Clear Acryl with my AB but still need to add another thin coat as I can see one or two spots where the gloss of the Future is still peeking through.
During the week I also applied a pastel pin wash and added some much needed post shading at the panel lines with a Prismacolor marker. With both mediums I wiped them off in the direction of the airflow over the surfaces to enhance the weathered effect. The pin wash gave me some resistance as my panel lines just were not deep enough for the slurry to make an impression. After I let it dry, and no matter how light of a touch I used with a Q-tip, the wash just kept wiping out. The areas where the panel lines were deeper the lines look great. I'm not fighting this so onward.....

semidone1.jpg
semidone10.jpg
semidone12.jpg
semidone13.jpg
semidone2.jpg
semidone3.jpg
semidone4.jpg
semidone5.jpg
semidone6.jpg
semidone7.jpg
semidone8.jpg
semidone11.jpg
semidone9.jpg

As I mentioned in the above pic I need to learn to use the AB a bit more for these type of effects. Practice, practice, practice!
I'm pretty happy with these results and the work I've done. As for the canopy it's not my favorite job on a build. I'm torn between masking and painting, or just painting by hand. The edges that need paint are so thin I feel like I can only accomplish this by hand. The whole masking thing seems a bit tedious at the moment. I have #0 brushes and the strokes would be minimal at best. Suggestions? Should I go for it by hand?
AND WHAT THE HELL IS A PITOT TUBE!!!
 
She is looking real nice Glorfindel ...great job ,I wouldnt worry about missing panel lines ...its not noticable . If you are not happy using the AB for exhaust stains you could use dry pigments ,thats what I will be doing on the Dauntless ;) ....But still looks great ,use some pigs to blend the stains in a bit :)

Oh yeah ....A pilot tube ...,well its basically for measuring the Airspeed ;)

Chris.
 
Chris S said:
She is looking real nice Glorfindel ...great job ,I wouldnt worry about missing panel lines ...its not noticable . If you are not happy using the AB for exhaust stains you could use dry pigments ,thats what I will be doing on the Dauntless ;) ....But still looks great ,use some pigs to blend the stains in a bit :)

Oh yeah ....A pilot tube ...,well its basically for measuring the Airspeed ;)

Chris.

Dang Chris I wasn't thinking! I have a bunch of Tamiya weathering pigments and it never even occurred to me that that's the stuff I should be using. I had air brush in my head! I'm going to do as you said and will be blending in some of the dry pigments to relieve the effect of the spray. Then I'll touch it up with the flat clear again to lock it in.
Thanks yet again for opening my eyes,
Anthony
 
No worries Anthony ,I like to use the pigments because it means if Im not happy with the result I can simply wash it off again before its fixed ,I like to use two or three different tones in the exhaust too .

Chris.
 
Back
Top