NYLON GAG MK 1 - FINISHED
- Thread starter The Nylon Gag
- Start date
The Nylon Gag
New Member
- Joined
- Nov 14, 2011
- Messages
- 829
Re: NYLON GAG MK 2?
Greetings My Herd like Brethren,
Thanks buddy, remember, if it ain't screwed down i intend to use it on this thing.
I appreciate that sir.
Not sure if your joking or not? ;D LOL
I'm not entirely sure i understand the "kitting" process? I assume they make a blank from my master somehow, i would be interested if someone could explain it to me.
But let me tell you this is a big sucker, currantly tipping the scales at 17 pounds.
Thank you 'G Man', hope the wedding was spectacular my friend, i missed your video updates, welcome back sir.
Trust me, i'm as impatient as you buddy to see this thing come together but thats the thing with scratch building, you have to make EVERYTHING, there are no short cuts or quick fixes. The engine tubes for example, in a kit, 2 halves, BOSH, glued together, fill that seem, sanded, primered, good to go. On this thing i have an idea in my head and some basic stetches but i have to locate the right sized materials, experiment with what looks good in relation to the body and the engines i want to put inside the tube, mock up some ideas in cardboard, cut & shape the tubes and styrene sheet, glue in position add layer after layer, fill, sand, fill again, sand again .......... you get the picture, i'm boring myself just typing it. As for Genius, you must of mistaken me for someone else who is a genuis, but thanks for the compliment.
Thanks for stopping by Mike, appreciate the comments, i think you can go over the top with lights, i'm happy with my 'real world' set up, after all 'Less is More' as they say, whoever 'They' are?
Thanks 'Q', progress is slow but steady, thanks for stopping by.
So, whats i bin doin then me old chums?
PIX
Needed to finish the engine tubes. Had to build up the back section into some sort of 'cool' shape. Added a top,
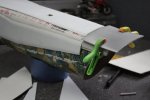
Added some layers for thickness,
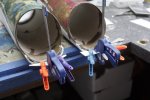
Small angled piece on the inside face,
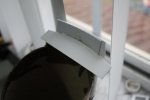
Rough cleaned everything up
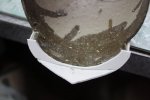
Finish sanded everything then started on the sides which were also finish sanded
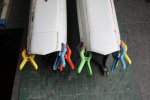
Filled everything ready to "blend baby, Blend"
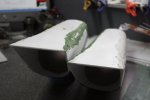
Whilst waiting for the putty to dry, used double sided tape and aluminium foil on the inside of the rear engine tubes, with the lights in position it looks perfect,
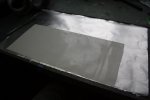
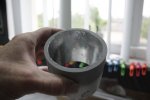
Back to the engine tube
Sanded all the filled bits smoooooth
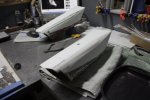
The new back section
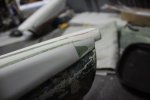
Re-filled with bondo and re-sanded even smoooooother
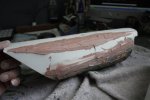
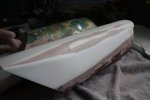
Finally, Mmmmmmmmmmmmmmm primer
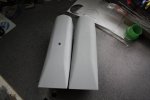
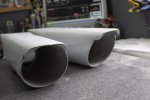
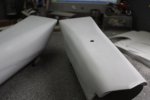
i intend to skin the underside, but i think i will panel the top, not 100% sure yet.
Well thats all folks, thanks for stopping by
And remember , Yes, We have NO bananas.
I think i've sniffed too much sanding dust today ;D
McGaggles, OUT
Greetings My Herd like Brethren,
Igard said:Those engine exhausts look magnificent Gag!
And I bet they smell minty fresh.
Thanks buddy, remember, if it ain't screwed down i intend to use it on this thing.
stretch said:just wow.
wow
I appreciate that sir.
Glorfindel said:Looking good mate. NG, you kitting this?
Not sure if your joking or not? ;D LOL
I'm not entirely sure i understand the "kitting" process? I assume they make a blank from my master somehow, i would be interested if someone could explain it to me.
But let me tell you this is a big sucker, currantly tipping the scales at 17 pounds.
Grendels said:Nicely done as always..
Thank you 'G Man', hope the wedding was spectacular my friend, i missed your video updates, welcome back sir.
adampolo13 said:Okay, so I know you can't rush genius but can you please finish thing thing already!!! I can't wait to see the final product, holy smokes is thing cool!
Trust me, i'm as impatient as you buddy to see this thing come together but thats the thing with scratch building, you have to make EVERYTHING, there are no short cuts or quick fixes. The engine tubes for example, in a kit, 2 halves, BOSH, glued together, fill that seem, sanded, primered, good to go. On this thing i have an idea in my head and some basic stetches but i have to locate the right sized materials, experiment with what looks good in relation to the body and the engines i want to put inside the tube, mock up some ideas in cardboard, cut & shape the tubes and styrene sheet, glue in position add layer after layer, fill, sand, fill again, sand again .......... you get the picture, i'm boring myself just typing it. As for Genius, you must of mistaken me for someone else who is a genuis, but thanks for the compliment.
ModelMakerMike said:This is coming along super nicely.
The lights really do add a lot. And all of your crazy details. Those engines are super kewl!
;D ;D ;D
Thanks for stopping by Mike, appreciate the comments, i think you can go over the top with lights, i'm happy with my 'real world' set up, after all 'Less is More' as they say, whoever 'They' are?
Quaralane said:Very nice progress on this
Thanks 'Q', progress is slow but steady, thanks for stopping by.
So, whats i bin doin then me old chums?
PIX
Needed to finish the engine tubes. Had to build up the back section into some sort of 'cool' shape. Added a top,

Added some layers for thickness,

Small angled piece on the inside face,

Rough cleaned everything up

Finish sanded everything then started on the sides which were also finish sanded

Filled everything ready to "blend baby, Blend"

Whilst waiting for the putty to dry, used double sided tape and aluminium foil on the inside of the rear engine tubes, with the lights in position it looks perfect,


Back to the engine tube
Sanded all the filled bits smoooooth

The new back section

Re-filled with bondo and re-sanded even smoooooother


Finally, Mmmmmmmmmmmmmmm primer


i intend to skin the underside, but i think i will panel the top, not 100% sure yet.
Well thats all folks, thanks for stopping by
And remember , Yes, We have NO bananas.
I think i've sniffed too much sanding dust today ;D
McGaggles, OUT
The Nylon Gag
New Member
- Joined
- Nov 14, 2011
- Messages
- 829
Re: NYLON GAG MK 1?
Dont ask me, cuz i have 'NO' bananas ;D
Gag
stretch said:And what do we do if we want bananas?
Dont ask me, cuz i have 'NO' bananas ;D
Gag
adampolo13
New Member
- Joined
- Dec 7, 2011
- Messages
- 2,633
Re: NYLON GAG MK 1?
Hey Nylon,
I had 30,000 pounds, but now their all mashed up on the side of a highway....
Hey Nylon,
I had 30,000 pounds, but now their all mashed up on the side of a highway....
The Nylon Gag
New Member
- Joined
- Nov 14, 2011
- Messages
- 829
Re: NYLON GAG MK 1?
LOL ;D
LOL ;D
The Nylon Gag
New Member
- Joined
- Nov 14, 2011
- Messages
- 829
Re: NYLON GAG MK 2?
Ello Matey Peeps,
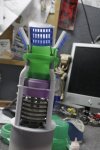
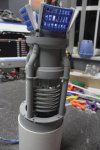
Made some real progress this weekend on the Engine Assemblies
Here's what's been done
PIX
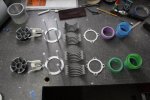
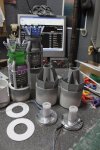
Made some bottom rings
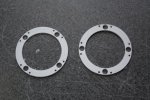
This little assemblie goes in the back of the engine
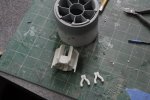
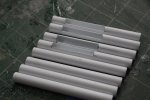
Tubes cut and slotted
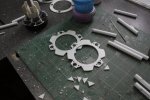
Made some top rings
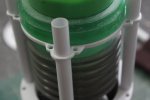
Basic main assembly
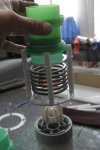
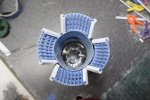
My vector thrust deflectors
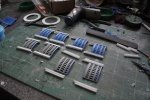
Some hardware
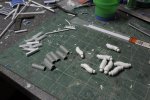
Dry run
Mmmmmmmmmmmmmmmm primer
And a realy bad video but i'm learnin, and 'yes' my voice is realy that boring
The Nylon Gag MK1.2 update June 10 2012
Gag
Ello Matey Peeps,
Made some real progress this weekend on the Engine Assemblies
Here's what's been done
PIX
Made some bottom rings

This little assemblie goes in the back of the engine

Tubes cut and slotted

Made some top rings


Basic main assembly


My vector thrust deflectors

Some hardware

Dry run

Mmmmmmmmmmmmmmmm primer


And a realy bad video but i'm learnin, and 'yes' my voice is realy that boring
The Nylon Gag MK1.2 update June 10 2012
Gag
ModelMakerMike
"It's Slobberin' time""
- Joined
- May 28, 2011
- Messages
- 1,838
Re: NYLON GAG MK 1?
HOLY COW !!!!!!!
Will this thing be space ready when you're done?
All the design work and engineering is great! Really.
I did some stuff like that for my current build, but nothing so elaborate, and usually when I was finishing with the components, I realized they wouldn't work.
I can see YOU don't have that problem. Do you have some actual engineering training/schooling in your past?
8)
The Nylon Gag
New Member
- Joined
- Nov 14, 2011
- Messages
- 829
Re: NYLON GAG MK 1?
Thanks for the comments guys, i find them very motivational ;D
I'm a toolmaker by trade with nearly 30 years experience and currently work as a CNC machinist so i do have an engineering brain, thats why my voice sounds like Marvin the paranoid Andriod , (95% mechanical 5% personality)
I always wanted everything on this build to look 'feasable' and as i have said before it must 'Flow' like it would if it was real and also look 'cool' 8) but this makes it a very time consuming process.
Gag
Thanks for the comments guys, i find them very motivational ;D
ModelMakerMike said:Do you have some actual engineering training/schooling in your past?
8)
I'm a toolmaker by trade with nearly 30 years experience and currently work as a CNC machinist so i do have an engineering brain, thats why my voice sounds like Marvin the paranoid Andriod
I always wanted everything on this build to look 'feasable' and as i have said before it must 'Flow' like it would if it was real and also look 'cool' 8) but this makes it a very time consuming process.
Gag
Glorfindel
Active Member
- Joined
- May 2, 2011
- Messages
- 1,504
Re: NYLON GAG MK 1?
Easy there Gag.....starting to look a bit like the Flux Capacitor. Love the detail work your putting into this. Really great stuff.
Easy there Gag.....starting to look a bit like the Flux Capacitor. Love the detail work your putting into this. Really great stuff.
NecronautDrummer
Member
- Joined
- Sep 25, 2011
- Messages
- 804
Re: NYLON GAG MK 1?
Amazing scratchbuilding, Gag!
Amazing scratchbuilding, Gag!
fumblethumbs
New Member
- Joined
- May 22, 2011
- Messages
- 963
Re: NYLON GAG MK 1?
Very cool Gag! So much fun to watch it all come together. You sure do make it look easy!
Very cool Gag! So much fun to watch it all come together. You sure do make it look easy!
The Nylon Gag
New Member
- Joined
- Nov 14, 2011
- Messages
- 829
Re: NYLON GAG MK 1?
Afternoon Movers And Groovers,
Thank you all so very much for taking the time to comment it realy does mean alot & continues to inspire me ;D
Pipes, pipes, pipes. Thats pretty much all i been doin lately it seems like. :
After looking at the 2 engine assemblies, i decided to make a few changes.
Soooo, here we go...... PIX 8)
The more i looked at this the nastier i thought the hole thru the flange looked..
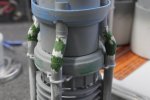
So dissasembled the top part of the assemblie and went to plan B
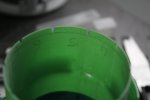
First i scored the inside of my nozzles/detergent caps, notched the corners and slit each one with me razor saw
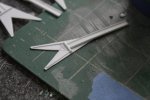
Made 10 vector thrust deflectors
Installed them with additional actuator rods

Cut the flange with wider gaps to accomodate extra details + started to add afterburner delivery greeblis.
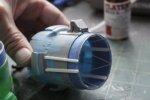
Filled and sanded the 4 support tubes & installed the external vector vane supports + more greeblies
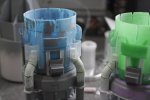
Then a coat of Primer, all together now ..... Mmmmmmmmmmmmmm Primer ;D
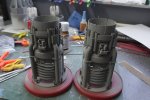
Then it was all pipes, pipes, pipes.
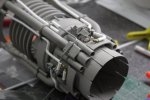
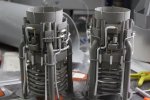
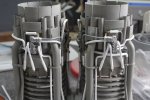
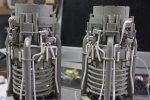
And thats the story so far.
Will probably install some wiring looms also, just to pack the detaii in like on the real thing.
Comments always welcome guys
Take it very squeezy my friends
Gaggles
[attachment deleted by admin]
Afternoon Movers And Groovers,
Thank you all so very much for taking the time to comment it realy does mean alot & continues to inspire me ;D
Pipes, pipes, pipes. Thats pretty much all i been doin lately it seems like. :
After looking at the 2 engine assemblies, i decided to make a few changes.
Soooo, here we go...... PIX 8)
The more i looked at this the nastier i thought the hole thru the flange looked..

So dissasembled the top part of the assemblie and went to plan B
First i scored the inside of my nozzles/detergent caps, notched the corners and slit each one with me razor saw

Made 10 vector thrust deflectors

Installed them with additional actuator rods

Cut the flange with wider gaps to accomodate extra details + started to add afterburner delivery greeblis.

Filled and sanded the 4 support tubes & installed the external vector vane supports + more greeblies

Then a coat of Primer, all together now ..... Mmmmmmmmmmmmmm Primer ;D

Then it was all pipes, pipes, pipes.


And thats the story so far.
Will probably install some wiring looms also, just to pack the detaii in like on the real thing.
Comments always welcome guys
Take it very squeezy my friends
Gaggles
[attachment deleted by admin]
Similar threads
- Replies
- 28
- Views
- 2K
- Replies
- 2
- Views
- 194
