P-38 F/G Lightning

Hi,
I missed your report and so am glad that you are home and able to return to your bench. However make sure that you care for your lungs, as so much of our hobby has the potential to harm us.

Would you believe that a Breast Cancer guide for patients and loved ones that I was given and has been superb in explaining and guiding us through this journey, is published by the John Hopkins medicine org. Nothing published here is of the same user friendly standard.

Here is hoping you kick the pneumonia fully and keep up the modelling Therapy.

John.
Thank you John.
With the paints we use in our hobby I know they can cause particles to float freely around the bench and room with the potential to negatively affect my lungs. Even though I stick to Vallejo acrylics the particles are still present. I have resorted to wearing, what I call my fighter pilot mask lol. It is a snug rubber mask.
Johns Hopkins has such a wealth of information on so many topics. I like how things are explained in a way that the average user can understand.
 
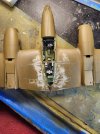
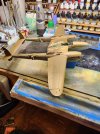
Hairspray round 2.
My wife gave me a pump spray of Sauve Hairspray so all I needed to do was to pour from the bottle into the air-brush. A few whisps and I was in business.
I'm pretty pleased with the outcome.
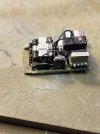
Next I'm planning to add more cabling to the radio bank. Tedious but I think it will payoff in adding small details.
 

Attachments

  • 20230108_022237.jpg
    20230108_022237.jpg
    561.3 KB · Views: 15
  • 20230108_022948.jpg
    20230108_022948.jpg
    247.3 KB · Views: 15
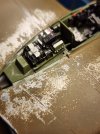
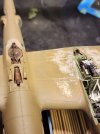
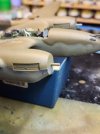
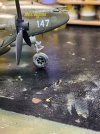
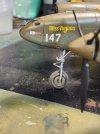
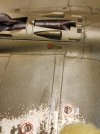
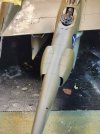
I tried creating the effect of oil leaks and I think I go a little too carried away.
I used umber and a black wash then used the airbrush to blow the wash in irregular patterns.
 

Attachments

  • Screenshot_20230113_141153_Gallery.jpg
    Screenshot_20230113_141153_Gallery.jpg
    163 KB · Views: 13
  • Screenshot_20230113_141124_Gallery.jpg
    Screenshot_20230113_141124_Gallery.jpg
    183.4 KB · Views: 13
I tried creating the effect of oil leaks and I think I go a little too carried away.
I used umber and a black wash then used the airbrush to blow the wash in irregular patterns.
I wouldn't want to be flying it with that much oil coming out of the engine. I do like the idea though, using the airbrush to blow it in the right direction is genius .
Pantherman
 
I wouldn't want to be flying it with that much oil coming out of the engine. I do like the idea though, using the airbrush to blow it in the right direction is genius .
Pantherman
The diorama (I hope to build) will have this plane under maintenance. I have enough figures left over from my B-17 where I think I can achieve this.
I agree it is exaggerated oil spurts.
 
The diorama (I hope to build) will have this plane under maintenance. I have enough figures left over from my B-17 where I think I can achieve this.
I agree it is exaggerated oil spurts.
I think if it's being set up as you say with maintenance crew fixing it then it's going to look cool. Can't wait to see the finished build.
Pantherman
 
Yeah, for an inline engine, that's catastrophic! But it's an interesting idea to replicate the flow in the airstream.
 
So with those kind of oil leaks I think he should put in for maintenance lol
I might try to blend some of them away.
 
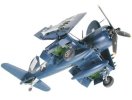
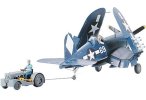
I want to build theTamiya 1/48 Vought F4U-1D Corsair to add to the P-38.
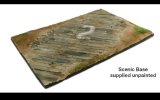
I found a base on ebay which I believe I can build myself.
My work is cut out for me.
 

Attachments

  • Screenshot_20230115_211636_eBay.jpg
    Screenshot_20230115_211636_eBay.jpg
    61.7 KB · Views: 9
  • Screenshot_20230116_183126_Amazon Shopping.jpg
    Screenshot_20230116_183126_Amazon Shopping.jpg
    61 KB · Views: 9
  • Screenshot_20230116_183118_Amazon Shopping.jpg
    Screenshot_20230116_183118_Amazon Shopping.jpg
    54 KB · Views: 9
...I found a base on ebay which I believe I can build myself...
Yeah, planking is relatively simple to reproduce. I use wooden coffee stirring sticks, but you can get basswood in strips that work just as well.

I picked up a couple resin bases that depict perforated steel planking and one is specifically for my Lightning.
 
Thanks. Coffee stirring sticks would save a lot of time instead of cutting balsa planks.

I found Perforated airfield slabs (4 pcs.) From ebay which might be a better option.
 
I was working on the P-38. As I was adding a PE control box to a brand new PE instrument panel they slipped out of my hands and onto the floor! OH NOOOO!:eek:
I found the box I then began to search and search for the instrument panel. I never found it. I used another PE instrument panel and pleased how it all turned out.
I added the dash and front window and now I am so disappointed. Turns out all of that searching, crwaling around on my hands and knees, and cussing was for nothing even adding the new instrument panel wasn't worth the hassle. The dash ended up concealing the panel. What a bummer that it's just barley visible with a flashlight. :(
Munching time for the carpet monster!! Do you have any photos of the panel after installation?
Pantherman
 
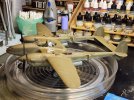
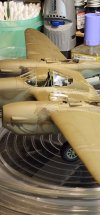
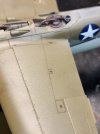
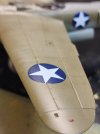
Finishing touch-ups underway.
Top decals are complete all but 4 that I will apply after I add a clear flat coat.
I still need to add around 55 tiny text decals.
Tamiya did a great job on these because they are all legible and not a black blob simulating text.

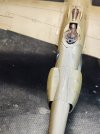
Seems I'm having some trouble of achieving exhaust trails on the booms. I have a base color down which is a pale grey wash. I've watched videos but I just don't have the hang of it yet.
Any advice?
 

Attachments

  • 20230119_010721.jpg
    20230119_010721.jpg
    362.9 KB · Views: 6
  • 20230119_010743.jpg
    20230119_010743.jpg
    301.4 KB · Views: 6
  • 20230119_010758.jpg
    20230119_010758.jpg
    242.9 KB · Views: 6
  • 20230119_010807.jpg
    20230119_010807.jpg
    147.1 KB · Views: 5
  • 20230119_010823.jpg
    20230119_010823.jpg
    338.8 KB · Views: 5
  • 20230119_010842.jpg
    20230119_010842.jpg
    343 KB · Views: 5
  • 20230119_010848.jpg
    20230119_010848.jpg
    278.7 KB · Views: 6
Munching time for the carpet monster!! Do you have any photos of the panel after installation?
Pantherman
Not yet. I just shove a bunch of foam in the cockpit to shoot a simigloss coat for pannel wash and decals.
I'll post one soon.
 

Latest posts

Back
Top