P-47D Razorback in progress
- Thread starter the Baron
- Start date
bttfspencer
New Member
- Joined
- May 6, 2009
- Messages
- 74
the Baron said:Thanks, Spencer! Believe me, it's coming out much nicer than expected, I'm surprising myself! And thanks everyone for the kind comments! Update to follow...
You're very welcome Sir, you have been creating some beautiful work, and deserve the praise for it.
Best Regards, God Bless you.
-BTTFSpencer
the Baron
Ich bin ja, Herr, in Deiner Macht
- Joined
- May 12, 2009
- Messages
- 2,275
Thanks, guys, and here's a quick followup.
A couple of the guys over at Agape Models challenged me, to keep me humble They asked, sure, I got the canopy separated, but does it fit?
OK, fair question, so here are some shots of a test-fitting. From the right side:
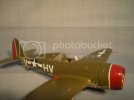
and from the left side:
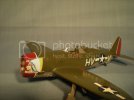
Two fit issues that I can see. First, with the windshield, I'll need to trim the trailing corners, because I think Squadron molded on the forward stops for the sliding section, and they're molded on the fuselage as well. But I think the windscreen will fit OK. I'm planning on attaching it with white glue, too, so that will help with any imperfections.
Second, with the sliding section, if anything, it's been flattened out a little from the whole process. That's not a major problem, though, because I can attach the one side, let it set, then attach the other side.
So, now it's on to the next phase, cleaning up the canopy sections with some sanding on the edges, some filler for the extra scratches (on the frame of the sliding section), then a dip in Future.
Thanks for following along, and all the kind comments!
A couple of the guys over at Agape Models challenged me, to keep me humble
OK, fair question, so here are some shots of a test-fitting. From the right side:

and from the left side:

Two fit issues that I can see. First, with the windshield, I'll need to trim the trailing corners, because I think Squadron molded on the forward stops for the sliding section, and they're molded on the fuselage as well. But I think the windscreen will fit OK. I'm planning on attaching it with white glue, too, so that will help with any imperfections.
Second, with the sliding section, if anything, it's been flattened out a little from the whole process. That's not a major problem, though, because I can attach the one side, let it set, then attach the other side.
So, now it's on to the next phase, cleaning up the canopy sections with some sanding on the edges, some filler for the extra scratches (on the frame of the sliding section), then a dip in Future.
Thanks for following along, and all the kind comments!
the Baron
Ich bin ja, Herr, in Deiner Macht
- Joined
- May 12, 2009
- Messages
- 2,275
Wow, it has been over a month since I posted any progress to this thread!  I surprised myself, because I expected to get some more work done over Christmas vacation, but it was too cold to work at my bench in the basement!
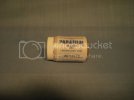
I haven't been completely idle, since the last post, I've been working off and on at the very fiddly job of masking the canopy. Thanks very much again to my brother Randie Coulter over at Agape Modes (shameless plug: www.agapemodels.com ;D ) for the supply of Parafilm! This is my first time using that material. I think I'm getting a little better at it-practice makes perfect, of course!
First off, here's a shot of the materials. The Parafilm:
and the tools I'm using:
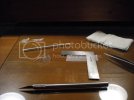
A new #11 X-Acto blade, a metal straight edge, good fine-point tweezers, a piece of glass plate for a base (mine is salvaged from an old copier), and the white thing is a plastic dental tool, I think it's used for trowling putty around on a tooth. It has a straight chisel edge at one end, and a rounded edge at the other. Perfect for manipulating the Parafilm and smoothing and pressing it down on the surface.
Working with a vacuform canopy is a little fiddlier than with a more rigid styrene canopy. Because it's flexible, I couldn't try the technique of applying a piece of the film across a whole section of the canopy, and then scribing along the framework and peeling away the framework lines. Instead, I laid a piece of Parafilm out on the glass, and used the straight edge to cut strips, and then little squares. I used these to fill the area of each panel of the canopy:
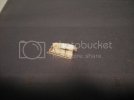
Hopefully it shows up well enough against the dark background.
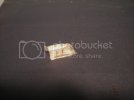
With the memory of my Airacobra canopy disaster still fresh in my mind, I tried to be careful and used pieces of Parafilm to cover the underside of the canopy, too, to protect it during spraying.
Here, then, are views of the left and right sides of the canopy, with a coat of Tamiya OD. From the port side:
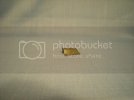
and from starboard:
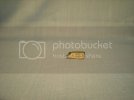
It's down on the bench right now, awaiting a couple of decals (there was some stencilling on the bottom rail of Little Chief's canopy).
The windscreen remains to be masked. I wanted to cut my teeth on the sliding section, with its relatively simpler shape. Now that I know a little better what to expect from the material, I think the windscreen will be a little easier.
Only a couple laps to go-the last of the stencils, a matte coat, then the canopy, gun barrels, wheels, and Lt. Klibbe himself. I'm hoping to finish this in the next week or so.
As always, comments/criticisms are welcome, thanks for looking and I remain
YbiC
Brad
I haven't been completely idle, since the last post, I've been working off and on at the very fiddly job of masking the canopy. Thanks very much again to my brother Randie Coulter over at Agape Modes (shameless plug: www.agapemodels.com ;D ) for the supply of Parafilm! This is my first time using that material. I think I'm getting a little better at it-practice makes perfect, of course!
First off, here's a shot of the materials. The Parafilm:

and the tools I'm using:

A new #11 X-Acto blade, a metal straight edge, good fine-point tweezers, a piece of glass plate for a base (mine is salvaged from an old copier), and the white thing is a plastic dental tool, I think it's used for trowling putty around on a tooth. It has a straight chisel edge at one end, and a rounded edge at the other. Perfect for manipulating the Parafilm and smoothing and pressing it down on the surface.
Working with a vacuform canopy is a little fiddlier than with a more rigid styrene canopy. Because it's flexible, I couldn't try the technique of applying a piece of the film across a whole section of the canopy, and then scribing along the framework and peeling away the framework lines. Instead, I laid a piece of Parafilm out on the glass, and used the straight edge to cut strips, and then little squares. I used these to fill the area of each panel of the canopy:

Hopefully it shows up well enough against the dark background.

With the memory of my Airacobra canopy disaster still fresh in my mind, I tried to be careful and used pieces of Parafilm to cover the underside of the canopy, too, to protect it during spraying.
Here, then, are views of the left and right sides of the canopy, with a coat of Tamiya OD. From the port side:

and from starboard:

It's down on the bench right now, awaiting a couple of decals (there was some stencilling on the bottom rail of Little Chief's canopy).
The windscreen remains to be masked. I wanted to cut my teeth on the sliding section, with its relatively simpler shape. Now that I know a little better what to expect from the material, I think the windscreen will be a little easier.
Only a couple laps to go-the last of the stencils, a matte coat, then the canopy, gun barrels, wheels, and Lt. Klibbe himself. I'm hoping to finish this in the next week or so.
As always, comments/criticisms are welcome, thanks for looking and I remain
YbiC
Brad
the Baron
Ich bin ja, Herr, in Deiner Macht
- Joined
- May 12, 2009
- Messages
- 2,275
Well, you probably thought that I sit around talking about building models, more than doing actual work on them  But here is another little bit of progress, and believe me, I actually have spent a lot of time on this step, since the last post.
I've finished masking and painting the windscreen! And when I say I spent a lot of time on it, I really mean it. This was my first time working with Parafilm, and I've learned some lessons.
For one thing, I probably wouldn't use it again on a small vacuform canopy such as this, at least, not in the same sequence. Cut from its carrier, the canopy is very flimsy; if it were more rigid, it would have been easier to lay a large piece of film over the entire sections, and then cut away the framing. On a styrene canopy, I think that method would have been relatively easy. I did try applying a large piece and cutting it on the work, but there just wasn't enough rigidity. If I were to Parafilm another vacuform canopy, I might apply it while the canopy is still on the carrier, then cut the carrier away.
As it was, I cut tiny pieces of Parafilm and applied them to the clear panels. I confess, I got frustrated with the windscreen, despite doing a little bit at a time, so as not to get bored. But applied in this way, the Parafilm is the fiddliest of all fiddly things in the entire fiddly universe. Fortunately, I'm blessed with a great brother, who gave me a third hand stand a couple of years ago, one of those stands with a cast metal base, a couple of alligator clips, and a magnifier. I stuck the windscreen in one of the clamps (which I wrap with masking tap, to protect the work), and worked carefully with tweezers and a plastic rod to attach each piece. Let me tell you, little 5mm squares and strips of Parafilm have minds of their own. But as I said, I got frustrated at one point, pulled of the film I'd applied, grabbed a brush and started painting. But that looked terrible. So, a quick spray of Easy-Off, a quick cleaning, and I started over.
Mind you, this was over a couple of weeks, a little bit here and there, cutting pieces, trying to fit them, re-fitting, cutting new, and on, and on, and on...
Anyway, one last push, and I declared the masking done. I shot the windscreen with OD (a different shade, argh! because I've run out of Tamiya AS olive drab), and, tonight, I've removed the masking.
So, after so much Geschwaetz, here is what the canopy looks like:
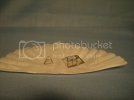
and from the other side:
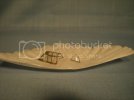
I can hear Quint, when Brody couldn't tie a knot--"Heh-heh, not too good, is it, Chief! Well, nuthin's easy the first time."
Actually, it's not as bad as all that. I've already done some cleanup; the bled paint comes off easily enough with a toothpick. It won't take too much longer to clean the rest of it off. And I had already planned on going over the clear panes, and the underside, with a weak ammonia solution, Windex, really, followed by Future brushed on, and touching up bare spots on the frames with a brush. I have a little scrap of plastic drying right now, for the mirror that Klibbe had on top of the windshield.
I'll probably use the Parafilm again, but for the next attempt, it'll be a styrene canopy, to see how that works.
I'm getting close to finished now, I can taste it. I attached some more bits, but I don't want to post any pics of the aircraft now, until I'm done. With another snowstorm on the way, I'll have some time to stay put this weekend.
Anyway, thanks for looking, sorry for running on, and always, comments/criticisms are welcome!
YbiC
Brad
I've finished masking and painting the windscreen! And when I say I spent a lot of time on it, I really mean it. This was my first time working with Parafilm, and I've learned some lessons.
For one thing, I probably wouldn't use it again on a small vacuform canopy such as this, at least, not in the same sequence. Cut from its carrier, the canopy is very flimsy; if it were more rigid, it would have been easier to lay a large piece of film over the entire sections, and then cut away the framing. On a styrene canopy, I think that method would have been relatively easy. I did try applying a large piece and cutting it on the work, but there just wasn't enough rigidity. If I were to Parafilm another vacuform canopy, I might apply it while the canopy is still on the carrier, then cut the carrier away.
As it was, I cut tiny pieces of Parafilm and applied them to the clear panels. I confess, I got frustrated with the windscreen, despite doing a little bit at a time, so as not to get bored. But applied in this way, the Parafilm is the fiddliest of all fiddly things in the entire fiddly universe. Fortunately, I'm blessed with a great brother, who gave me a third hand stand a couple of years ago, one of those stands with a cast metal base, a couple of alligator clips, and a magnifier. I stuck the windscreen in one of the clamps (which I wrap with masking tap, to protect the work), and worked carefully with tweezers and a plastic rod to attach each piece. Let me tell you, little 5mm squares and strips of Parafilm have minds of their own. But as I said, I got frustrated at one point, pulled of the film I'd applied, grabbed a brush and started painting. But that looked terrible. So, a quick spray of Easy-Off, a quick cleaning, and I started over.
Mind you, this was over a couple of weeks, a little bit here and there, cutting pieces, trying to fit them, re-fitting, cutting new, and on, and on, and on...
Anyway, one last push, and I declared the masking done. I shot the windscreen with OD (a different shade, argh! because I've run out of Tamiya AS olive drab), and, tonight, I've removed the masking.
So, after so much Geschwaetz, here is what the canopy looks like:

and from the other side:

I can hear Quint, when Brody couldn't tie a knot--"Heh-heh, not too good, is it, Chief! Well, nuthin's easy the first time."
Actually, it's not as bad as all that. I've already done some cleanup; the bled paint comes off easily enough with a toothpick. It won't take too much longer to clean the rest of it off. And I had already planned on going over the clear panes, and the underside, with a weak ammonia solution, Windex, really, followed by Future brushed on, and touching up bare spots on the frames with a brush. I have a little scrap of plastic drying right now, for the mirror that Klibbe had on top of the windshield.
I'll probably use the Parafilm again, but for the next attempt, it'll be a styrene canopy, to see how that works.
I'm getting close to finished now, I can taste it. I attached some more bits, but I don't want to post any pics of the aircraft now, until I'm done. With another snowstorm on the way, I'll have some time to stay put this weekend.
Anyway, thanks for looking, sorry for running on, and always, comments/criticisms are welcome!
YbiC
Brad
DreamKnight
Active Member
- Joined
- Dec 8, 2009
- Messages
- 1,160
It's looking good!  You are stretching out the parafilm before applying them to the canopy right?
the Baron
Ich bin ja, Herr, in Deiner Macht
- Joined
- May 12, 2009
- Messages
- 2,275
Thanks, DK!
Yes, I took a piece about an inch wide, which stretches out to about four or five inches. I only needed half of that for the actual canopy surface.
The next opportunity to try it on a canopy will be with my other P-47 build, the bubbletop. I have the kit canopy for that one, and I think it will be easier to lay a larger piece of film over the whole piece, and then scribe along the frame lines, and remove the film on the frames.
Plus, the bubbletop has basically three or four frame lines to cut, one along the whole edge of the sliding section, and a couple lines on the windshield.
I like the Parafilm, but I'm still experimenting. I'm curious to try it for masking camo patterns, too.
DreamKnight
Active Member
- Joined
- Dec 8, 2009
- Messages
- 1,160
Ah, then it MUST be the vacuform canopy then which is understandable but you'd probably have the same problem with regular masking tape no?
the Baron
Ich bin ja, Herr, in Deiner Macht
- Joined
- May 12, 2009
- Messages
- 2,275
DreamKnight said:Ah, then it MUST be the vacuform canopy then which is understandable but you'd probably have the same problem with regular masking tape no?
It would still be fiddly, but the masking tape is a little more rigid, and with its adhesive, it's a little easier to attach a piece and anchor one end, as you lay the piece down on the surface. One problem with the little bits of Parafilm was that I would approach the canopy with the piece, held in a pair of tweezers, and touch an edge of the film to its intended spot, like the edge of the framing, say, and where a piece of masking tape would stick, the Parafilm would lift off, and it took several passes with many of the pieces, until I had them laid down where I wanted them.
It occurred to me, I could have packed the canopy with putty again, like I did when I cut it. I would have had to clean it afterwards, but I have to clean it now, anyway, because there still is some smudging, even with the Parafilm. Or another second thought that I had was that I could have masked the canopy, while it was still attached to the carrier. That would have kept it rigid enough to cut the film, I think.
All things to file away for the next time
the Baron
Ich bin ja, Herr, in Deiner Macht
- Joined
- May 12, 2009
- Messages
- 2,275
P-47D Razorback in progress-FINALLY FINISHED!
Hi, everybody! Today I made that extra push and finished "Little Chief", finally! Here are some shots of the completed aircraft.
From the left front:
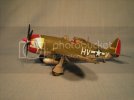
Last little bits to add were the aerial and the radio mast, the armored glass plate in front of the gunsight, and the canopy. I also had to paint the landing and formation lights.
From the right front:
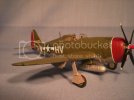
A view into the cockpit, from the right and behind:
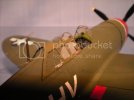
I'm not too happy with the way the canopy turned out, the framing is ragged. But I chalk that up to a combination of firsts, including working with a vacuform canopy, and working with Parafilm, for the first time.
A view into the cockpit from the left and behind:
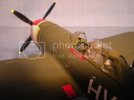
And since I started this kit back in 2006, I've learned a thing or two, that I would do differently today. Those lessons will get applied to the P-47D bubbletop currently in progress, and I have another copy of this kit in my stash, too.
Here's Lt. Klibbe in his office. I am happy with the way he turned out:
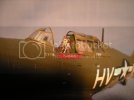
Monogram's figures were always very good, and that's a feature that keeps me buying old Monogram kits today.
Finally, a shot of the nose art, "Little Chief":
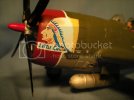
Well, despite the little things here and there that didn't come out quite the way I'd have liked, I'm happy with this build. It was fun, I do think it turned out better than the TBFs I built last year, and I think my buddy Brian, for whom I built this, and who passed away shortly after I started, would have liked it.
As always, I welcome comments and criticisms, and thanks for following along!
YbiC
Brad
PS-apologies to anyone who already saw this over at Agape, too, I post at both sites.
Hi, everybody! Today I made that extra push and finished "Little Chief", finally! Here are some shots of the completed aircraft.
From the left front:

Last little bits to add were the aerial and the radio mast, the armored glass plate in front of the gunsight, and the canopy. I also had to paint the landing and formation lights.
From the right front:

A view into the cockpit, from the right and behind:

I'm not too happy with the way the canopy turned out, the framing is ragged. But I chalk that up to a combination of firsts, including working with a vacuform canopy, and working with Parafilm, for the first time.
A view into the cockpit from the left and behind:

And since I started this kit back in 2006, I've learned a thing or two, that I would do differently today. Those lessons will get applied to the P-47D bubbletop currently in progress, and I have another copy of this kit in my stash, too.
Here's Lt. Klibbe in his office. I am happy with the way he turned out:

Monogram's figures were always very good, and that's a feature that keeps me buying old Monogram kits today.
Finally, a shot of the nose art, "Little Chief":

Well, despite the little things here and there that didn't come out quite the way I'd have liked, I'm happy with this build. It was fun, I do think it turned out better than the TBFs I built last year, and I think my buddy Brian, for whom I built this, and who passed away shortly after I started, would have liked it.
As always, I welcome comments and criticisms, and thanks for following along!
YbiC
Brad
PS-apologies to anyone who already saw this over at Agape, too, I post at both sites.
I
Ialarmu
Guest
I really like this one, nice clean build. It's a great paint scheme choice and I'm assuming that it is hand painted?
You say you had fun building it....I'd say mission accomplished...well done!

You say you had fun building it....I'd say mission accomplished...well done!
the Baron
Ich bin ja, Herr, in Deiner Macht
- Joined
- May 12, 2009
- Messages
- 2,275
Thanks for the kind words, guys!
@ialarmu-no, actually, it's rattlecans for painting, though there were some spots where I had to retouch with the brush, and the OD mismatched :-[ I did brush on the Future in preparation for decals. Masking was done with 3M masking tape, which I prep by sticking it to my fingertips a couple of times, to remove some of the adhesive. I've worked with the technique of lifting the edge of the tape ever-so-little, to get more of a feathered edge. I still haven't gone operational with an airbrush, having some trouble with a leaky hose coupling.
@ialarmu-no, actually, it's rattlecans for painting, though there were some spots where I had to retouch with the brush, and the OD mismatched :-[ I did brush on the Future in preparation for decals. Masking was done with 3M masking tape, which I prep by sticking it to my fingertips a couple of times, to remove some of the adhesive. I've worked with the technique of lifting the edge of the tape ever-so-little, to get more of a feathered edge. I still haven't gone operational with an airbrush, having some trouble with a leaky hose coupling.
svinehunden
New Member
- Joined
- May 30, 2009
- Messages
- 77
wow... great work 
Similar threads
- Replies
- 29
- Views
- 688
