Revell 50th Anniversary 1/144 Saturn V Rocket (Complete)

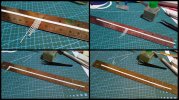
Dude try it. Like ras said, there's not much to loose. I hope ras won't mind me showing... I replaced some wires, and scratched the cloth on the back of the old mpc speeder bike.
View attachment 1277View attachment 1278
Rastanz I'm sorry for jacking your thread... Just say the word and I'll take em down.
That's totally fine mate, really awesome work with the wires and that cloth looks real to scale.

I also have an mpc speeder bike in my stash, dunno when I'll get to it but it's on my future to do list.

Thanks for sharing your work.
It is a shame how sparse the Revell kit is one details, You think for the 50th anniversary kit they might do some extra details similar to how the 30th Anniversary BSG kits addressed some of the shortcomings of the older kits

At any rate, it is a vast improvement!
True about the lack of detail on it, thinking to myself for a 50th it'll be awesome, but.... not the case here, I don't mind anyway, I'm still glad I picked it up.

I didn't read or watch any unboxing reviews of the kit, I bought it as it was going at half the price they usually sell for here plus I've really wanted to build and own one.
.....................................
Woohoo! my metal earth magnets arrived this morning (6hrs) ago so I jumped right into construction.

I had already planned my strategy to where and how I was going to mount them, I wanted each module section to have a solid connection so I made sure the magnets had plenty of contact. I used only one metal screw which is mounted to the underside of the command module which it still has a pretty solid connection with the magnet.

I mentioned earlier I was cutting off the little nub on the top of the command module as I wanted the area to look nice and flat so I did and mounted a magnet in it's place.

I used styrene tube to house another magnet which I covered the hole (where the command module connects) that was on top of the lunar module.

Happy how the magnets worked out as they hold really great but not too much that I need to force pry them apart.
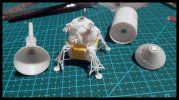
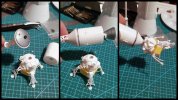
A11SV118.jpg

A11SV117.jpg

Going back over some more reference photo's I decided to add more piping detail to stage 3's engine area.
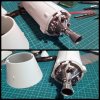
A11SV119.jpg

Just some tidy up to do then I can start laying down some primer on the seams and see where I'm at.

Thanks for looking.
 
Wow... That looks sweet. That is really amazing. It almost makes the hull seem out of scale, with all that fine detail.

Love the magnet idea BTW... Great idea man
 
Last edited:
It's really coming to life, looks amazing with all of your added detail.
Thank you, I'm having fun with it.
Wow... That looks sweet. That is really amazing. It almost makes the hull seem out of scale, with all that fine detail.

Love the magnet idea BTW... Great idea man
I do agree with the added detail kind of makes it look bigger, handy lil' things them magnets :)
Some incredible work going on with this.
I would never have the patience for it
Thanks, I think it gives me something to do while I am waiting for a supply delivery like paints or other stuff.
...................................................................

Waiting on some supplies to be delivered so I added more details, but firstly I scratch built a strip of corrugated panelling of which I will use later to further detail one of the stages inner structures.

Yep, took me a couple of hours once I got into a flow, probably would've taken me less if I had some quick dry cement.

A11SV121.jpg

Looking closely at some reference photo's, I noticed that the piping down the side of the Saturn V had small grooves in them, so I added them to mine.

I also added some piping to the inside bulkheads of which I had to glue into place just to be sure I could get them in there without hassles and that they are in place nice and secure.

A11SV122.jpg

Didn't like how the rings looked bare on the insides so I added some frames to them using some thin styrene strip.

I think it completes the bulkiness look of the sections.

A11SV123.jpg

A11SV124.jpg

There's one section that I'm not completely satisfied with and it's been doing my head in, the Lunar Module section, mainly the flaps / doors.

I have them lined up with the Command Module just fine but the lower edge seems to have a lip, reference photo's show thin raised detail around that edge as well as other tiny details that aren't on the kit, so I will try and scratch build that detail once my supplies are delivered.

Here's a photo of the said piece and what I'm thinking of doing. with some thin strip..

A11SV120.jpg

Might deal to the platform too as that looks a bit empty and bare.

Thanks for looking!
 
Bad A$$! Just a beautiful build.
Thank you.

Nothing major, just a mini update as my paints arrived but my styrene strip hasn't so no further detailing can be achieved on my Lunar Module compartment just yet but I did complete the inner structural frame details with smaller strips which was actually more challenging than the longer strips when curving them to the shape of the rings.

A11SV125.jpg

More to come...
 
Primed all the sections in black but the Lunar Module section which I completed adding the detail, I think my strip idea worked out really well in giving the piece some depth since the details on this section were soft, it also helped with my gap problem.

Also cut 2 dozen or so pieces of half round styrene and glued in place at the lower edge of the section, and lined the inners with more framing.

Once I prime this section I'll make a start on some paint work beginning with the engines and tanks.

A11SV127.jpg

A11SV128.jpg

Thanks for looking.
 
Looks fraking amazing... Tell me do find it hard to cut plastic in straight lines? I know these are just strips, but I always struggle with my scratching looking a bit... Well scruffy.

Not urs tho. Totally awesome job.
 
Was a busy weekend away at work but managed to do some additions on the Lunar Module last night.

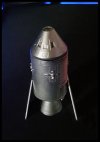
Moving along in slow mode... I went through the painful process of adding craft foil to the Lunar module, this stuff is brittle but I managed to get it down okay of which I applied in sections, I tried to achieve some good coverage with the foil and I guess it turned out better than what I had expected, I painted any tiny patches I missed with gold paint.

Wrapping the foil around the legs was tough with them being so narrow in places, these took the longest to do.

A11SV129.jpg

More to come...
 
Awesome man, this is fantastic.
Thank you for commenting.
Looks fraking amazing... Tell me do find it hard to cut plastic in straight lines? I know these are just strips, but I always struggle with my scratching looking a bit... Well scruffy.

Not urs tho. Totally awesome job.
I've actually given up on trying to cut plastic in straight lines lol, I find it easier to cut it to 'close enuff' then glue in place and sand it straight when glue has set... I'm terrible at cutting straight lines even with a ruler :D
nice work ... looks very impressive
Thank you :)
 
As cobraleader said Impressive.

Do you use gold leaf or something else? If it is gold leaf I didn't realize that was brittle.
 
Thank you for commenting.

I've actually given up on trying to cut plastic in straight lines lol, I find it easier to cut it to 'close enuff' then glue in place and sand it straight when glue has set... I'm terrible at cutting straight lines even with a ruler :D

Thank you :)
Ha... And here I thought I was the only one doing it that way. Fraking annoying when you sand too much off and have to glue a strip back on again.

That landing module looks a million times better, great job man.

Keep it up.
 
As cobraleader said Impressive.

Do you use gold leaf or something else? If it is gold leaf I didn't realize that was brittle.
Yes, gold leaf which it's probably known as or craft foil here, it is very brittle due to how thin the sheets are and compared to your regular kitchen foil when handling this stuff breaks apart very easily, I had to be gentle when picking up the pieces as my tweezers would sometimes tear through the sheet.

I carefully cut square shapes of roughly 10mm and patched it on using tamiya thin since it dries quicker and evaporates without leaving an unwanted thick layer of left over residue as I found using gel to glue it into place only made a gloopy mess with this stuff.

I built up layers on the legs as I wanted to get good coverage but I may add more because they still look a bit thin and my reference photo's show the foil around the legs to be a bit more puffy and thicker.

Hope this helps.

Cheers.
 
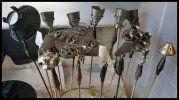
Laid the base coat down for the metal bits, used three types of gunze metallic's as I wanted to separate the uniformed look if I were to paint everything aluminium, looking to experiment with some tonal variations.

I applied a couple of coats of aluminium on the fins and the service and lunar modules, I want to these to look the cleanest, I then dusted a light coat of stainless steel on all the engine bells and the F1 engine deck as I wanted the black primer to show through (they'll be weathered as well) and finally I used titanium on the command module as I liked the metallic sheen compared to the aluminium on the service module.

A11SV131.jpg

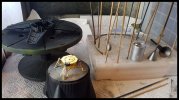
Airbrushed a black primer on the lunar module compartment which is ready for some base color on it's interior, I don't think I will follow the green scheme on the kit instructions, I will follow another reference photo which has a yellowish orange instead.

I quite like the difference in tone between the engine bell and the service module, it looks very cool... Once the service module is dry enough for masking I'll paint in the white panels and lay the decals.

Sealed the lower section of the lunar module with a gloss coat ready for decals, I'm glad the foil didn't crumble away as I was worried that it would being exposed to paint solvents and thinners.

A11SV132.jpg

Just a matter of waiting for paint to dry before moving on to the next step.

Cheers!
 
My god, the patience required to put that foil on!

It was worth it though. The details are just amazing
 
My god, the patience required to put that foil on!

It was worth it though. The details are just amazing
Thanks mate, I do think it adds some interest to the module.
..............................

Some friends on Facebook were joking around that the service module looked like a droid... so...

Introducing R2-SV :D

A11SV133.jpg
 

Latest posts

Back
Top