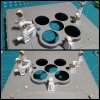
Revell 50th Anniversary 1/144 Saturn V Rocket (Complete)

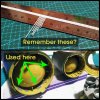
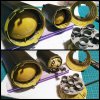
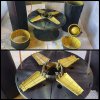
More painting progress today, did the bulkheads, the LM compartment doors and connecting rings with a gunze aqueous cream yellow as I didn't follow the instruction booklet to paint those areas green plus I want my Saturn V to be a different color theme... I built up thin layers over certain sections as I wanted some areas more solid looking and others with a hint of black primer showing through, almost used up my whole paint pot painting these sections.

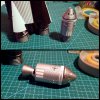
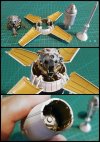
Also laid a second coat of metallic aluminium on the fins and the Lunar and service modules.

I'll give them a good overnights drying then start on detailing the metal areas with metallic paint and once those are complete start the big mish of laying down the white.
A11SV134.jpg

A11SV135.jpg

Thanks for looking.
 
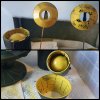
Yes, gold leaf which it's probably known as or craft foil here, it is very brittle due to how thin the sheets are and compared to your regular kitchen foil when handling this stuff breaks apart very easily, I had to be gentle when picking up the pieces as my tweezers would sometimes tear through the sheet.

I carefully cut square shapes of roughly 10mm and patched it on using tamiya thin since it dries quicker and evaporates without leaving an unwanted thick layer of left over residue as I found using gel to glue it into place only made a gloopy mess with this stuff.

I built up layers on the legs as I wanted to get good coverage but I may add more because they still look a bit thin and my reference photo's show the foil around the legs to be a bit more puffy and thicker.

Hope this helps.

Cheers.

I see. I've never worked with it so I didn't know it was brittle. Thanks for letting me know.
 
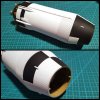
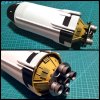
Masked off and airbrushed the Service Module with white panels, all that's left is to lay the decals down and that section is complete, I'm also liking the tones of the different metallic's I used, looks pretty cool.

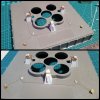
I've also been experimenting with some Tamiya Clear acrylics using Smoke for shading the engine bells and the F1 engine deck which turned out pretty good, it's hard to get a decent photo of the effect but it's there.

A11-SV14145.jpg

I've watched some Saturn V build video's on Youtube, one thing I noticed with all the builders is that they all followed the same sequence of black priming with multiple thin layers then painting the complete rocket white and lastly masking off then painting the areas for the black panels.

After some thought of how I was going to approach my own paint work, I decided not to follow what they did as I saw it as a waste of white paint and a waste of time because they all pretty much went over the black panels with white only to have to paint that same area black later on.

I primed everything with three coats of Vallejo black surface primer which will also act as my base coat for the black colored panels, from there I masked of the areas that will remain black which left me with just having to paint the rest of the rocket white.

I also chose to paint the sections separately instead of the whole thing as the builders on Youtube did, this enabled me to get a tighter mask in and around the panels hoping this would keep any paint bleeding to a minimum which it did and left me with almost nothing to tidy up.

A11-SV14146.jpg

A11-SV14147.jpg

Thanks for looking.
 
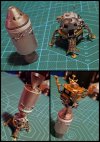
Painted some of the panels on the Lunar Module black and added the decals on both it and the Service Module, they're pretty much completed, just some touch up paint work here and there to add some tiny details then I can put these aside to concentrate on the remaining paint work of the other sections.

Stoked about how good the magnets turned out, they're solid and can handle the weight of both the modules when connected..

A11-SV14149.jpg

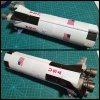
Once the clear coat on stage 1 was dry enough I placed all the decals, they went down pretty good except for one of the flags which kept wanting to wrinkle so I drowned it in micro set and with a cotton bud lightly rolled back and forth until it flattened out which did the trick nicely.

Stage 1 is also pretty much done, stage 3 just needs a wet sand to smooth out my rough paint work then a clear coat and finally it's decals.

A11-SV14148.jpg

A11-SV14150.jpg

The rings, stage 2 and the LM compartment are next in line for a base colour as soon as the weather fines up, at the moment it's rain and humidity.

Thanks for looking :)
 
Looks amazing man. Especially considering the scale of this thing.
Thanks, yeah tiny little things to detail, doesn't help that my eye sight sux :D
Looks beautiful man, great job!
Thank you, trying my hardest to dress her up a bit.
..................................

Okay, headed to the semi finals with only two sections stage 2 and it's connecting ring left to paint and from there onwards its just tidy up and laying the last of the decals. I'll approach the masking the same as I done with the other areas by using the previous section to line my masking tape as you can see in the photo with the ring connected to stage 2.

Once painted I can insert the bulkheads and booster rockets, these were the only two sections that I didn't need to glue before sealing the two halves as I was able to test fit them and they slid into position quite easily.

A11-SV14154.jpg

I realized I shouldn't have painted the lip area's along the edges as fitting was tight almost having to force the parts together, so I roughly sanded away the paint work and since the model is originally white anyway, it should blend nicely with the paint colour... I'll have to tidy up those areas later.

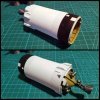
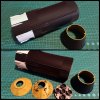
Finally got around to masking off the module compartment, I was purposely avoiding this stage as it was not the easiest to mask but had to be done anyway, after laying its base coat I did a test fit of stage 3 and the modules including the escape tower.

A11-SV14151.jpg

I'm glad that I chose to detail the Lunar Module compartment with styrene strip to both dress up and hide the gaps as I can only imagine the gaps each layer of paint would've created if I hadn't no matter how thin a coat was.

A11-SV14152.jpg

A11-SV14153.jpg

Really happy with how it's turning out.

Thanks for looking and for all your comments :cool:
 
Last edited:
I have this kit, looking forward to building it.
It's a great kit overall, just lacks detail in certain areas mostly the interior bulkheads unless you plan to display it in separate sections it's not really necessary to detail these parts but the option is there.

Good luck with your build and post a lot of progress pics :)
 
Seems I've exhausted all my white paint as I had used the whole jar already, oh well.

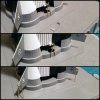
Meanwhile whilst I wait for my order of paint to be delivered, I test fitted the rocket to it's display base, lucky I did as without any forced effort one of the plastic pins snapped right off as I was bending it into place, thought to myself a bit of glue will fix it but no, the piece would snap right off as soon as I applied a tiny bit of bend to it, I tried various types of glue, gel, sealant, hot glue but the piece just kept breaking.

It had become a time waster and a nuisance so I cut the other piece off as well then sanded smooth all the messy glue stains that were left from my previous failures.

Brass wire to the rescue!

Had a brainstorm to replace the flimsy plastic with brass wire so I measured the height from the base to the ledge on the side of the rocket, cut two pieces of brass wire to identical lengths then shaped both pieces into what I needed, I took my pin vice and drilled two anchoring holes into the base where the wire was to be inserted, I used a slightly smaller drill bit than the actual size of the wire as I wanted the wire to be a tight fit.

Mounted the rocket and tested, hey presto! it actually worked better than the plastic clips... I may dress the wire up a bit and slide a tiny bit of red and black wire sleeve to cover the brass in the design of a hazard strip.

The last photo is just an idea for extra support for the base of the rocket because the last thing I want is for all my effort to topple over because of a lack of support on it's base.

A11-SV14155.jpg

Cheers.
 
Last edited:
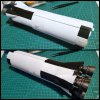
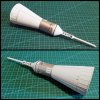
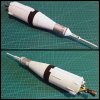
Completed the final two sections of paint work on stage 2 and it's connecting ring... the tapered section was hell to mask, getting the line straight was a pain in the ass but I got there, as for stage 2 I use a combination of masking tape and liquid frisket.

Once the paint has set dry overnight it's just a clear coat left and then I can finish laying the decals.

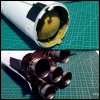
Slid the bulkheads into place and used a paint brush to apply cement to the ledge up through the cylinder.

I like how the bulkheads turned out with the added details on stage 2 as the booster rockets was the most bare looking piece of the model.

A11-SV14156.jpg

A11-SV14157.jpg

Almost at the finish line.

Cheers :cool:
 
This is looking VERY good.
Nice fix with the brass, too
Thanks, yeah I was a bit peeved that the tab snapped off but then I thought at least it will give me the opportunity to add some details to the base :cool:
.......................................
Rocket is pretty much done, I'm almost saddened that the build is nearly over as it was a fun project detailing it.

Anyway, with me thinking my paint had run out I actually found a half full pot going through an old paint stash along with some old school Floquil paints that are still good to go, so now all the painting is complete, the decals are added and she's ready for a top coat.

I've started detailing the base, it's not highly detailed as I was only trying to achieve the basic shapes from reference... the cable thingy's were meant to be on the sides by I like them on an angle.

I made a custom label to replace the kit one as I think it doesn't do the base any justice and looks bland, I'm thinking with a dark metallic or gold background.

A11-SV14158.jpg

A11-SV14161.jpg

Cheers for looking.
 
2ffa423d88da1f8f4007a96fc7c9f013.gif
 

Latest posts

Back
Top