Revell Space Shuttle 1:144 Build

Sweet-Chuck

New Member
Joined
Dec 30, 2024
Messages
12
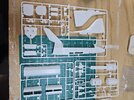
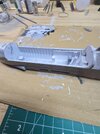
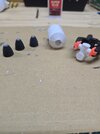
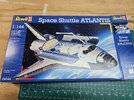
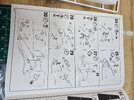
Needed something to do over the winter, so I decided to try a model. There are three white sprues, 1 clear sprue, a variety of shuttle decals, and instruction book. The book appears to be clear and notated well. I Noticed decent amount of flash right away on many pieces. I cut the first few pieces out to see how the fit was, and I think it's going to give me some challenges. Did some sanding and filing which helped a bit. I think I'll spray prime the entire sprues to make it easier, then figure out the best time to paint pieces or sub assemblies. We'll see how this goes....
1000004846.jpg

1000004849.jpg

1000004848.jpg

1000004847.jpg
 
Nice! and welcome!
I've only been active here since mid-December, but I can tell you the water's nice!

Hope you'll pay particular attention to that Canadarm! ;)
 
Needed something to do over the winter, so I decided to try a model. There are three white sprues, 1 clear sprue, a variety of shuttle decals, and instruction book. The book appears to be clear and notated well. I Noticed decent amount of flash right away on many pieces. I cut the first few pieces out to see how the fit was, and I think it's going to give me some challenges. Did some sanding and filing which helped a bit. I think I'll spray prime the entire sprues to make it easier, then figure out the best time to paint pieces or sub assemblies. We'll see how this goes....
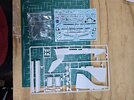
View attachment 132966

View attachment 132967

View attachment 132968

View attachment 132969
Hi and welcome to the forum. Pantherman
 
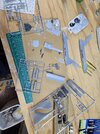
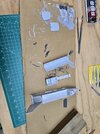
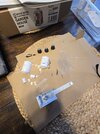
Well, there are 4 white sprues, not 3, lol. Didn't really know if it would be better to paint before assembly, or afterwards. Going to do a bit of both so if I build another I'll lnow better. The two parts that make the fuselage took a fair amount of filing to line up decently. Using general purpose craft paint because it's here and I didnt want to invest a bunch of $ in model paint for this one kit. I'll reevaluate that stance in the future if need be. It isn't ideal and doesnt lay down like I want, bit it will do enough to bring this girl to life.

1000004914.jpg

20250101_205059.jpg
 
Have been repainting and touching up parts I've already painted, so not much to share. I've been researching model paints because these craft paints clearly are not up to the task, lol.
 
This looks like a cool project. I've been wanting to do something other than cars (and Star Trek), and my wife does not like me doing military (WAR) models. I concede, mostly. Doesn't hurt to have a few Corsairs and Zeros in the stash though. Besides this is NASA baby. Anyway, welcome and I'll be following along.
 
This looks like a cool project.
I wanted to get the Tamiya 1:100 shuttle model, but $60+ plus a longer delivery time caused me to pause. From what Ive read, this Revell is easier and was under $30, so figured this would be the one to test the waters with. I think it would be sweet to have a nicely done shuttle model hanging from the ceiling in my office, bay doors open and facing the floor.
 
Looks like putty and sandpaper will be needed in the future. The fit is.....challenging at times. Although, maybe all models are like this? Anyway, what grit sandpaper is most common for modeling?

20250105_205218.jpg

20250105_205449.jpg
 
I usually use 400-600 grit on putty and seams. I don't use anything courser than 400 grit as it takes too much material away. I will go down to 2000 grit if wet sanding paint.
 
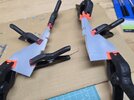
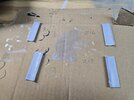
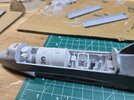
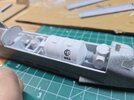
Got the wings fitted and glued, inise of.bay doors primed, and radiators primed. The cargo bay of the orbiter is beginning to look like something too. Did ok with the decals on the ESA module for a newbie. The fit between some sub assemblies is rough looking, but didnt wamt to file and trim excessively and potentially ruin parts altogether.

20250110_210136.jpg

20250110_210141.jpg

20250110_210151.jpg

20250110_210209.jpg
 
Nice - looking good!
Fun to see it coming along.

didnt wamt to file and trim excessively and potentially ruin parts altogether.
.. I know eh? I guess that is something we'll get better at with experience. I'm still learning, so others please jump in!

I found that filing works to a point, and sanding too, but in some situations, scraping gives me better control. There are special tools, but a sharp #11 blade, with just a little pressure, makes a great scraper pulled sideways along a mold line on a convex surface, removing a minimum amount at a time.

Like @TimM63 , no less than 400 grit sand paper, and then carefully, avoiding scratch marks in the plastic that need even higher grit to remove.

With cylinders and other rounded features, I've started using sanding sponges, and they work great because of how they conform to the shape and don't flatten the cylinder!

Cheers
 

Latest posts

Back
Top