Scratch built Baneblade on steroids

The Swedish DR. Plastic

Pleas enter, the day has gone to hell any way.
Joined
Mar 10, 2014
Messages
185
Hi guys Here i was planing to show you guys my progress on a scratch built Baneblade, :) if i ewer get it finished :p. Wrecked the first superstructure this weekend, had started gluing parts on it before the frame was finished. So I got some pictures of the construction of the new frame for you guys, I just need to get em out of my dad's camera first :-\.
 
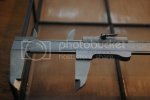
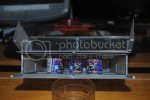
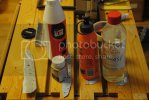
So as promised I will try to make a scratch built Baneblade. And you might think i will be using evergreen material, sadly no. That would run up my budget fast, so instead i will be recycling everyday items combined whit hobby material. So these are the tools i used so far.
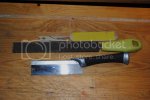
DSC_0000_zps2476ba8b.jpg

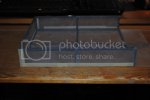
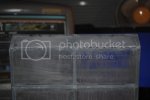
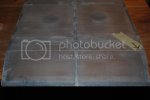
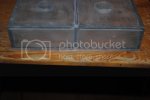
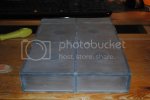
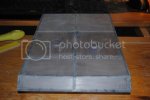
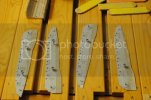
So for the frame I will be using those annoying Cd covers that you got laying all over the house, I saved up all of mine and ended up whit 2 grocery bag's full of them. And the scratchier the better, trust me. So grab a stack and remove the lids to start whit, oh and remove those annoying insert as well. You'll be needing about 16 of them, depending on how good you are whit the saw.
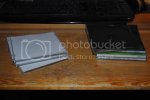
DSC_0001_zps44b596bb.jpg

Fist of were going do do the front part, first cut should be about 1" ore 25 mm MAKE TWO. If u want u can smother out the part that remains, second cut should be about 2, 3/4" ore about 70 mm MAKE TWO. The smaller part is OK, but if you try fitting the front on later you will notice that the top is to big. Will be adjusted later. !!! WARNING DO NOT REMOVE THE INLAY STOP ON THESE PIECES !!!
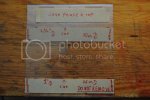
DSC_0002_zps3e21b336.jpg

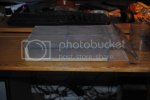
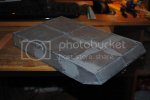
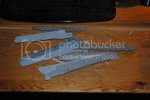
Gluing the two parts together side by side wont hold up very long, so to help them I'm gluing down long sanded down sprue's from my GW models. And it helps if you take a sand paper and run it along the side were your gluing, and simply use the natural slanting of the sprue to get that V shape in the front.
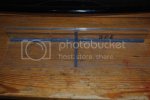
DSC_0003_zps0af75a31.jpg
DSC_0004_zps94da5dba.jpg
DSC_0005_zpsaed2e331.jpg

Cutting out the peaces for the bottom, you'll need to cut after the doted line :p. Just cut away the sides and the stop for the inlay on the inside and you'll be fine. Make 4 full size parts and 2 half size parts.
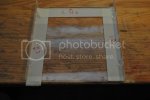
DSC_0006_zpsf691ed95.jpg

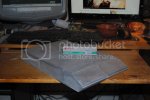
Now for the top (the lid) I opted for keeping that stop on the back until i have glued it down securely and then grind it down. We will also be using the part that was left over from wen we did the front.
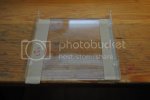
DSC_0007_zps1e74d22f.jpg
DSC_0008_zpsba3de7c9.jpg
DSC_0009_zps926df120.jpg

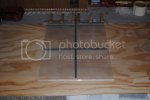
Wen you get this far put it aside for now. And the observant viewer will notice that i used smaller strips towards the front (my bad, didn't find my leftover). So at this point it is about 302 mm long
DSC_0010_zps24babdf9.jpg
Will post the rest this afternoon.
 
Part two of this monster build.

Next step i made the sides, cut out three 1,77" ore 45 mm strips length wise and join them end to end.

DSC_0011_zpse7f32b9d.jpg

Start joining together the bottom peaces in to a 2x2 & ½ grid, at this time it is time to cut it down to size. I measured after the with of a standard A4 paper folded lengthwise as best i could to get the center line.
DSC_0018_zps59b29514.jpg
Added another paper so i covered the total length of the bottom, then marked out the edges and started sawing. When finished glue on the back peas and trim it down, then it's time to start gluing down the side supports.
DSC_0012_zps89a36368.jpg
DSC_0013_zpsc659ed9e.jpg

Add the sides and the sprue's holding on the top.
DSC_0014_zpsd3dfe657.jpg
DSC_0015_zpsace82854.jpg

Have the sprue's stick up about 1,5 mm, wait for it to set over night and ether grind it down whit a file ore use power tool but take it easy.
DSC_0016_zpsdeadcb63.jpg

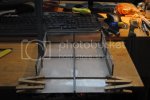
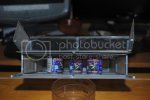
By now you should have something that looking like this.
DSC_0017_zpsb96a6821.jpg

And that is as far as i have come for now, tomorrow i will grind down the sprue's and some more support frames on the inside.

So until tomorrow, god night.
 
So I grinded and filed my sprue's down yesterday and test fitted the lid and the deviation on it was only 0,5 mm on the entire length 8). Only had to ad about 1,5 mm of sprue to one place to get the side to come out just right, besides that everything fitted just fine. This is my power tool BTW.
DSC_0025_zps68ef6a4f.jpg

DSC_0020_zps6f1c3fc9.jpg
I added the remaining sprue's on the bottom half and checked how deep the model was, a five year old could have told me the answer. (YA STUPID SWEDES PERSON)
DSC_0021_zps813caacc.jpg

45 - 1 = 44 mm ore 1,73", so now to fide some support material. My best advise go to your local hardware store and buy a peas of plumbing pipe, I used some old candy bottles and cut em down to size. Try to get a diameter of about 1½" ore around 40 mm. Then i used a glue gun to get em in to place, the one in the middle you need to cut out to fit. just place the supports like the Nr5 on a dice, and add the cut out peace in the center were the 4 largest peaces meat.
DSC_0022_zps5a7ba6ae.jpg

Next I cut of a bit of the lid at the front to make the two smaller peaces the same sizes, so the lids total length is Now 11.42" or 290 mm. And I might not have mention this before, the lid is actually about 2 mm wider then the bottom and the sides. Next stem i did was to cut the front down to size, line it up on the center line and mark were to cut. The with and the length of the top section, measure twice and mark once. I made a bu-bu and messed up, but ill correct it later. Let the underside of the model rest on the Inlays back stop that remained on the smaller peace of the front.
DSC_0027_zps2e6be25a.jpg

Next step is the last two side panels (you need a new cleared of lid 4 this, so wee up to 17) , hold the peace in place were it will eventually be glued and just put a dot whit a marker were the line start and ends. Then put down some tape and do some cutting, check to see if the lies match up; if they do; cut out the peas. I made another bu-bu here and cut one to short but ill fix that one later. Then just start marking out were the support sprue's goes on the inside of the new peaces and start gluing them down, don't forget to sand em down. I forgot on the lover part of the front and had to go in whit some sandpaper.
DSC_0023_zps4c1c843a.jpg

Thats it for now, ill get back to you this afternoon when we glue down the front and seal the entire thing up for good.
 
OK fist of I apologize for the typo's I got dyslexia and I'm Swedish, and the Firefox spell check inset the best.

So sorry for that, so all i have done to day is glued down the front and the top and was a bit eager to remove...
DSC_0028_zps4c4ce9e2.jpg
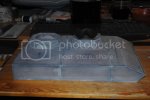
So right now it looks like this...
DSC_0031_zps10d8aaa7.jpg

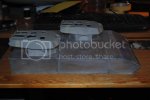
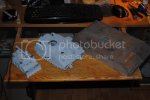
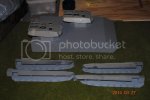
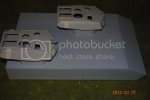
So I have cut a peas of 0,5 mm evergreen styrene that i will add to hide that bu-bu. The good thing is my dad made a miniature hand bending machine ;D, unfortunately he doesn't know were it is :(. So i wont be able to continue on this until next week, but I do have the gun turret's ready and awaiting installation...
DSC_0032_zps5c010a3d.jpg

DSC_0030_zps631bfd5d.jpg
I did a size comparison so far and its big at GW scale witch i think is closest to 1:32, the thing on the left is a standard rhino tank i turned in to a repair unit.

Well see ya tomorrow. :)
 
OK, so i managed to get some work in on the model to day, despite what i stated earlier.

The thing that was holding me up was this thing...
DSC_0033_zps126c1fd9.jpg
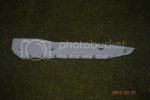
When i started going over it whit the sand paper stick, the corner wanted to grab it. So I pored on some glue, put a clamp on it and I thought it needed to sit and dry longed then needed.

Then I removed the last inlay stop at the back.
DSC_0034_zps07471ab8.jpg
DSC_0035_zpsf8eb5b3d.jpg
It left a few nicks but ill fix em whit putty.

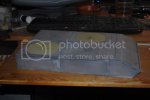
After that i sanded the whole thing down whit the finest sandpaper stick i got, and you can see were i left to panels alone when i took this image.
DSC_0040_zps581c0bc5.jpg

Finished the sanding and put on the first layer of putty.
DSC_0041_zpsc03e361d.jpg

And thats were i will pick up tomorrow
 
Baneblade what a beast of a tank and yours will be a super beast ;) great scratch work so far my friend

Dan B
 
Ok. Finished first layer of putty / Model filler as you can see, and I added a thin 3/64" 1,2 mm styrene rod.
DSC_0042_zps3a2d4624.jpg
And I'm actually going to prime this before i do another round of filler, hopefully i can buy a spray can on Monday otherwise I need to wait another week.

But in the meantime I will try and make something out of this...
DSC_0043_zpsd93157ce.jpg

I actually managed to dig out a photo of the first try, and you can see some other models.
DSC_0044_zpsfe88e09d.jpg
The big Bu-bu i made whit the first one, i did not use model filer before i added the tax. So basically thats why i restarted on it.

Did another test fit.
DSC_0045_zps20327fe5.jpg
IT BLOODY BIG!!! 8) ;D :D :)

Here I'm just cowering up were the gun turrets are going, to prep for the primer.
DSC_0046_zpsc4bea7b0.jpg
DSC_0047_zps4980f363.jpg

So I'll get back when i get some headway whit the tracks. Bye
 
Hi guys, to day I managed to get my lazy ass down town and buy the primer. So some more masking on the mane body of the tank and shell be ready to pant.

I am about 75% finished whit the tracks, they are taking a long time to fix. Especially sens i want to get it right this time.
DSC_0048_zps8308d477.jpg

At this stage I am building up an inner wall whit evergreen styrene, only had corrugated imitation so allot of putty.
DSC_0050_zpsdee4dba0.jpg

Almost finished whit the insides, then i just got some filling to do on the back sides of the track units. Ore i just ad a thin sheet of styrene.
DSC_0051_zpsab5994bb.jpg

Thats it 4 today.
 
Hi guys, just two update photos to day. Have been puttying and sanding an painting yesterday and today and it is almost as smooth as a baby's bottom 8).

DSC_0052_zps28ec20cb.jpg

DSC_0053_zpsf4034805.jpg
I forgot to add the gun-emplacements after the second layer of paint but its on now.
 
Hi guys, so this morning and most hours before lunch i spent in a coma. Sens i didn't fall asleep until the early hours of the morning, about when the paper comes in the morning (due to back problems). So when i noticed that there was a very strange and bright glow coming in threw the curtains i decided to take a look outside, and what did i find. A calm and sunny day, so i grabbed my spray can grabbed my Baneblade and started priming. So now it looks like this.

DSC_0054_zpsc9b39024.jpg

DSC_0055_zps44cd5712.jpg
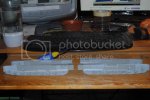
Close up of the track unit.

DSC_0056_zpsf59ee7cb.jpg
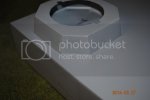
Here i just wanted to see the color difference between the primer and the gray plastic of the gun turrets.

DSC_0057_zpsf7ca541e.jpg
A small 5 mm styreen strip along the botom and the gun mounts will be finished.
 
That Baneblade is a whopper :) great work so far

Dan B
 

Latest posts

Back
Top