You are using an out of date browser. It may not display this or other websites correctly.
You should upgrade or use an alternative browser.
You should upgrade or use an alternative browser.
Scratchbulding a Banshee (Wing Commander IV)
- Thread starter elend
- Start date
79 Daytona
New Member
- Joined
- May 6, 2009
- Messages
- 48
WOW!!! Outstanding work!!
Blitzspear
New Member
- Joined
- May 7, 2009
- Messages
- 63
That's looking great elend I really like what your doing with the cockpit, I to am going for the stuffed cockpit look on my latest junk bash thing.
blitz
blitz
elend
Member
- Joined
- May 6, 2009
- Messages
- 459
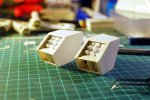
So those engine details looked quite crappy. Luckily I was able to remove them with some pliers and remade everything. Incredible how much time they consumed.  Yet, I think it looks quite ok by now. Not like in my reference illustration but they are hardly visible there and I have no clue about their true shape and form.

Backbreaker
Member
- Joined
- May 6, 2009
- Messages
- 314
looks much better ;D
I think you made the right choice
Joolz
I think you made the right choice
Joolz
Blitzspear
New Member
- Joined
- May 7, 2009
- Messages
- 63
Yep much nicer looking elend. But conversely you now know how to make a great looking missile pod for a future scratch build ;D
blitz
blitz
morethandanorm
New Member
- Joined
- May 30, 2009
- Messages
- 21
Nice job! Thats gotta take a great imagination to just make it yourself. Looking forward to the finished product!
elend
Member
- Joined
- May 6, 2009
- Messages
- 459
Some more progress. I am still working on it. It's just that the progress isn't as visible anymore, as it was before. Anyway. I added more detail to the cockpit. Random styrene parts, tank kit parts and some scribed panel lines. Which is quite a tedious work, I can tell you.  There's still a lot to do on the cockpit, especially adding detail in those recessed areas in the hull, which have to be STUFFED with detail.
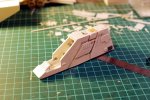
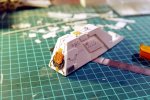
Other than that I scribed the first panel lines into the "wings" and added some detail there as well. Not enough, though. There's still a lot to add. The blue lines on the upper one will be scribed panel lines as well.
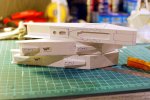


Other than that I scribed the first panel lines into the "wings" and added some detail there as well. Not enough, though. There's still a lot to add. The blue lines on the upper one will be scribed panel lines as well.

elend
Member
- Joined
- May 6, 2009
- Messages
- 459
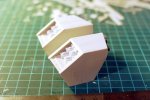
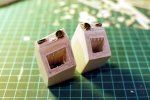
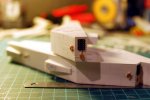
So, I am still working on it. I just recently completed the back of the engines, which caused me a little trouble. Due to my construction of the engines they are a tad warped at the back. That made it impossible for me to build up the guts of the engine outside and just place them on the back of the engines. So, I had to first place a sheet of PS on the engines, to get the proper form and then cut out a rectangle, where I placed the guts of the engines inside. I also scribed some panel lines on them. Other than that I was also adding some details to the upper section of the engine.
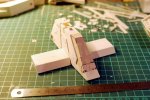
With the engines complete, I could concentrate on a way to make the canopy. I decided to make a cardboard decoy of it, which I then place on a sheet of clear plastic, which I found. I already testet folding the plastic and it works quite well. Then, with the glass folded to its final form, I will add the canopy frame. I think I'll make that out of ordinary evergreen plastic strips.
What you can also see on this picture are the connection things, which connect the fuselage to the wings. They are already scribed and with bits of detail. But I guess there is still some detail left there...
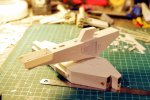
Next we have some additional work on the wings. I scribed all panel lines, which you can barely see on the pictures unfortunately. I also added, scribed and detailed the third fuselage connection thing for the lower wing. Some additional details found place on the back of the wings as well, which you can clearly see in the second picture. I used random 1/72 Tank Parts for that.


With the engines complete, I could concentrate on a way to make the canopy. I decided to make a cardboard decoy of it, which I then place on a sheet of clear plastic, which I found. I already testet folding the plastic and it works quite well. Then, with the glass folded to its final form, I will add the canopy frame. I think I'll make that out of ordinary evergreen plastic strips.
What you can also see on this picture are the connection things, which connect the fuselage to the wings. They are already scribed and with bits of detail. But I guess there is still some detail left there...

Next we have some additional work on the wings. I scribed all panel lines, which you can barely see on the pictures unfortunately. I also added, scribed and detailed the third fuselage connection thing for the lower wing. Some additional details found place on the back of the wings as well, which you can clearly see in the second picture. I used random 1/72 Tank Parts for that.


Blitzspear
New Member
- Joined
- May 7, 2009
- Messages
- 63
That's looking great elend, your fine details in the second pic are very nice mate keep them updates coming.
blitz
blitz
Backbreaker
Member
- Joined
- May 6, 2009
- Messages
- 314
looking great !! ;D
Joolz
Joolz
elend
Member
- Joined
- May 6, 2009
- Messages
- 459
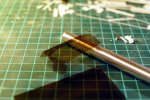
Another batch of pics. This time I mainly worked on the canopy! In the reference it's a dark toned one, so I wanted that as well. Since I was not sure about how good I will be working with Tamiya Smoke I decided to buy pre-toned stuff. Luckily I found those clear sheets of foilage (used in bureaus I guess?!) which works incredible well. It cutes easily, is very glossy and once you scraped it a bit with the back of the knife, it will fold easily. After folding the foil using a cardboard template I made earlier, I added 0,5 mm wide PS stripes on it, which was a bit of a hassle, since no glue wanted to stick on it. And superglue was curing too fast, making it impossible for me, to arrange the thin stripes. I eventually made it, though and that's how it looks now!
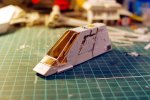
Oh and some additional detail has been placed into the "trenches" of the cockpit as well. It's very tiny and takes aaages, thus the progress is not that visible at the moment. But soon I'll start on the canons.
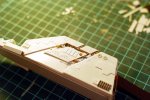


Oh and some additional detail has been placed into the "trenches" of the cockpit as well. It's very tiny and takes aaages, thus the progress is not that visible at the moment. But soon I'll start on the canons.

ScreamingSamuraiStudio
New Member
- Joined
- May 13, 2009
- Messages
- 257
Excuse me while I pick up my jaw off the floor....
sorry for the mess.
Amazing work here...and the cockpit just makes me wish I could be a modeler just like you when I grow up.
sorry for the mess.
Amazing work here...and the cockpit just makes me wish I could be a modeler just like you when I grow up.
schweinhund227
New Member
- Joined
- Jun 24, 2009
- Messages
- 2,511
Pretty Cool Scratch.....
Lots of patience and Talent ....
Can't wait to see more....
Take care...
and once again... NICE WORK
Lots of patience and Talent ....
Can't wait to see more....
Take care...
and once again... NICE WORK
elend
Member
- Joined
- May 6, 2009
- Messages
- 459
Hello peoples. Long time no see. I got myself injured and had to be operated. But everything is fixed now and I continued to work on my Banshee. Haven't updated here for a while, so I'll let the pictures do most of the talking.
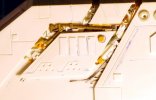
The Details I put in the trenches on the main cockpit sides. Veeery tiny bits, which I partly got from 1/72 Tank kits and had to scratchbuild, since even 1/72 Tank kits don't have enough small bits for that.
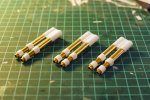
Then I finally started on the cannons. That weird brass tube gave me quite a hard time sawing it and sticking it together with superglue. I got very angry sometimes.
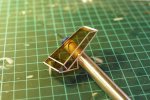
Here's the canopy with added stripes of sticky foil. I wanted to use 0.2 mm PS Sheet at first, but that was too hard to work with. I had to use superglue for the PS stripes and more often than not they were sticking to my fingers instead of the canopy. So I came up with the foil which looks quite ok as well. I just hope it doesn't deform too much over the time. :-\ Oh and I actually had to re-do the canopy several times. First it didn't fit properly, then I accidentally destroyed it, then it didn't fit AGAIN and then I thought about making everything out of one piece, instead of two. Hehe.
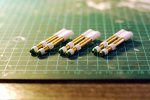
Here are the cannons with some Aves Apoxie Sculpt put on them. That stuff is really incredible and a joy to work with, even though it's veeery sticky.
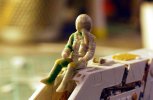
Then, work started on the pilot. I first wanted to use a 1/72 Tank officer, but he was too tiny. So I eventually bought a set of 1/48 Jet Pilots and voila! Fits perfecty and already has a cool helmet on..
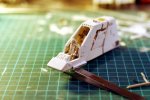
I still had to alter the pilot's position of legs and arms a bit. I also added a head cushion on his seat, so that his neck won't get wrecked in battle. Oh you can also see the pilot's joystick, which I added out of thin PS stripes with a glob of glue on the end.
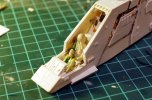
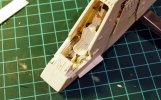
Added foot pedals!
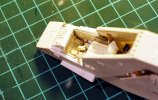
The Details I put in the trenches on the main cockpit sides. Veeery tiny bits, which I partly got from 1/72 Tank kits and had to scratchbuild, since even 1/72 Tank kits don't have enough small bits for that.

Then I finally started on the cannons. That weird brass tube gave me quite a hard time sawing it and sticking it together with superglue. I got very angry sometimes.

Here's the canopy with added stripes of sticky foil. I wanted to use 0.2 mm PS Sheet at first, but that was too hard to work with. I had to use superglue for the PS stripes and more often than not they were sticking to my fingers instead of the canopy. So I came up with the foil which looks quite ok as well. I just hope it doesn't deform too much over the time. :-\ Oh and I actually had to re-do the canopy several times. First it didn't fit properly, then I accidentally destroyed it, then it didn't fit AGAIN and then I thought about making everything out of one piece, instead of two. Hehe.

Here are the cannons with some Aves Apoxie Sculpt put on them. That stuff is really incredible and a joy to work with, even though it's veeery sticky.

Then, work started on the pilot. I first wanted to use a 1/72 Tank officer, but he was too tiny. So I eventually bought a set of 1/48 Jet Pilots and voila! Fits perfecty and already has a cool helmet on..

I still had to alter the pilot's position of legs and arms a bit. I also added a head cushion on his seat, so that his neck won't get wrecked in battle.


Added foot pedals!


Similar threads
- Replies
- 2
- Views
- 681
- Replies
- 35
- Views
- 4K
