Sd.Kfz. 251 Ausf C stuka fuss

longlance67

cry havoc and let slip the dogs of war -shakespear
Joined
Sep 21, 2011
Messages
656
Howdie All,


I thought id start the new year with another armor build, so no better place to start than with a kit my other half got me for my birthday......AFV Clubs 251 stuka fuss ;D
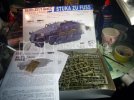
P1100151-1.jpg

this kit is very nice in terms of detail without going into the huge part counts often found with DML kits (not saying theres anyhting wrong with ;)) having put together AFV's 251 D with the infra red nigth fighting kit before this should be a very smooth build....hopefully ;)

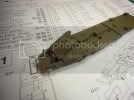
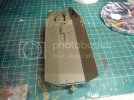
Assembly begins like with most armor models with the running gear and related assemblies, this kit was no expection with the crew compartment decking receving attention first
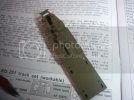
P1100152.jpg

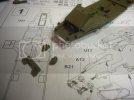
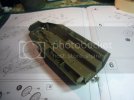
then onto the suspension housing for the wheel and part of the engine compartment i thing ???
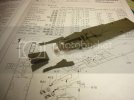
P1100153.jpg

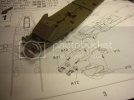
P1100157.jpg

P1100159.jpg

P1100162.jpg

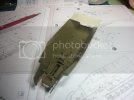
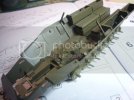
then finaly I joined the side walls to the lower hull
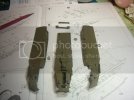
P1100164.jpg

P1100166.jpg

thats all for now gents


cheers


shane
 
oh cool my fav halftrack the 251, ive been tempted to grab this kit a few times so now you can tell me if its any good.

good start so far shane.
 
Nice looking kit this, i wouldn't wanna be on the recieving end of all those rockets. ;D

Will you be painting it Panzer grey like the box art or going for camo?

TTFN Matt
 
Hay Spud

the 251 series is one of my fav models of all time too ;D

ive built one of DML's offerings a while ago, and ran into trouble when it came too joining the side lockers to the hull which needed some serious filling :(

but so far no such drama's have popped up in this kit yet.....only a few injection marks here and there


Howide Fubar,

I hear ya bubby...wouldnt want to be down range when these things start throwing rockets !

As for painting im think of either whitewash over a dark yellow base or just a nice worn dark yellow coat

cheers buddy


shane
 
LL ,

Good start on th 251 ! I too have been a lil' leery of AFV Clubs 251's .... I'll be watching this closely.

Although th troubles that I've heard are with th Upper "Hull" when fitted to th Lower.

Keep on gettin it Brotha' !
 
panzerace007 said:
LL ,

Good start on th 251 ! I too have been a lil' leery of AFV Clubs 251's .... I'll be watching this closely.

Although th troubles that I've heard are with th Upper "Hull" when fitted to th Lower.

Keep on gettin it Brotha' !


Cheers bud, ill keep an eye out for the hull joints when i come to it ;)


BUILD UPDATE:

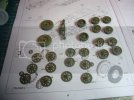
Spent a few hours on the bench today assembling the 251's many many wheels :(
thats the only thing that i find a little daunting about german armor is the mass of wheels that make up the running gear

P1100297.jpg

the wheels went together without much of a fuss, a few injection marks in the faces of the wheels but this will be hidden once they fixed in place, the suspenison arms for the front wheels were a little more tricky


cheers all


shane
 
Thats a wheely good job you done there. ;)

I know, i know i should have been on stage. ;D What type of tracks have you got....not single link i hope!!

TTFN Matt
 
whats wrong with single link. :p i actulay dont mind teh single link, but that will be tested in the next few days once my fruli meatl tracks arive fro my tiger,

and shane i feel your pain my tiger has about 48wheels..
 
Hi Matt

the links in this kit are rubber type but has a cool feather that the guide horns sit very snuggly into the wheels so you can get realistic sag withough have to break out the CA glue which is always a good thing ;)
But i personaly prefer link to link, as you get a much better end result with them, and are easy to work with once you get used to them ;)


Spud,

Link tracks all the way my man :p
as for the wheel overload i went through it with their tiger 1 late verison last year, but was a fab build got to put my own zim on her and turned out well


Build report:

making the best of the chirstmas break to get as much done before i returned to college, i aim to have the fighting compartment fittings installed and the firewall done also


thats the plan :)


cheers


shane.
 
Lookin good I do like a good half track and Like spud said I've always wanted one but other thing got in the way will keep up with ya build


Geegad
 
-Spud, one of the few situations in life where sag is a good thing :p

- Geegad, i would recommend trying one in the future there really nice little builds with plenty going to keep ya busy for a while


Build Update:

about four hours at the bench i got most of the troop compartment done, only thing i could mention here was, when i was installing the benches i found it easier to remove the locator pins as they line up with the holes the instructions tell drill in the compartment floor, other than that everything went smoothing without drama

P1100169.jpg

fittings installed

P1100299.jpg

P1100300.jpg
 
Looks really nice, lots of little details that catch the eye.

Keep it up dude.

TTFN Matt
 
Cheers for all your kind words gents ;D


im currently painting up the interior and will have photos posted as soon as ive got a bit progress doen


cheers


shane
 
Howdie Gents,


its very early in the morning here, one of those sleepless nights i guess, but not to worry got a load of nice painting work for the interior ;)


BUILD UPDATE: THE INTERIOR

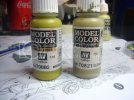
Before breaking out the array of paintbrushes need to tackle the interior, i first sprayed the interior with Games Workshop Choas Black primer can to give the a nice primer and basecoat. The two main colours for the interior are Vallejo German Camo Beige as a basecoat and Middlestone as highlight which would be randomly dry brushed on after a few coats of beige

P1100316.jpg

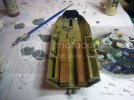
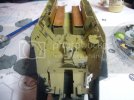
I normaly apply a few coats thinned with tap water to build up a nice even coat and also helps to advoid brush marks. The great thing about vallejo paints are there quick drying time, allowing for very productive yet reasonable short painting sessions at the bench. After i got a even and full coat of beige, with a wide brush i began adding dry brushes of middlestone randomly to the model to help breakup the monotone scheme and add a little depth. I removed about 80% of paint from the brush to advoid the dry brushing to overwheilm the base coat. After around 4 hours at the bench with plenty of breaks i was left with this :)

P1100310.jpg

P1100315.jpg

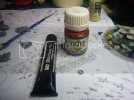
for chipping i used vallejo oily steel and GW's choas black (normally use Vallejo flat black, but all out)
and weathering used mig oils and filters

P1100318.jpg

the filter is drying over night so hopefully tomorrow evening so time it will be set

and finaly part im most proud about is the drivers station, which was some tricky painting, getting the main dail to look right ;)

P1100324.jpg


thats all for now


cheers


shane
 
:eek: Wow that's great work mate, I love the detail painting...how the hell did you paint in the gauge? lol

What are those Abteilung paints like to use? They sure give a pro finish.

TTFN Matt
 
Those are the mig oils and there not bad, there made for modellers
 

Latest posts

Back
Top