You are using an out of date browser. It may not display this or other websites correctly.
You should upgrade or use an alternative browser.
You should upgrade or use an alternative browser.
Sd.Kfz. 251 Ausf C stuka fuss
- Thread starter longlance67
- Start date
spud
Irish and proud of it :)
- Joined
- Jun 29, 2011
- Messages
- 6,918
Paint the Base a light tan then get some raw umber to it and after a while wipe it off with some tissue.
Panzerace done an sbs on how he done the floor of the kuble w/cold starter, its in the armor section now. it may help seeing pics on it
Panzerace done an sbs on how he done the floor of the kuble w/cold starter, its in the armor section now. it may help seeing pics on it
longlance67
cry havoc and let slip the dogs of war -shakespear
- Joined
- Sep 21, 2011
- Messages
- 656
Rentar1 said:Do youi mind sharing some of your wood kung fu? It looks great!
Its pretty much how Spud said. But ill explain what i do, first i base the wooden part with a tan yellow base, sometimes will layer a few brown shades from dark to light if i want a different tone. But a tan yellow basecoat works just fine on its own. Some modelers will seal the base with a coat of matt varnish, but as i use artist acrylics i find it better to leave the base on unvarnished as the washes tend to take to it better. Once the base has been given full drying time i start adding the washes, as a base i use Brunt Umber and apply it too the base, and with a Q-tip dipped in water streak it across the base following one direction (the direction of grain) once im happy with it. Leave 24 hours to set, and then do the same with a layer of Brunt Sienna and what you should get it is a decent woodeffect. Im not best for doing wood effects but this method serves me well,
hope you find this of help mate,
cheers
shane
longlance67
cry havoc and let slip the dogs of war -shakespear
- Joined
- Sep 21, 2011
- Messages
- 656
Rentar1 said:Thank you very much for the instuction. I think I'll give it a try on some stowage for my german armored radio car I'm doing. Thanks again for sharing!
Rob W.
Happy to be of help bud
longlance67
cry havoc and let slip the dogs of war -shakespear
- Joined
- Sep 21, 2011
- Messages
- 656
Jelly - Glad you found the info on the woodeffectsto be of some use mate 
BUILD UPDATE:
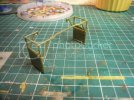
Im in the process of assembling the laucher rigs that will sit on the side of the halftrack its been a bit a slow after i realised i fitted the laucher platfroms the wrong way around on the rigs
But a quick swap out and we are back in bussiness ;D
ill have photo updates to follow once i got the rigs sorted
oh i passed my german oral exam too today.......happy out ;D
cheers,
shane
longlance67
cry havoc and let slip the dogs of war -shakespear
- Joined
- Sep 21, 2011
- Messages
- 656
Howdie Gents, i think you know what time it is lol 
BUILD UPDATE:
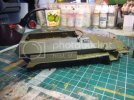
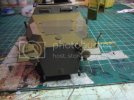
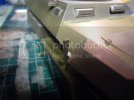
been busy adding the last assemblies to the hull, before i add the launcher racks. The fender stowage bins and some of the tools have been fixed in place (the rest will be painted seperately)


I also had to scratch build a mounting bracket for one of indicators on the hulls side, it wouldnt be one of my builds if i didnt lose some part

more updates to follow soon
cheers,
shane.
BUILD UPDATE:
been busy adding the last assemblies to the hull, before i add the launcher racks. The fender stowage bins and some of the tools have been fixed in place (the rest will be painted seperately)


I also had to scratch build a mounting bracket for one of indicators on the hulls side, it wouldnt be one of my builds if i didnt lose some part

more updates to follow soon
cheers,
shane.
longlance67
cry havoc and let slip the dogs of war -shakespear
- Joined
- Sep 21, 2011
- Messages
- 656
spud said:lol, the Pipe... looking good shane
Hahahaha i was wondering when someone would cop it lol, not many 21 year olds smoke these days hahaha
longlance67
cry havoc and let slip the dogs of war -shakespear
- Joined
- Sep 21, 2011
- Messages
- 656
cheers buddy 
letsgobrowns82
Active Member
- Joined
- Feb 27, 2011
- Messages
- 1,368
This is looking good, a lot of nice detail on it.
longlance67
cry havoc and let slip the dogs of war -shakespear
- Joined
- Sep 21, 2011
- Messages
- 656
Chris S said:Its what ya got in the pipe that matters ;DLooking good Shane ,nice to see you modelling again , and well done on the exam buddy
Chris.
hahahahaha its just ordinary pipe tobacco, you should see the looks i get from people when they see me lit up hahahahaha
longlance67
cry havoc and let slip the dogs of war -shakespear
- Joined
- Sep 21, 2011
- Messages
- 656
Howdie all,
just a quick build update for yee,
been working on the the launcher rig, and must say their an pain in the ass
AFV (not sure if its the smae for the DML kit) have made it the entrie thing rather annouying to say the least, not getting the same level of fit with aspect of the build as the i did with eariler assmeblies. Ill have some photo updates to illistrate my meaning soon.
On the plus side, ive taken a project off the shelf that has been sitting there for the last year to work on alongside with my 251. Its Revells old U99 model which my lovely girlfriend got me for my birthday, ive already assemblied it, it just needs painting and weathering.....im thinking of opening a thread on it over on the naval section as a side project......which ill have set up soon
cheers,
shane
longlance67
cry havoc and let slip the dogs of war -shakespear
- Joined
- Sep 21, 2011
- Messages
- 656
spud said:sounds like your having fun there
having buckets and buckets of fun mate
Similar threads
Latest posts
-
-
Maisto MARVEL Model Kits DAREDEVIL 2002 HONDA S2000 1:24 Scale! $26.00 Shipped!!
- Latest: SuperheroSanctum
-
-
-
-
-
-
