"Snowy Wind" - Yukikaze: Tamiya's 1/350th Scale Japanese Navy Destroyer
- Thread starter TRM
- Start date
fumblethumbs
New Member
- Joined
- May 22, 2011
- Messages
- 963
Nice review T. Great the way you incorporated still shots of the various parts into the video!
TRM
New Member
- Joined
- Mar 18, 2011
- Messages
- 5,024
Hello again everyone!!!
I have an update to my progress with The Yukikaze. After installing the weather decks permanently and sanding and filling a couple small spots, I was ready to lay down a coat of primer. This will help smooth things out and allow me to see if there were any gaps that I may have missed.
First step I take care of before any painting is checking “the toolsâ€. When painting, I prefer to lubricate the needle in my airbrush. Badger makes a great product designed for this exact purpose. This is called Needle Juice. Just a drop is all that is needed on the needle.
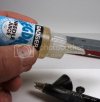
Rub the Needle Juice along the airbrush needle, being careful of the sharp tip and reinsert into the airbrush. You will notice the difference right away on how smooth the action will be. Needle juice is not just for Badger Brand Airbrushes, it works excellent on all brands.
Onto the hull…
After preparing all my painting supplies I began shooting a nice primer coat the entire hull and weather deck sections.
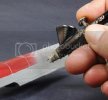
I used Alclad Base and Micro Filler for this stage. REMEMBER, make sure you use plenty of ventilation while spraying any paints and/or using any solvents.
Once the base was applied everything looked pretty good.
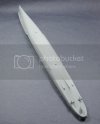
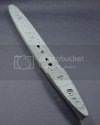
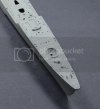
At this stage, I could go back to starting the construction of the model’s superstructure and other components, but I am choosing to stick with the lower hull section for a couple of reasons. First, If I paint the hull then I can apply a clear coat over the paint, this is not only to prepare for weathering further on into the build, but, I will be less likely to damage the paint while handling the model during construction. Secondly, most red paints, including the Hull Red from Tamiya, have a tendency to bleed under a mask. To eliminate this, I paint it first clear coat and mask the hull when I paint the top.
Here I am applying shading to the raised details including the panel lines. I used a mix of Black and Dark Grey from Tamiya mixed 50/50 with a small amount of thinner.
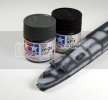
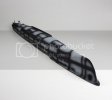
With the shading done, I am ready to begin application of the below the waterline hull coloring. Most hulls to ships were painted with an anti-fowling paint to resist barnacles and such from attaching to the hull, creating drag for the ship. This color varied from shipyard to shipyard, so typically Tamiya’s Hull Red is an excellent color to use on most hulls. For the Yukikaze I will be adding a few color shadings to attempt to create a more realistic looking hull of a vassal that is in use.
First step I apply a thin coat of Tamiya’s Hull read. It’s tough to see in the picture, but the pre-shading I applied is still visible.
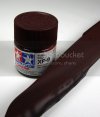
Next I mixed equal parts Tamiya Orange, Flat Earth and Hull Red and mix this 50/50 with thinner to obtain a really thin, light coat for shading.
This coat, again, is barley noticeable at this point but it is there is still another step. A light touch on modulation to highlight the hull.
Finally, with Hull Red thinned down about 70%, I lightly misted the hull to blend everything together.

And that is the hull! There will be some weathering to this later in the hull but I need to move on. Next segment I will be starting the construction of the super structure, preparing and painting the upper hull and weather deck along with adding some photo-etching to the model.
As always thank you for stopping by to check out my progress on the Yukikaze. I hope you come back soon to see my next update here on SMA.
I have an update to my progress with The Yukikaze. After installing the weather decks permanently and sanding and filling a couple small spots, I was ready to lay down a coat of primer. This will help smooth things out and allow me to see if there were any gaps that I may have missed.
First step I take care of before any painting is checking “the toolsâ€. When painting, I prefer to lubricate the needle in my airbrush. Badger makes a great product designed for this exact purpose. This is called Needle Juice. Just a drop is all that is needed on the needle.

Rub the Needle Juice along the airbrush needle, being careful of the sharp tip and reinsert into the airbrush. You will notice the difference right away on how smooth the action will be. Needle juice is not just for Badger Brand Airbrushes, it works excellent on all brands.
Onto the hull…
After preparing all my painting supplies I began shooting a nice primer coat the entire hull and weather deck sections.

I used Alclad Base and Micro Filler for this stage. REMEMBER, make sure you use plenty of ventilation while spraying any paints and/or using any solvents.
Once the base was applied everything looked pretty good.


At this stage, I could go back to starting the construction of the model’s superstructure and other components, but I am choosing to stick with the lower hull section for a couple of reasons. First, If I paint the hull then I can apply a clear coat over the paint, this is not only to prepare for weathering further on into the build, but, I will be less likely to damage the paint while handling the model during construction. Secondly, most red paints, including the Hull Red from Tamiya, have a tendency to bleed under a mask. To eliminate this, I paint it first clear coat and mask the hull when I paint the top.
Here I am applying shading to the raised details including the panel lines. I used a mix of Black and Dark Grey from Tamiya mixed 50/50 with a small amount of thinner.


With the shading done, I am ready to begin application of the below the waterline hull coloring. Most hulls to ships were painted with an anti-fowling paint to resist barnacles and such from attaching to the hull, creating drag for the ship. This color varied from shipyard to shipyard, so typically Tamiya’s Hull Red is an excellent color to use on most hulls. For the Yukikaze I will be adding a few color shadings to attempt to create a more realistic looking hull of a vassal that is in use.
First step I apply a thin coat of Tamiya’s Hull read. It’s tough to see in the picture, but the pre-shading I applied is still visible.

Next I mixed equal parts Tamiya Orange, Flat Earth and Hull Red and mix this 50/50 with thinner to obtain a really thin, light coat for shading.

This coat, again, is barley noticeable at this point but it is there is still another step. A light touch on modulation to highlight the hull.

Finally, with Hull Red thinned down about 70%, I lightly misted the hull to blend everything together.

And that is the hull! There will be some weathering to this later in the hull but I need to move on. Next segment I will be starting the construction of the super structure, preparing and painting the upper hull and weather deck along with adding some photo-etching to the model.
As always thank you for stopping by to check out my progress on the Yukikaze. I hope you come back soon to see my next update here on SMA.
spud
Irish and proud of it :)
- Joined
- Jun 29, 2011
- Messages
- 6,918
yep its great i use the grey with micro filler for my figures,
will that be the final color on teh lower hull? looks kinda dead compaired to the big bright red ya normaly see of is it like this to be part of teh weathering?
the preshading coming trough looks good too.
oh is it finished yet
will that be the final color on teh lower hull? looks kinda dead compaired to the big bright red ya normaly see of is it like this to be part of teh weathering?
the preshading coming trough looks good too.
oh is it finished yet
scratchmod
New Member
- Joined
- Feb 13, 2011
- Messages
- 856
Good to see the paint going on T. Looks mighty sharp bro. yep, love that needle juice. Works great don't it.
TRM
New Member
- Joined
- Mar 18, 2011
- Messages
- 5,024
Hi again spud!!
The hull: yes, done with paint....tons of washes, filter, oils, kitchen sink....
Needle Juice: "The Juice" Basically a specialized lubrication oil for air brushes from Badger.
Makes the action on your AB feel brand new!!!
Hey Rob!! Thanks!! ...."The Juice"...Good!! 8)
The hull: yes, done with paint....tons of washes, filter, oils, kitchen sink....
Needle Juice: "The Juice"
Makes the action on your AB feel brand new!!!
Hey Rob!! Thanks!! ...."The Juice"...Good!! 8)
fumblethumbs
New Member
- Joined
- May 22, 2011
- Messages
- 963
Excellent update T! Great of you to let the laymen (me) behind the curtain to see some of the tricks and tecniques you use to get such awesome results. That's one of the most convincing lower hull jobs I've ever seen. I really like ship models although I've only done a couple. I"ll be bookmarking your build here to use when I tackle the Tamiya 1/350 Fletcher class I have IBOS (in box on shelf). So then, that needle juice...Just for the dual action action or...? Looking forward to your next update T!!
TRM
New Member
- Joined
- Mar 18, 2011
- Messages
- 5,024
Hey guys!
The Badger Needle Juice Question...
I originally picked my bottle direct from Iain from AKInteractive USA at a local show. I contacted Iain and he is currently out of stock. He did forward two Online stores that might have the "Juice"! ;D Sorry only US at the moment...I am still checking for UK
MIDTENNHOBBIES.com http://store.midtennhobbies.com/categories.aspx?Keyword=needle%20juice - 2 instock
& Possibly
http://coastairbrush.com/index.html - I have not checked out to see if this is in stock or even if they carry it.
After speaking with Iain, he mentioned working to get this item back into stock soon. If I hear of a restocking, I will certainly post it right away. I have bought several item from Iain and his service is impeccable.
Myke, Thank you for the kind words BTW!!
Spud...still looking at the moment ???
FT....I will keep my eye out for the Fletcher Class another great model from Tamiya...count me in for that build. Glad to have you along here. As for the "Juice", it is a lubricant that works on making a smooth action of the needle...so yes, single and/or duel action AB.
Thanks again!!
Similar threads
- Replies
- 17
- Views
- 313
