Space Ship Crash Site

Photon

Active Member
Joined
Feb 26, 2020
Messages
41
The inspiration for this vignette came from this sketch by concept artist, Guy Warley.
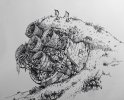
0fwiGuB.jpg

I originally planned to have the figures to be backpackers or maybe having a picnic, unaware they were sitting upon the site of an ancient extraterrestrial ruin. I also thought it would be funny to have one of the figures have a metal detector, but I've been unable, as yet, to find an HO scale detectorist figure.

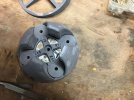
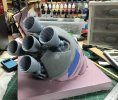
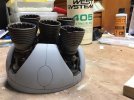
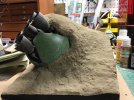
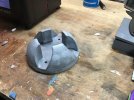
The ship hull was printed in polystyrene. I made the ship a bit more organic than the one in the drawing, as I thought it would look cool if the engines were nestled in recesses. After some minor body work with sandpaper and Tamiya putty:
XmcClKZ.jpg

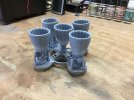
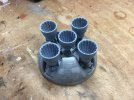
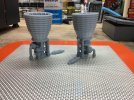
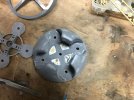
The engines themselves were designed in the free version of Fusion 360 cad software and printed. I also added some kit part details between the engines, but I think this will be largely invisible in the finished piece.
PjuwvTh.jpg

vNW6iKk.jpg

FIoDRik.jpg

4ep3Ykx.jpg

nw5CF95.jpg

dFlOLC7.jpg

M0iNuQQ.jpg

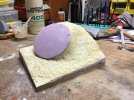
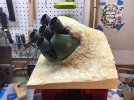
Here are things mocked up. I bulked out the ship with some styrene insulation. I think the overall base will need to be slightly bigger, but overall I'm pleased with how it's turning out.
 
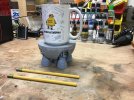
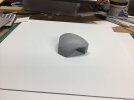
I thought the ship hull looked a bit stark, so I decided to have a go making some panels. In order to get them to conform to the compound curves of the hull, I vacuum formed them. I printed three instances of this portion of the ship.

kazh2Ut.jpg

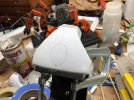
I arranged them with a triangular plywood spacer, so the plastic wouldn't have to be drawn as deep, preserving a bit of material thickness in the final parts.
ieIjU1Y.jpg

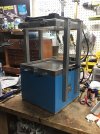
vacuum-forming machine:

DBlaPhP.jpg

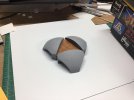
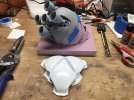
Here's the result. The form is still trapped within the part, as I wasn't too concerned with undercuts. Also it will provide some needed support whilst scribing.

QJDHj5k.jpg

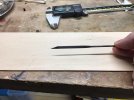
I scribed some lines into the panels using a chisel made from a ground down needle file. Scribing an ellipse onto a curved surface was challenging, but I got better at it as I went. The worst of them will positioned so it will be hard to see in the final piece.

zd73GVg.jpg

Here's the 'chisel:

pkXF1yK.jpg

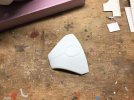
After scribing, the panels were trimmed to size.

EDhlDTN.jpg


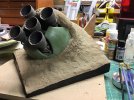
Here is the hull fully paneled, with some grey primer. I've started to paint and weather the engines, as well. They've got a ways to go.

e8EM3Ar.jpg

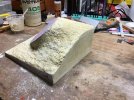
I also started to bulk out the base. I will paint the ship before attaching it, then continue to add ground material.

FAG3utE.jpg

RVOffR8.jpg
 
Thanks guys, I really appreciate it.

I have added some fine dirt. This was just dirt from a pile at a job site near where I work. I grabbed a couple yogurt cups full and then later sifted it through a wire screen to get rid of rocks and plant debris. I applied some glue with a brush (Mod Podge matte) to the plaster. A nylon stocking was stretched over the yogurt cup and shook it over the model, salt shaker style. Only the finest powder made it through the stocking, so it looks reasonably in-scale.

igLrbUG.jpg

ox31UeZ.jpg

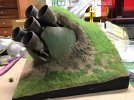
Here I've added some static grass. The applicator was made from an electric fly swatter from the junk shop (cheapness), using instructions gleaned from a thousand YouTube videos. There's also a bit of weathering...some oil paint rain streaks and some dirt, dust and mud clumps.
abQLSOr.jpg

Next I'll add some of the vine like vegetation hanging from the engines, as seen in the original sketch.
Over & Out, Pete
 
This is looking GREAT! Such a cool design idea to bring together the technical and organic. Love it! I was wondering how you accomplished the paint job. It looks like a patinaed rag technique. What kinds and colors of paints did you use and how did you do it? Definitely following this build!
 
Nice techniques here. Loving the look! Brings back memories of my electric train board landscaping as a kid.
 
Thanks. For this I tried using the salt masking technique. I mixed up a light, medium, and dark green using Mission Model Acrylics. I base coated with the medium, and when that had dried a bit I misted it with water then sprinkled on kosher salt. Then sprayed the lighter green. Let the paint dry a bit and brush off the salt. Then repeated again with the salt and then spray with the darker paint. I went back and forth until I liked how it looked. I will say the effect is much more subtle after weathering and if I use this again I may push the contrast more.
 
Thanks guys, I really appreciate it.

I have added some fine dirt. This was just dirt from a pile at a job site near where I work. I grabbed a couple yogurt cups full and then later sifted it through a wire screen to get rid of rocks and plant debris. I applied some glue with a brush (Mod Podge matte) to the plaster. A nylon stocking was stretched over the yogurt cup and shook it over the model, salt shaker style. Only the finest powder made it through the stocking, so it looks reasonably in-scale.

spacer.png

spacer.png

Here I've added some static grass. The applicator was made from an electric fly swatter from the junk shop (cheapness), using instructions gleaned from a thousand YouTube videos. There's also a bit of weathering...some oil paint rain streaks and some dirt, dust and mud clumps.
spacer.png

Next I'll add some of the vine like vegetation hanging from the engines, as seen in the original sketch.
Over & Out, Pete
Wow, amazing stuff!
 
Its a bit stalled. I added some more vegetation, but I never really found figures that I was happy with. I got some HO scale backpackers, but they look sort of cartoon-ish (and they were not cheap). So as usual, I put it aside and have since been building other models. (I'll have to make a thread here for those, I think people might be interested.)

Thanks for asking, maybe repainting the figures will resurrect my interest in this one.
 
Back
Top