Spark plug wire boot
- Thread starter durangod
- Start date
urumomo
Well-Known Member
- Joined
- Mar 18, 2013
- Messages
- 7,751
" Tamiya glue " isn't a glue , it's solvent .
butyl acetate and acetone .
It ain't " sticky " , it will only solvent weld plastics .
CA is ideal for bonding metals but not all polymers , polymers like the insulation coating that copper conductor in the phone wire .
butyl acetate and acetone .
It ain't " sticky " , it will only solvent weld plastics .
CA is ideal for bonding metals but not all polymers , polymers like the insulation coating that copper conductor in the phone wire .
Jakko
Well-Known Member
- Joined
- Oct 9, 2024
- Messages
- 1,076
There are ways to get superglue to stick to "unglueable" plastics, though. Over here in the Netherlands (and I assume other parts of Europe), Pattex used to sell a tube of superglue packaged with what was basically a marking pen with a clear liquid in it: apply the liquid to both parts, wait half a minute or so, then put superglue on one side and press together. IIRC, the liquid microscopically etches the material so that the glue has something to grip.
The Pattex brand has now been mostly replace by Loctite in a rebranding exercise from the parent company, Henkel, but the superglue-with-marker seems to be gone. Luckily I still have a couple of the pens
The Pattex brand has now been mostly replace by Loctite in a rebranding exercise from the parent company, Henkel, but the superglue-with-marker seems to be gone. Luckily I still have a couple of the pens
durangod
Well-Known Member
- Joined
- Aug 27, 2024
- Messages
- 457
durangod
Well-Known Member
- Joined
- Aug 27, 2024
- Messages
- 457
Sadly it is stranded and that was the original technique i tried the other day which turned out to be a big fail using stranded.If that is solid-core wire you could leave a 1/16-1/32 bit sticking out the end. Would help locate them (evenly spaced) on the distributor but also allow the CA to bond.
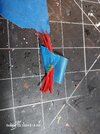
At first it looked good but then as the wires are moved (for firing order or not) they get weak, loose, or break off. So that is when i tried to stabllilize them as a group using Superglue, all that did was create a big glob of SG that looked horrible.
The second pic in my prev post shows all the wire stubs still in the part, i covered them up with putty so i could create a more friendly ice cream cone shape.
There is another technique where instead of individual holes, it uses just one larger hole for all wires at once then use white glue. That is my next attempt, ill just hide the coil wire somewhere on the front of the block since there is no coil in the kit.
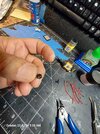
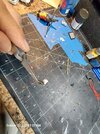
Im also using clear sleeves (part of a new paint brush protector) to bind the wires to help restrict movement. See pic.
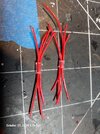
My original idea was to use the red tube part if a rattle can spray nozzle as the distributor cap but that plastic is very brittle and it shattered when i cut it. Plus it wont hold all 8 wires plus coil wire.
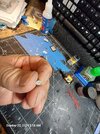
I do think i may have better luck with the wire im using for the radiator upper and lower. It may be just a tiny bit big though. see pic
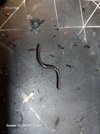
durangod
Well-Known Member
- Joined
- Aug 27, 2024
- Messages
- 457
yes but what do i do about bare wire color, prime n paint? Since its a 80 bronco, back then i believe braided plug wires were available but rare (had not become popular yet) but yellow jackets were all the rage so i was hoping the phone line had yellow wire but it did not so i went with red.Hmmm, whatever you use it will have to be thin but still show "some" rigidity. What about thin wire without insulation? Copper is easy to find but a bit stiff, solder is pliable but too thick.
Is lead wire available anywhere near you?
What am i thinking duh! i can make a chrome coil from sprew
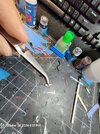
Last edited:
durangod
Well-Known Member
- Joined
- Aug 27, 2024
- Messages
- 457
The white clue did not work, the phone wire is just too stiff and so i put the model away and im going to order a new distributor piece and forget about wires. One day i will venture into this idea again when and if i have the right kind of wire material. 
Last edited:
Similar threads
- Replies
- 5
- Views
- 1K

