STUKA !!!

Exactly what I meant Mr. S...and that was the perfect explanation...wasn't seeing the black there!! I'm a dope!! ::) Thanks for the heads up!!
 
wow chris that is savage work inside her, love the shading on the sides and floor and the chipping, lovin this man great stuff, cheers :)
 
Chris S said:
My plan from the start is a Russian front aircraft (winter) ...meaning one thing ....whitewash !! ;D
DSCF1639.jpg
Never tried Whitewash on an aircraft before so it should be fun :)

Wicked. I didn't read page one.. This will be killer man.
 
Martay ,Cheers mate ;)

Letsgo ,Thank you very much :)

Scott ,Thanks man ,just fancied a go at a whitewash :) ...If it works I've got a Shturmovik in the pile too ;D Or maybe I should do it Bare metal & wood ?? ...not sure .

John ,Cheers Bro ;D

Geegad ,Thanks ,I'll try not to keep you waiting too long ;)

Chris.
 
Interested to see the winter scheme applied, not one you see very often on aircraft.

Like the full color instructions, dont see many of them either.

Nice work on the office so far :)
 
Thanks Jason :)

Rookie ,I'll try my best with it ,havent done one yet so it will be a learning curve for me :) All the Trumpeter kits come with a seperate full colour paint & decal guide ...nice touch :)

More up tomorrow ,I didnt get time for pics today .

Chris.
 
cheers chris this winter camo is very interesting, deffo wanna do one too, will you use a h/s tech ?
 
Hi Martay ,

I wont be using Hairspray ,but will be using AK Interctives chipping fuild in 'select areas ,I dont want big patches of flaked of white as it wont look right and its unrealistic in my opinion,So I want to create a worn whitewash ,with areas that water / rain have have taken the wash off ....if yer know what I mean ,The chipping fluid will be used more for areas of use ,like where the pilots climb in and out or where mechanics have removed covers etc ...

Chris.
 
Thanks Solander :)

Bit more done :)

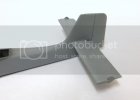
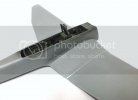
I assembled all the tail feather parts ,sanded all the edges then done a dry fit ....pretty neat :)

DSCF1728.jpg

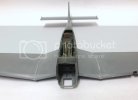
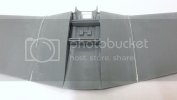
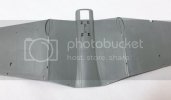
Then moved on to tackle those Huuuuge wings ! .After joining the havles of the outer wing panels they then need fixed to the centre section .To be honest I was expecting a few problems here simply because of the way everything joins together. Basically you have four havles meeting in a butt join along with two spars to help hold everything . Its very important to make sure all the joining faces are as smooth & flat as possible ! If not ,you're in for a world of hurt :( .
I got everything as neat fitting as I could ,but still ended up with a little filling to do (again to be expected ) ,Once I had joined the wings I filled up the seams with CA ,then when it was dry I wet sanded it ,this was followed by a coat of Tippex (correction fluid ) just to take care of any pinholes there may be in the CA . Again the Tippex was wet sanded to finish .
DSCF1723.jpg

DSCF1724.jpg

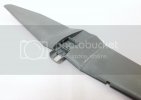
Apart from those joins ,the rest of the wing is a good fit with the leading /trailing edges just needing sanded . ....Its a big wing !!
DSCF1725.jpg

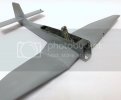
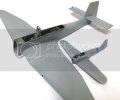
Again ,once I had finished I did a dry fit to the fuselage ...just to check ;) ....its all good ;D

DSCF1729.jpg

DSCF1727.jpg

DSCF1726.jpg

Just for a laugh , A size comparison with a 1/72nd Zero Im working on over in the Secret Santa GB ;D ...she's a big ole Bird ;D ;D
DSCF1730.jpg


Thanks for looking :)

Chris.
 
That thing is massive! :eek: Good update Chris, looking more like a Stuka every time.
 
Thanks Jason , She's a biggin alright ;D ;D

Chris.
 

Latest posts

Back
Top