Chris S
Its a bit like being handcuffed to a lunatic !
- Joined
- Feb 14, 2011
- Messages
- 4,573
Hi chaps ....Its only me ;D
As some of you know I havent been about much lately due to moving house .Thankfully the move is all complete now and I can try to get on with a bit of plastic bashing again . At the minute tho ,most of my modelling stuff including all of my projects are still sitting in boxes waiting to be unpacked ,and I cant do that until I have the new workshop sorted
  ...getting there tho .
However ,just a couple of days before the move this kit landed in my hands ,so it wasnt packed in the mountain of brown boxes marked 'Models' ;D And to be honest ,the temptation was so strong I just have to crack this one open (The force is strong in this one ) ;D
Ok ,The kit is Academy's 'New Tooling' of the famous Sundowners F-4B Phantoms . I must say ....Im impressed !!!!
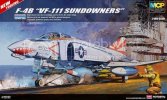
The box arrives STUFFED with lots lovely plastic and very very nice detailing an all parts . Three colours of plastic are used much like the way Matchbox used to do back in the golden days , This allows the novice builder to assemble the kit without needing to paint ,you have light Grey for the topside ,White for the underside and Black for some detail parts ,But off course this one will get paint ;D ;D
I should also mention that this kit comes with some very nice touches .First thing to note is that it has a complete weapons loadout ,including drop tanks ,rockets ,various bombs ...etc in fact there is Four different options and layouts !
There is Three pilot figures included ...yes Three ! two seated & one standing ,which look to be very good ,we'll see how they paint up
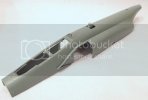
The Fuselage is molded in one piece and sports some very fine engraved panel lines & rivet detail ,as does the rest of the airframe .
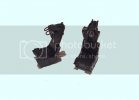
There is lots of detail in the cockpit including the seats ,and the landing gear is also well done ,In a nutshell the detail looks to be Excellent .
The Decals ...they are Carograf ....need I say more ! But there is quite a lot of them .Being a Phantom there is a stencil on just about every panel ,which again are perfectly printed .
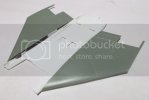
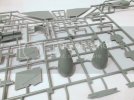
Lets take a look at some parts (please excuse the not so great pics ,Im using a temporary set up at the minute ,but the pics will improve over the next couple of updates )
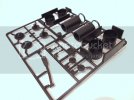
Note here the way Academy have protected some parts by using walls on the sprues ...nice
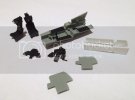
Did I mention there is extra parts in the box which enable you to build a number of different variants
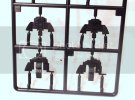
Instrument panels ....
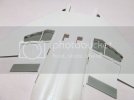
No seams to get rid off on the top of the Fuselage
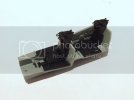
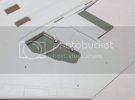
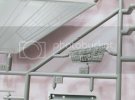
Check out the panel lines & rivets ,and details in one of the underwing bays ....
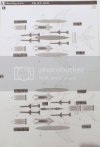
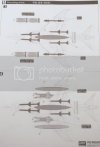
Loadout options ......
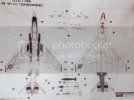
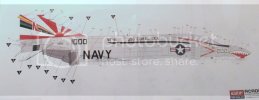
Colour & Decal guide , the black triangles are colours ,the rest are decals !!!!!
All in all .....very very nice I cant wait to get going ,I'll be building this alongside my Comp entry ,which Im also looking forward too ;D
Hope you'll join me for this ,should be a fun ride ;D
ps ...better pics on the first update ....promise
Chris.
As some of you know I havent been about much lately due to moving house .Thankfully the move is all complete now and I can try to get on with a bit of plastic bashing again
However ,just a couple of days before the move this kit landed in my hands ,so it wasnt packed in the mountain of brown boxes marked 'Models' ;D And to be honest ,the temptation was so strong I just have to crack this one open (The force is strong in this one ) ;D
Ok ,The kit is Academy's 'New Tooling' of the famous Sundowners F-4B Phantoms . I must say ....Im impressed !!!!

The box arrives STUFFED with lots lovely plastic
I should also mention that this kit comes with some very nice touches .First thing to note is that it has a complete weapons loadout ,including drop tanks ,rockets ,various bombs ...etc in fact there is Four different options and layouts !
There is Three pilot figures included ...yes Three ! two seated & one standing ,which look to be very good ,we'll see how they paint up
The Fuselage is molded in one piece and sports some very fine engraved panel lines & rivet detail ,as does the rest of the airframe .
There is lots of detail in the cockpit including the seats ,and the landing gear is also well done ,In a nutshell the detail looks to be Excellent .
The Decals ...they are Carograf ....need I say more ! But there is quite a lot of them .Being a Phantom there is a stencil on just about every panel ,which again are perfectly printed .
Lets take a look at some parts (please excuse the not so great pics ,Im using a temporary set up at the minute ,but the pics will improve over the next couple of updates )
Note here the way Academy have protected some parts by using walls on the sprues ...nice

Did I mention there is extra parts in the box which enable you to build a number of different variants

Instrument panels ....

No seams to get rid off on the top of the Fuselage

Check out the panel lines & rivets ,and details in one of the underwing bays ....

Loadout options ......


Colour & Decal guide , the black triangles are colours ,the rest are decals !!!!!


All in all .....very very nice
Hope you'll join me for this ,should be a fun ride ;D
ps ...better pics on the first update ....promise
Chris.

